



Self-adhesive mesh tape isn't an automatic upgrade over paper tape, even when you're trying to finish a repair quickly. It's easier to stick onto the wall, but that doesn't make it the right reinforcement for every seam. The useful question in the mesh tape vs paper tape debate is which tape, compound, and installation method fit the joint you're repairing.
For a Portland homeowner fixing a ceiling crack or a property manager preparing a Beaverton rental, the goal isn't just to hide damage. It's to produce a repair that stays intact and looks right after painting.
Table of Contents
- Why the Mesh Tape vs Paper Tape Debate Gets Oversimplified
- Material Differences That Actually Affect Performance
- Strength, Moisture Resistance, and Finishing Quality Compared
- How to Install Each Tape Correctly
- Common Failure Modes and How to Avoid Them
- Which Tape to Use for Each Joint and Repair
- When to Hire a Professional Drywall Contractor
- Get a Free Drywall Estimate in the Portland Metro
Why the Mesh Tape vs Paper Tape Debate Gets Oversimplified
“Mesh is easier, paper is stronger” leaves out the decisions that determine whether a repair works. A flat patch, an inside corner, and a long ceiling seam don't present the same finishing problem. Choosing tape before inspecting the joint puts the material choice ahead of the diagnosis.
Both materials belong in legitimate drywall systems. ASTM's specification for joint compounds and joint tape covers paper and glass-mesh tape, with testing that addresses bond, dimensional stability, edge cracking, tensile strength, and joint assemblies. Recognition of both materials doesn't mean they're interchangeable.
Compare systems, not rolls
Start with the location, then consider the compound and finished appearance.
| Starting question | Why it matters |
|---|---|
| Is the joint flat or folded into a corner? | Joint geometry affects how the reinforcement can be embedded. |
| Is the board dry and sound? | Tape isn't a substitute for removing compromised gypsum. |
| What compound will embed the tape? | Compatibility matters more than self-adhesive convenience. |
| Is the repair isolated or part of a larger installation? | Handling speed and finish consistency carry different weight. |
| Will the surface be smooth or textured? | The finish plan affects how carefully the joint must blend into the wall. |
For a Hillsboro turnover, quickly positioning mesh on an appropriate patch may be useful. For a Lake Oswego remodel with broad, smooth walls, the priority may be a restrained joint profile and consistent finishing.
Practical rule: Choose the tape-and-compound system for the joint, not the tape that looks easiest on the shelf.
A useful assessment starts with the wall itself, including the damage, surrounding finish, and repair boundaries.
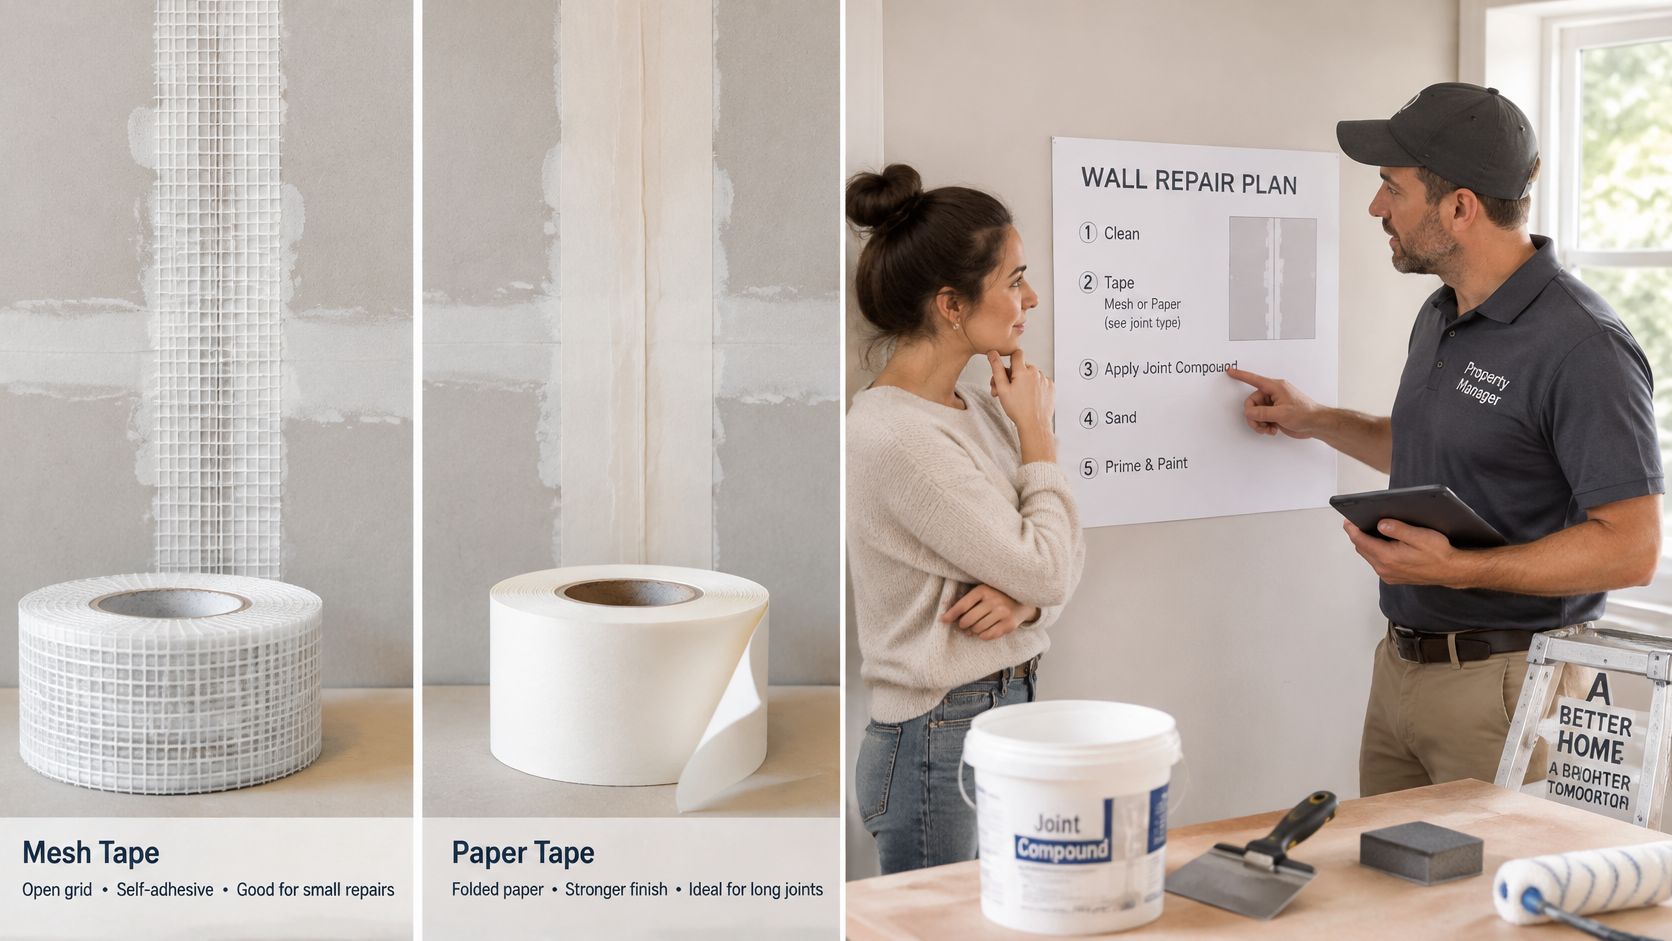
Before buying materials, decide whether you're treating a sound seam, replacing damaged board, or investigating a recurring crack. Those are different jobs, even when the visible damage looks similar.
Material Differences That Actually Affect Performance
Paper tape is a continuous reinforcement, while glass mesh is an open weave. That difference changes how the compound and tape work together. Comparing how hard each material is to pull apart won't tell you everything about the finished joint.
Paper tape is typically cross-fibered, giving it strength along and across the roll. Published specifications describe resistance to stretching, wrinkling, tearing, and distortion. For estimating, one representative product is approximately 2 1/16 inches wide and 75 feet long, with stated coverage of approximately 370 linear feet per 1,000 square feet of gypsum panels, as described in this paper and mesh tape reference.
The materials look straightforward, but their behavior inside hardened compound is what matters.
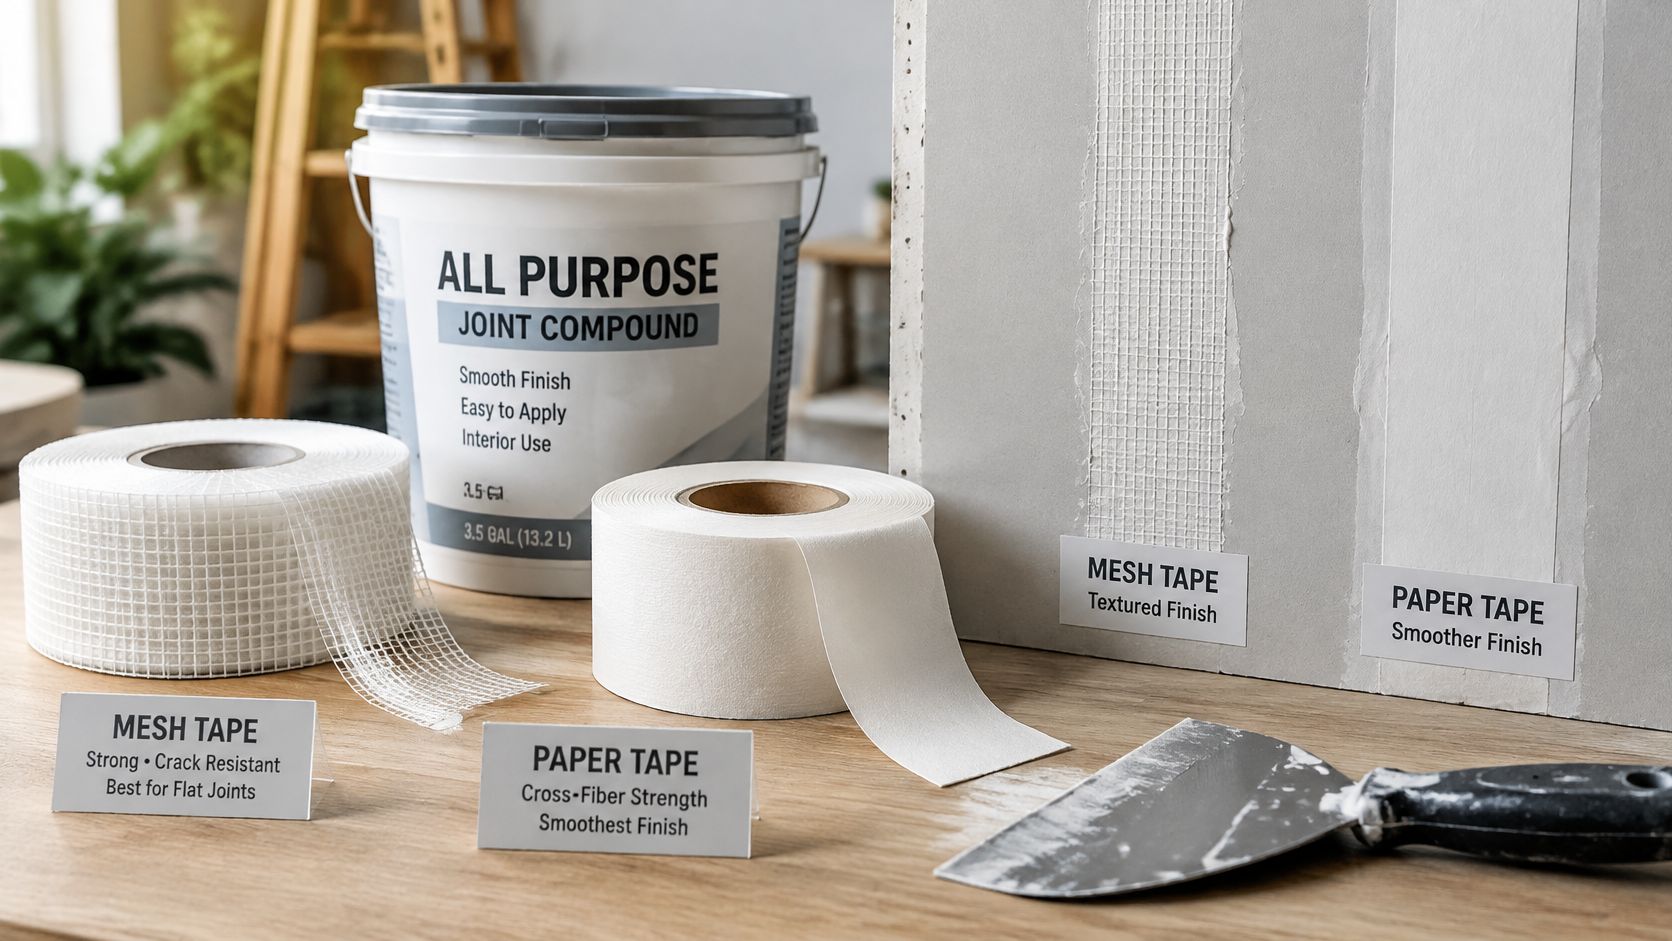
What movement does to a taped joint
Drywall joints can experience different kinds of loading:
- Compression: The joint is pushed together.
- Bending: The boards or finished joint flex.
- Shear: Adjacent surfaces try to slide relative to each other.
- Tension: The joint is pulled apart.
In modified joint-assembly testing comparing paper and fiberglass mesh, paper reinforced the compound under compression, bending, and shear. Mesh showed its advantage in ultimate expansion or tension, but stretched as loading increased, allowing visible compound cracking at lower loads in other directions.
That explains why a strong-looking mesh roll can still produce a disappointing repair. The compound can crack before the mesh breaks. The relevant question isn't whether the tape survives being pulled, but whether the complete joint resists visible damage.
Why compound pairing changes the result
The same testing found that mesh with drying-type compound produced significantly weaker joints than paper with drying-type compound under compression, bending, and shear. Setting-type compound improved the mesh system's suitability, but didn't erase paper's advantages in compression and shear.
For a homeowner, the practical takeaway is straightforward: adhesive backing only holds mesh in position. It doesn't replace the compound system that gives the repair its finished performance.
Strength, Moisture Resistance, and Finishing Quality Compared
The best tape choice balances crack resistance, site conditions, labor, and appearance. A material that saves handling time isn't necessarily the one that produces the least finishing work.
Mesh Tape vs Paper Tape at a Glance
| Criterion | Paper Tape | Glass Mesh Tape |
|---|---|---|
| Joint behavior | Strong reinforcement across several movement directions | Useful tension performance, but can stretch |
| Bedding compound | Compatible drying-type or setting-type compound | Setting-type compound for embedding |
| Positioning | Requires a wet bedding coat | Self-adhering versions attach to dry board |
| Inside corners | Factory crease forms a defined angle | Not the preferred conventional corner choice |
| Surface finishing | Continuous surface supports uniform finishing | Open weave must be completely filled |
| Moisture-related repairs | Appropriate after the substrate is dry and sound | Specified alkali-resistant products may suit particular repair systems |
| Labor trade-off | More embedding skill and knife control | Faster positioning on suitable flat work |
Moisture tolerance isn't water-damage repair
For a leak-damaged wall in Portland or Vancouver WA, stop the moisture source and replace compromised gypsum before taping. Choosing fiberglass doesn't make damp or deteriorated board suitable for finishing.
Industrialized-construction guidance on joint tapes distinguishes between fiberglass tape with setting-type compound for appropriate flat joints and paper for corners and wall-to-ceiling intersections. Moisture tolerance is a system-selection consideration, not permission to cover an unresolved leak.
Finish quality needs its own decision
Paper's creased center helps establish a clean inside corner. Its continuous surface also provides a more uniform starting point for high-quality paint preparation. Mesh requires enough compound to conceal the weave without leaving an unnecessarily raised patch.
For Level 4 or Level 5 finish work, tape selection is only part of the result. Embedding, feathering, surface preparation, and the agreed finish scope still need attention. A stronger tape won't compensate for a ridge left in the finished wall.
A repair isn't finished just because the crack has disappeared. It also needs to blend with the surrounding surface.
For a property manager, that means discussing texture matching and painting before authorizing the patch. For a homeowner preparing to sell, it means evaluating the entire visible repair area rather than accepting a narrow strip of fresh compound.
How to Install Each Tape Correctly
Paper and self-adhering mesh use different installation sequences. Don't borrow the convenient parts of each method and assume the result will be equivalent.
Correct embedding starts at the seam, not at the final sanding stage.
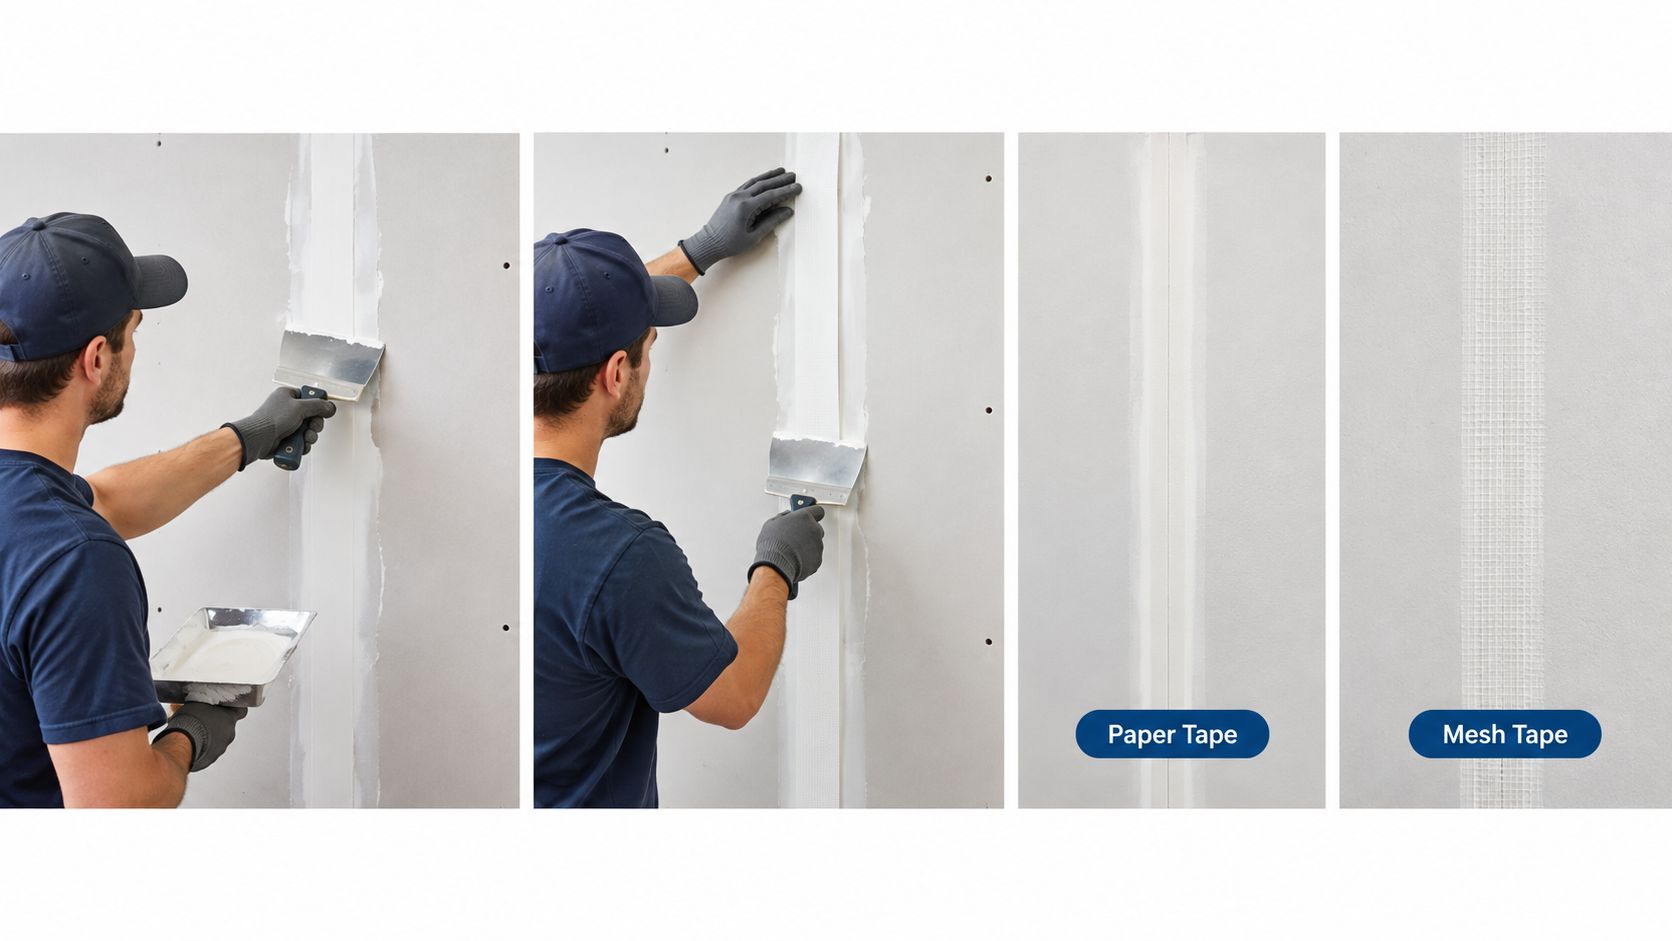
Bedding paper tape
The Gypsum Association's gypsum-panel installation guidance describes applying joint compound first, centering the paper tape over the seam, pressing it into the compound, and wiping away excess.
- Apply the bedding coat: Spread compound along the joint so the tape has continuous support.
- Center and embed: Press the tape into the wet compound with a drywall knife.
- Wipe with control: Remove excess without stripping away the material needed beneath the tape.
- Treat corners deliberately: Fold the crease into a defined angle and embed both sides.
Paper takes more knife control because the bedding layer must remain adequate while the tape is smoothed. Pressing harder isn't automatically better.
Embedding self-adhering mesh
Place mesh on clean, dry gypsum board, center it over the joint, and press it firmly into place. Then force setting-type compound through the openings until the underlying joint is filled and the weave is fully concealed.
Non-self-adhering glass mesh requires corrosion-resistant staples before the compound application described in the installation guidance. That's a different product workflow, not an optional step for self-adhering tape.
The taping-compound compatibility guidance confirms the essential distinction: fiberglass mesh requires setting-type compound for embedding, while paper can be used with suitable drying-type or setting-type compound. Ordinary premixed drying compound isn't an equivalent first coat over mesh.
For a visual look at drywall taping work, use the demonstration below alongside the written installation requirements.
Get help before covering an uncertain repair
If you're unsure whether the board is sound or which system belongs on the seam, request a free drywall estimate. Describe the damage, whether there was a leak, and the finish you want so a professional can assess the repair before it's buried under compound.
Common Failure Modes and How to Avoid Them
A visible tape line can come from poor embedding, incompatible materials, or an unresolved problem beneath the finish. Adding another coat without identifying the cause can hide the symptom without correcting the repair.
The appearance of the defect helps guide the inspection.
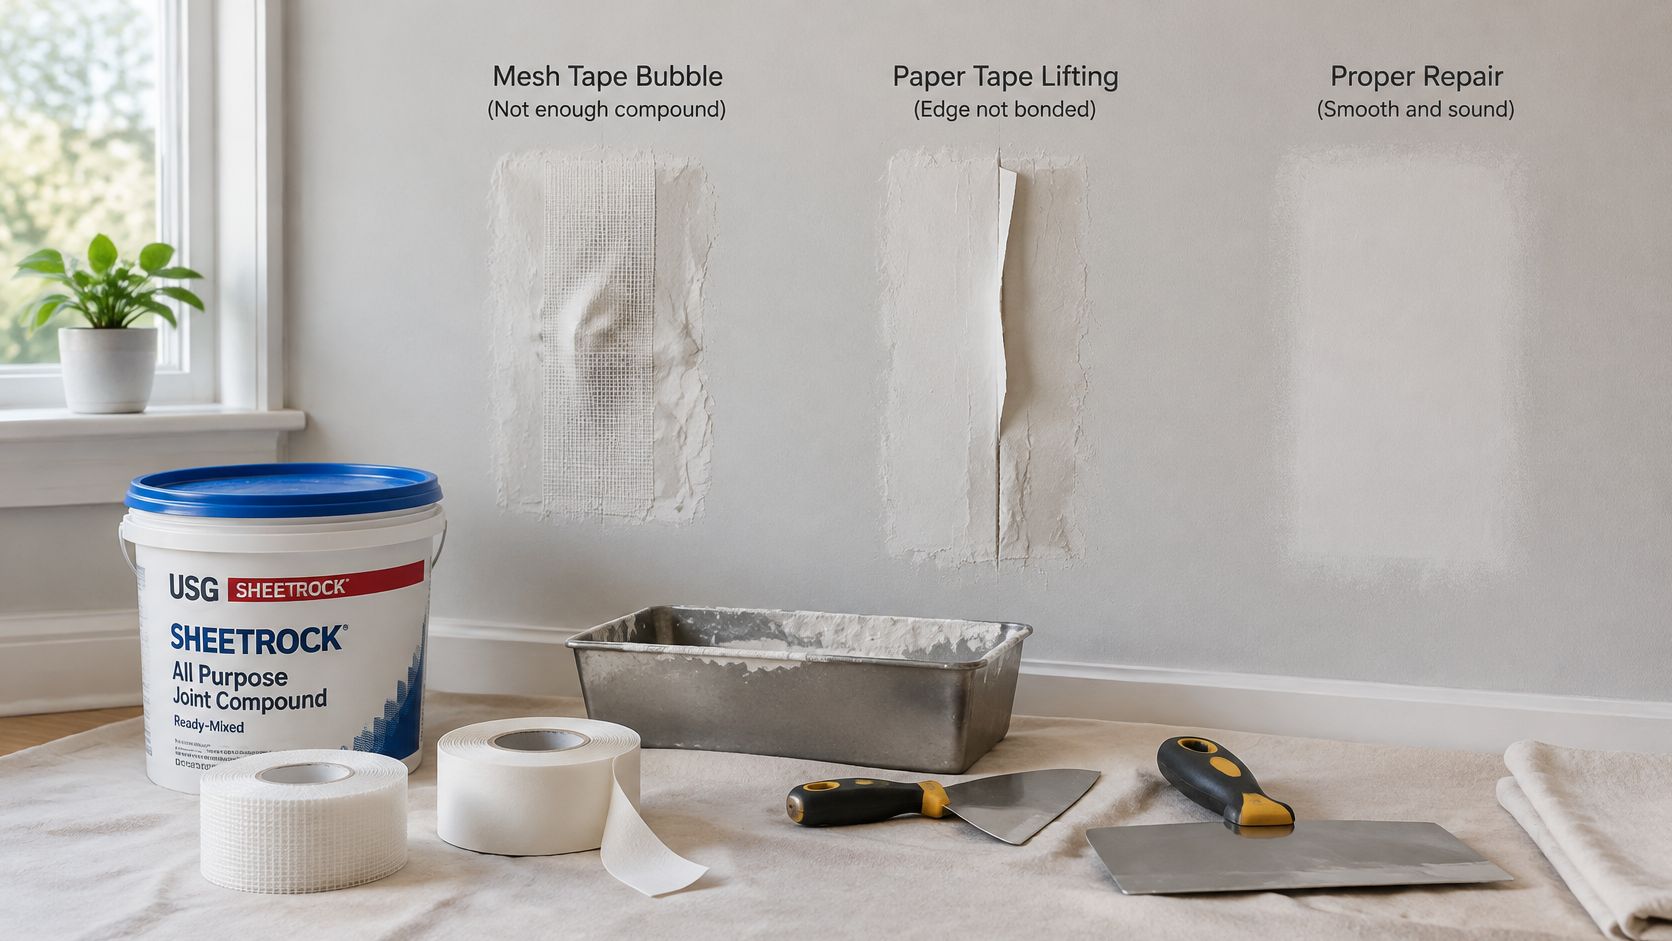
Mesh defects to investigate
Visible weave points toward incomplete coverage. Don't try to solve exposed fiberglass by sanding it aggressively. The repair needs properly filled openings and an appropriate finishing profile.
A crack following the original seam deserves a closer look at the bedding coat and underlying joint. Voids beneath the mesh, slack tape, and an unsuitable first coat are reasons to inspect the assembly rather than skim over it.
The technical comparison of joint tape and compound combinations connects visible cracking with tape elongation and compound compatibility. That makes the original material choice relevant when diagnosing a failed patch.
Paper defects to investigate
Paper can bubble, wrinkle, tear, or lift when it isn't properly bedded. At an inside corner, a poorly formed fold can also leave an irregular line that additional finish coats won't neatly correct.
- Lifted areas: Inspect for missing compound or incomplete contact.
- Wrinkled tape: Correct the defective reinforcement rather than coating over the distortion.
- Recurring cracks: Check the board and surrounding joint before choosing a replacement tape.
- Texture mismatch: Evaluate the repair boundary and finish pattern, not just the seam.
Before repainting: Inspect the repaired area as a finished surface, not merely as a covered crack.
For repairs in Beaverton, Tigard, Gresham, or nearby communities, ask whether the crack has returned before and whether moisture or framing movement remains a concern. Don't assume every Portland-area crack has the same cause.
A patch that looks acceptable immediately after sanding may still need correction before texture or paint. That inspection is the right time to address exposed weave, lifted edges, ridges, and an uneven transition.
Which Tape to Use for Each Joint and Repair
Use joint geometry as the starting point, then adjust for board condition, repair size, movement concerns, and the finish specification. Paper is the practical default for conventional seams and corners; mesh is a targeted option for suitable flat repairs.
The illustration below introduces common applications. For butt joints, follow the matrix rather than treating mesh as the automatic choice.
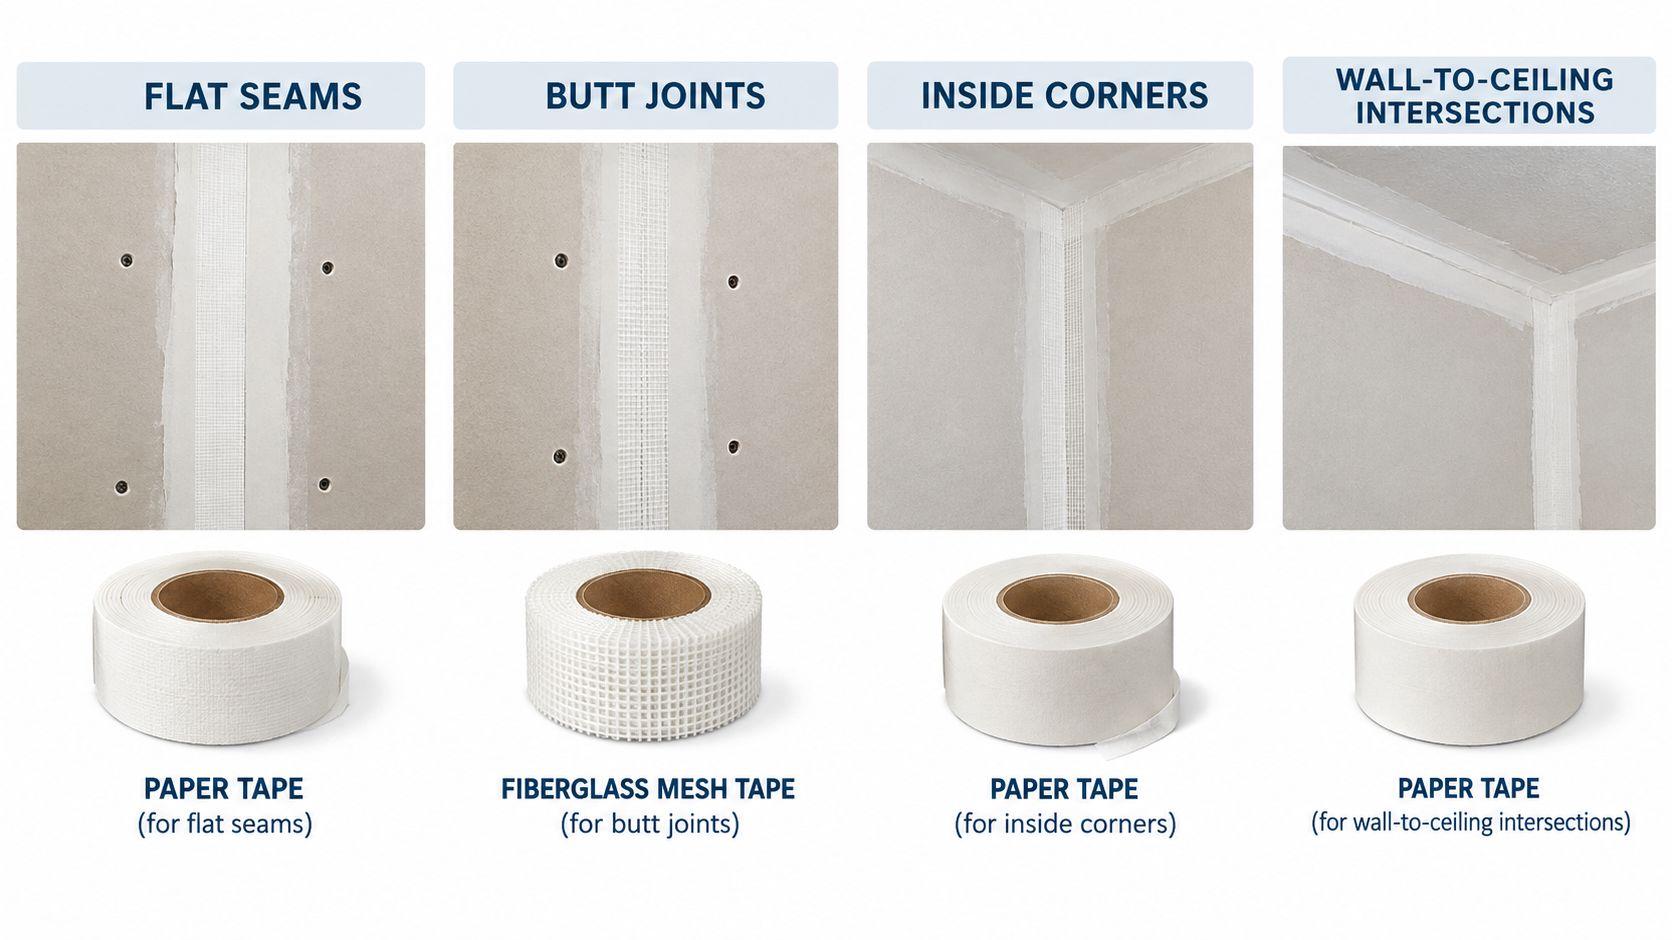
Joint-by-joint decision matrix
| Joint or repair | Recommended starting choice | Compound and project considerations |
|---|---|---|
| Standard flat seam | Paper | Use a compatible bedding compound and plan the finish across the full seam. |
| Butt joint | Paper | Prioritize crack resistance and careful feathering, especially on smooth walls. |
| Inside corner | Creased paper | Form and embed a defined angle. |
| Wall-to-ceiling intersection | Paper | Treat it as a corner system, not a flat patch. |
| Ceiling seam | Paper | Inspect the surrounding assembly when cracking is recurring. |
| Small, stable flat patch | Mesh can be appropriate | Use the specified setting-type compound and installation method. |
| Patch after water damage | Decide after removal and drying | Select the repair system for the replacement board and site conditions. |
| Joint with suspected movement | Diagnose before taping | Don't expect a different tape to correct an unresolved underlying problem. |
| Large installation or smooth-wall remodel | Paper as the conventional starting point | Coordinate reinforcement, finish level, and painting scope. |
Match the choice to the actual job
For a small hole repair in a dry Tualatin rental, mesh may reduce positioning work if the patch is otherwise suitable. That doesn't mean it should replace paper throughout the room.
For a long butt joint in a Hillsboro remodel, use the conventional paper system as the starting recommendation. The fact that a seam is flat doesn't make speed the deciding criterion.
After a plumbing leak in a Vancouver WA ceiling, the tape decision comes after assessing the damaged board and eliminating the moisture source. Where a specified repair system calls for alkali-resistant mesh, follow that system rather than substituting a generic roll.
Turnover work needs a finish plan
A property manager should define whether the job includes patching, texture matching, and painting. Ask for the proposed tape-and-compound pairing and how the contractor will assess a recurring crack.
The useful distinction isn't “homeowner tape” versus “professional tape.” It's a suitable system versus a convenient substitution.
When to Hire a Professional Drywall Contractor
A careful homeowner can reasonably tackle a small flat patch on dry, stable gypsum. The work becomes less suitable for trial and error when the seam keeps reopening, the ceiling is damaged, or the surrounding finish needs close matching.
Hire a professional for large water-damage repairs, recurring cracks, ceiling seams, and demanding smooth-wall finishes. If you suspect structural movement, ask for an assessment of the underlying condition rather than a promise that stronger tape will solve it.
Questions worth asking
A contractor should be able to explain the repair in plain language.
- What caused the damage? Ask what needs investigation before finishing begins.
- Which system will you use? Expect a clear tape-and-compound pairing.
- What will the finished surface look like? Discuss texture matching or Level 4 and Level 5 finish expectations.
- Where does painting begin and end? Clarify whether painting is included and which surfaces it covers.
- How will the site be managed? Ask about protection, cleanup, safe work practices, and scheduling.
For a restaurant, clinic, retail space, or occupied home, also discuss access and how the work will fit around daily use. Clear scope matters as much as a neat sample patch.
Think beyond the visible crack
A remodel may involve drywall installation, insulation, metal stud framing, finishing, and interior painting. Coordinating those tasks before closing the wall helps avoid treating each visible defect as an isolated patch.
Review the available drywall repair and interior services and confirm coverage for your Portland-area drywall project. Ask for a written scope that identifies the repair area, finish expectations, and related work.
Professional help is especially useful when you don't know whether the problem belongs to the finish, the board, or something behind it. A dependable contractor should explain that distinction before recommending materials.
Get a Free Drywall Estimate in the Portland Metro
A useful estimate starts with a clear description, not a guess about which tape to buy. Send photographs showing the damage close up and the surrounding wall or ceiling, along with the approximate repair area and any history of leaks or previous patching.
Have these details ready
- Location: Identify the city and whether the project is residential or small commercial.
- Damage history: Explain when you noticed the problem and whether it has returned.
- Finish expectations: Describe the existing texture or ask about a smooth finish.
- Related work: Mention painting, insulation, framing, or additional drywall installation.
- Access needs: Explain occupancy, scheduling concerns, and any turnover deadline.
CS1 Real Interiors is a family-owned contractor serving Portland, Beaverton, Hillsboro, Tigard, Lake Oswego, Gresham, Forest Grove, Cornelius, Tualatin, and Vancouver WA. The team provides drywall repair, installation, finishing, texture matching, interior painting, insulation, and metal stud framing for homeowners, builders, property managers, and small commercial clients.
Request a free estimate and contact CS1 Real Interiors for professional help with your drywall or interior project. Whether you need a cracked seam repaired or a full interior build-out, describe the result you want and let the contractor match the repair system to the job.
CS1 Real Interiors offers drywall repair, installation, and interior finishing with the tape-and-compound system selected for your actual joint conditions. Visit CS1 Real Interiors for service details, then request a free estimate for your cracked walls, damaged ceiling, or upcoming interior project.


