



“Find the studs and screw up the panels” is incomplete advice for slat wall installation. It doesn't tell you whether the panel accepts storage hooks, whether a deep shelf exceeds the bracket rating, or whether the drywall behind it is dry and sound.
The useful question is more specific: Which panel, insert, fastener path, and backing will carry this item on this wall? Answer that before buying a finish. In a Portland garage, mudroom, or small commercial interior, a good-looking wall isn't a successful installation if the first loaded hook pulls it loose.
Table of Contents
- Pick a Slat Wall by Load Not Looks
- Prepare the Wall and Fasten Panels to Structure
- Cut Paint and Trim Without Trapping Moisture
- Read Slat Wall Failures Before They Spread
- Decide Whether to DIY or Hire in Portland
Pick a Slat Wall by Load Not Looks
Say a Beaverton garage gets new slat panels, matching trim, and a bike hook. Everything looks finished until the bike goes up and the screws pull through the gypsum. The problem isn't the appearance of the panel. The installer never established a reliable connection to the structure.
Slat wall is a family of products, not a universal storage system. Decorative wood slats on acoustic felt aren't automatically suitable for shelving. Merchandising panels, reinforced grooves, and PVC storage channels each have their own attachment requirements.
Slat wall types and published load benchmarks
The following benchmarks describe particular systems, not interchangeable capacities. A per-square-foot rating also isn't a per-bracket rating.
| Panel | Published load | Fastening pattern | Best use | Main limit |
|---|---|---|---|---|
| MDF, no metal inserts | One MDF specification lists 25 lb per square foot and about 30 screws for a 4-by-8-foot panel on 24-inch stud centers | That specification requires a 2-inch screw every third slot, about 9 inches vertically, at each stud, plus an end nailer where needed | Light garage and closet storage in dry conditions | Damp MDF can swell; screws must reach structural backing |
| MDF with metal inserts | The same specification lists 50 lb per square foot; a separate inserted-groove benchmark lists 75 lb with the load distributed 6 inches from the face | Every third slot and every stud, typically 16 inches and no more than 24 inches on center, under the applicable specification | Retail displays and heavier shelves | Brand ratings don't transfer; deep shelves increase leverage |
| PVC channel panels | One PVC installation guide lists up to 75 lb per square foot on 16-inch-on-center framing | Into studs at least every 16 inches, with approximately 1/4 inch of end clearance | Garages, basements, and moisture-prone rooms with a sound supporting wall | Not an MDF rating; drywall alone isn't structural backing |
| Aluminum or aluminum inserts | Published bracket-capacity guidance describes 50–60 lb per bracket for aluminum-insert systems, compared with 10–15 lb per bracket for unsupported MDF | Screws into studs or continuous structural backing, following the selected system's instructions | Bikes, tools, and commercial displays when expressly rated for them | Shelf depth, bracket spacing, and overhang affect capacity |
Don't read the largest number and work backward. An insert reinforces the groove, but it doesn't repair weak drywall or make a missed stud acceptable. Likewise, a heavy-duty bracket can't give an unrated decorative panel a storage rating.
Write the load down before buying
Make a simple worksheet for each intended accessory:
- Item and loaded weight: Include the shelf, basket, cabinet, or hook itself, not just its contents.
- Distance from the wall: Record how far the loaded item projects, especially for bikes and deep shelving.
- Accessory compatibility: Confirm the bracket and insert belong to a combination the manufacturer permits.
- Fastener path: Identify what each screw will pass through and what structural material it will engage.
- Future changes: Allow for rearranging storage without assuming every new position has adequate backing.
A shallow shelf holding gloves and a cantilevered bike impose different demands even when their total weights look similar. The farther the load sits from the wall, the more force it applies to the connection.
Buying rule: Choose the wall assembly for the item you intend to hang, not the panel finish you prefer.
Anything beyond light shelving deserves a deliberate blocking plan. Don't fasten a storage panel to drywall alone and hope that spreading the screws around will compensate.
Prepare the Wall and Fasten Panels to Structure
The panel follows the surface behind it. A bowed wall produces uneven joints, rocking panels, and trim that won't sit cleanly. Covering cracked or softened drywall doesn't turn it into a reliable substrate.
In older Portland, Gresham, and Vancouver WA houses, check for plaster transitions, irregular framing, and repairs supported only by gypsum. In a Hillsboro clinic or Tigard office, establish whether the wall has metal studs and whether the proposed connection needs reinforcement.
Check the wall before opening the panel boxes
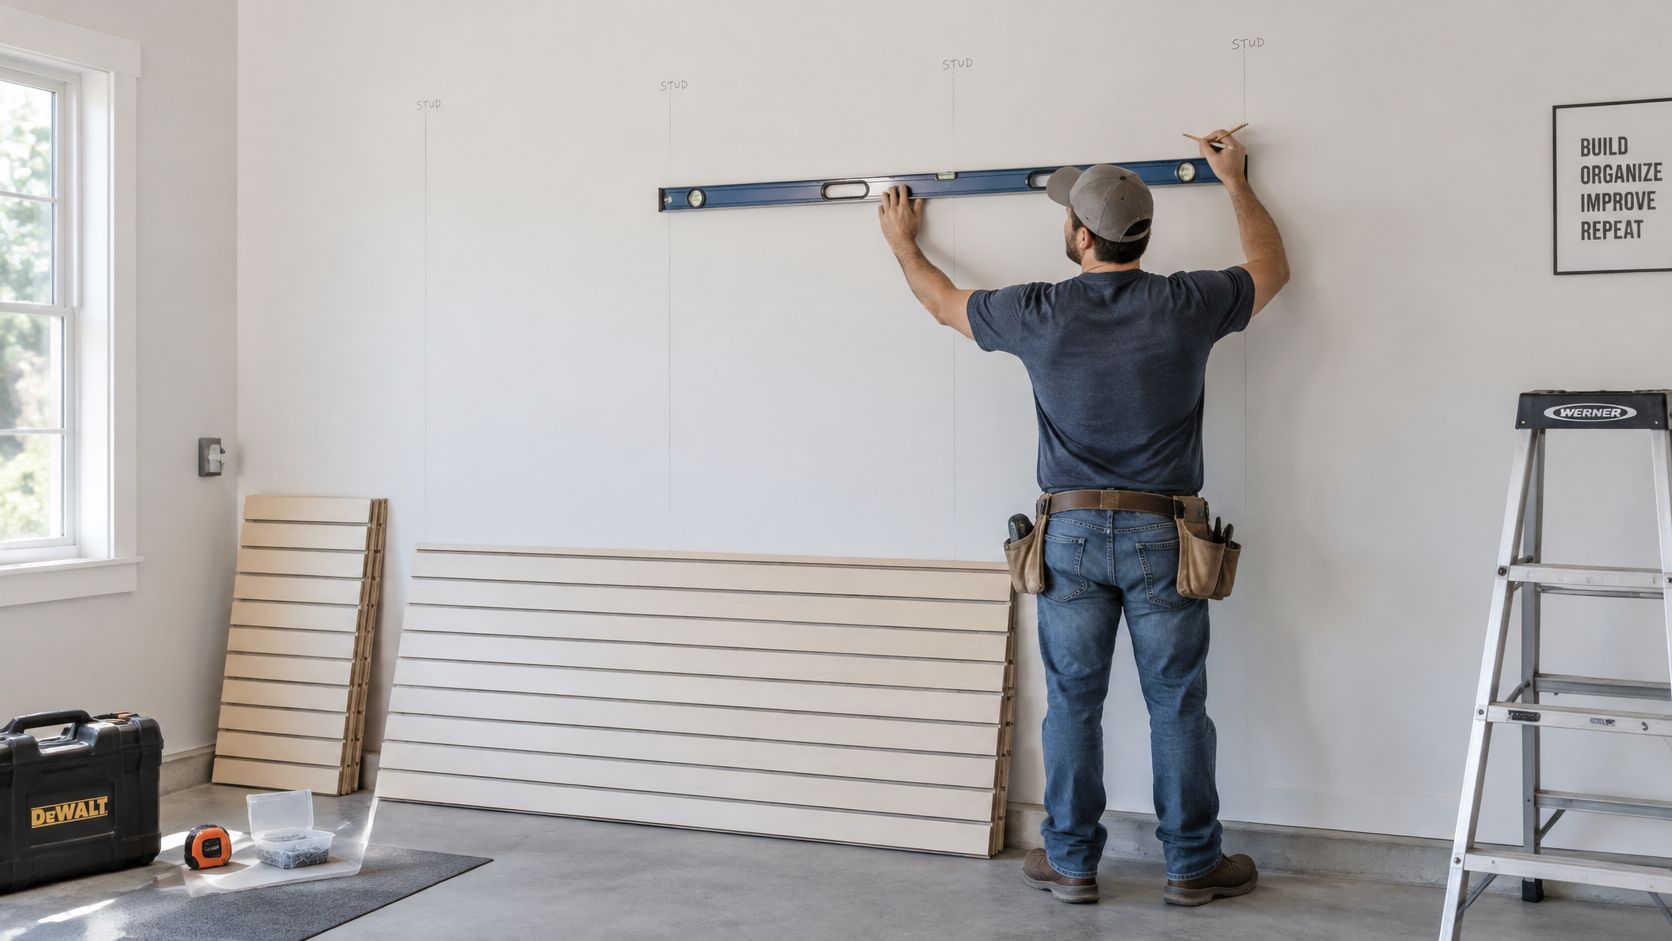
Walk the surface with a straightedge and mark high spots, depressions, loose seams, and soft areas. Locate framing with a stud finder, then verify uncertain locations carefully while avoiding concealed wiring and plumbing. A detector reading alone isn't proof that a screw has a suitable structural target.
Panel requirements can be stricter than the existing framing layout. For example, an acoustic-panel installation guide calls for support centers no greater than 300 millimeters, about 11.8 inches, illustrating why ordinary stud spacing can't be assumed acceptable for every panel.
Before installation, gather:
- Layout tools: Stud finder, level, chalk line, tape measure, pencil, and straightedge.
- Cutting equipment: A sharp carbide blade suitable for MDF, or the specified fine-tooth cutting equipment for PVC.
- Protection: Eye and hearing protection, suitable respiratory protection, and dust collection for cutting.
- Attachment supplies: Manufacturer-compatible corrosion-resistant screws, blocking, battens, and shims.
- Repair materials: Replacement drywall, joint materials, and appropriate primer where the supporting surface needs work.
Plan outlet openings and trim returns before cutting. Don't bury electrical boxes behind the new finish or improvise extensions. Added wall thickness may require properly listed box extensions and electrical coordination.
The layout work should happen before panels conceal your framing marks.
Follow a system-specific installation sequence
The sequence below separates PVC storage-panel details from acoustic-panel construction. Follow the selected panel manufacturer's instructions whenever they differ. Don't apply movement-slot fastening rules to a wood panel that requires a different connection.
Acclimate panels and trim. For the PVC system described in the comparison, keep the material in the installation room for the manufacturer's specified acclimation period. Store it supported and away from conditions that could distort the pieces before installation.
Resolve damage and moisture first. Repair cracks, holes, unsupported patches, and deteriorated drywall. Find the cause of staining or softness before closing the surface. If the wall remains wet, stop the finish work.
Install the required backing. Add blocking where framing spacing exceeds the panel's permitted span and where loaded accessories need support. For cabinets or frequently rearranged storage, continuous structural backing can be more useful than isolated blocks. Secure that backing to framing, not merely to the drywall face.
Establish the reference line. Snap a level starting line and check it independently. Measure the resulting top and bottom cuts before fastening anything. A sloping garage floor isn't a dependable reference for a level panel run.
Fit perimeter trim. Install the specified base and side pieces without bending them to follow an uneven floor. Check that the trim can conceal the movement allowance without trapping the panel tightly.
Set and fasten PVC panels correctly. The PVC slatwall installation guide specifies at least 1/4 inch of end clearance, corrosion-resistant #8 or #10 screws with a low-profile head at least 3/8 inch in diameter, and at least 1 inch of penetration into solid backing, with fastening at 16-inch centers. That guide also requires straight screws centered in the slots and at least 1/16 inch between the screw head and flange so the panel can move.
Build an acoustic cavity only where the design calls for it. A published acoustic-panel installation guide describes 1-by-2 timber battens at 23.5-inch intervals and at least 20 screws per panel. Treat that as a product-specific layout, anchor the battens to framing, and coordinate any insulation or wiring before enclosing the cavity.
Check the first installed run. Confirm alignment, engagement, trim fit, and fastener locations before covering the remaining wall. A controlled hand check can reveal a loose connection, but it isn't a load certification. Don't hang from a panel or use your body weight as a test.
Fit accessories and load gradually. Use compatible hardware and check that hooks or brackets seat completely. Keep the manufacturer's load documentation with the project records so a later occupant doesn't mistake the wall for an unlimited storage surface.
Know when preparation becomes a drywall job
A few shallow surface defects may need ordinary patching. Crumbling gypsum, widespread water damage, loose board, or unsupported seams require more than cosmetic filler.
Opening the wall can be the sensible choice when the intended connection can't be verified from the room side. It provides access for blocking, insulation repairs, and framing reinforcement while letting the contractor correct the substrate properly.
A screw that feels tight isn't necessarily in framing. It may be binding in a patch, trim piece, or damaged material.
For metal framing, don't substitute a wood-screw assumption for a connection plan. The fastener, stud gauge, backing, and load all matter. Heavy storage may require reinforcement before the finish panels arrive.
Cut Paint and Trim Without Trapping Moisture
Clean cuts matter, but dry, protected edges matter more than a tight-looking joint. An exposed MDF cut behind attractive casing can still take up moisture. PVC needs a different approach because its trim and fastening system must accommodate movement.
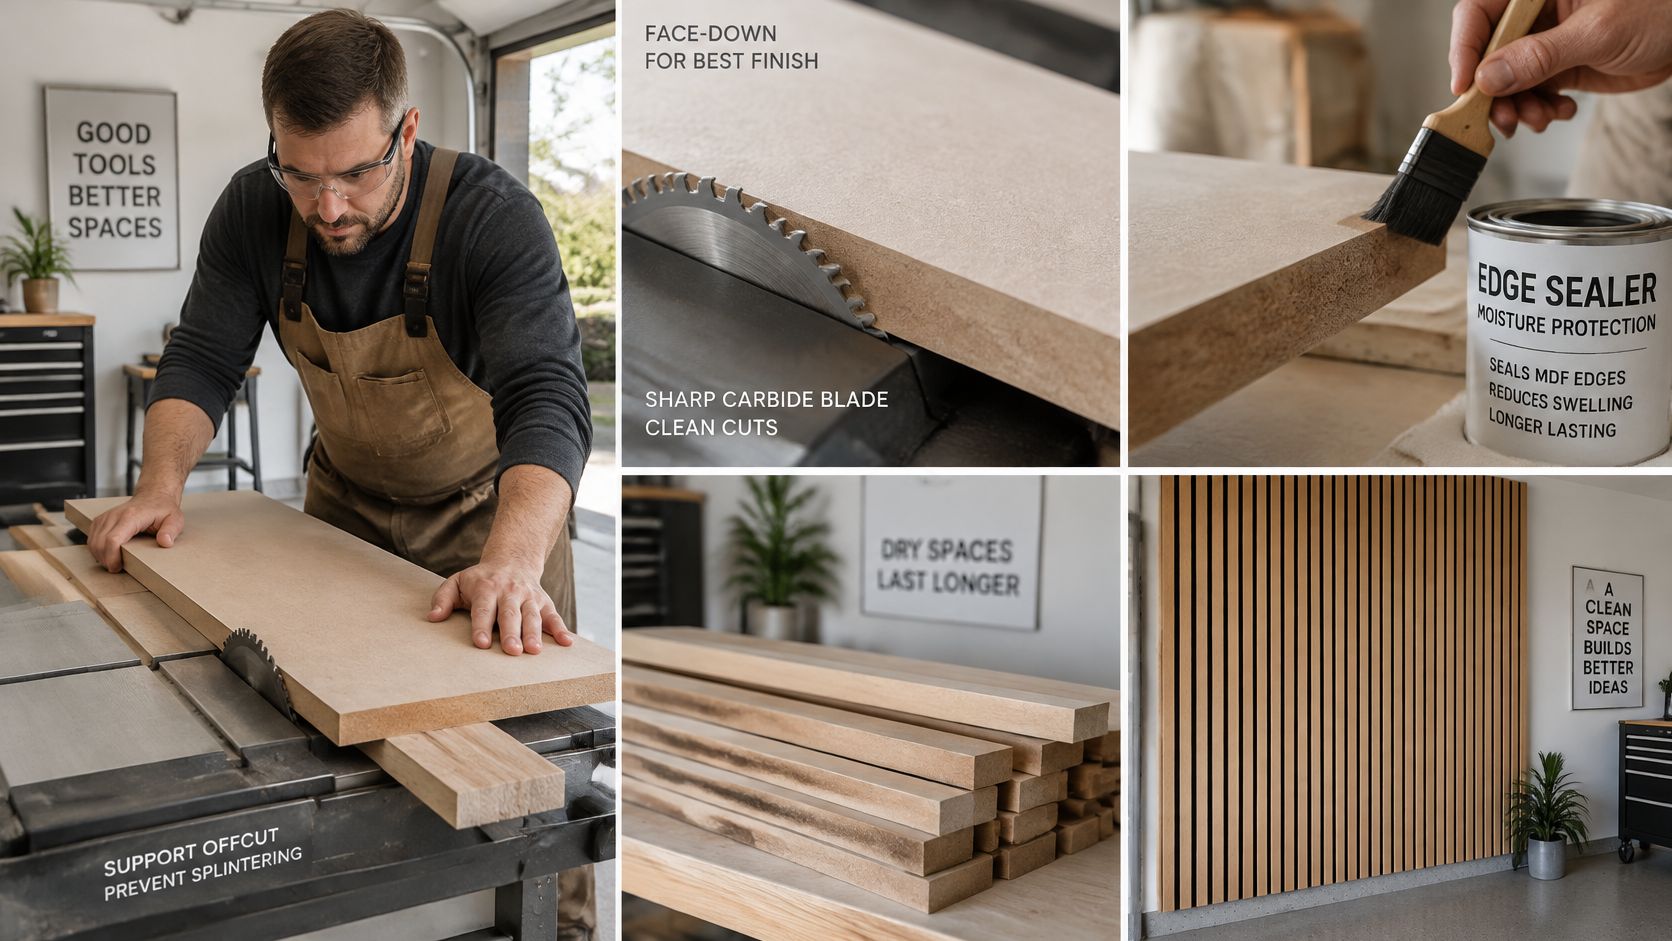
Support the workpiece and offcut before cutting.
Protect cuts without locking the panel in place
For MDF, use a sharp carbide blade and orient the finished face to suit the saw's cutting direction. A handheld circular saw commonly calls for the finished face down; don't assume that orientation suits every saw. Support the offcut so it doesn't tear the final portion of the cut.
Seal raw MDF edges with a compatible primer, including cuts around outlets and returns. Finish exposed areas before they become inaccessible. For PVC, use the maker's approved score-and-snap or fine-tooth method, and leave the factory finish alone unless painting is expressly permitted.
Dry-fit inside corners, window returns, and electrical openings before final fastening. Conceal movement allowances under compatible J-trim or casing, but don't pack a moving PVC joint solid with caulk.
- Active leaks: Repair the source before reinstalling any finish.
- Persistent humidity: Improve ventilation and moisture control rather than relying on a covering.
- Wet-room planning: Home Dehumidifier Reviews' bathroom dehumidifier sizing tips can help assess supplemental humidity control, but a dehumidifier doesn't repair a leaking wall.
Build for the noise problem you actually have
Don't assume decorative slats alone provide the advertised sound absorption. In the April 2023 ASTM C423 laboratory report, the wood-slat panel achieved an NRC of 0.54 in a direct-mounted Type A configuration, 0.82 on felt with Type C-20 mounting, and 0.90 with wool insulation under Type A conditions.
Those are assembly results, not a promise attached to the wood face. Document the substrate, cavity depth, backing, and attachment configuration before assigning an acoustic expectation.
Use installation demonstrations to understand handling, then check every detail against the selected system's documentation.
Sound absorption can help reduce echo in a media room, restaurant, office, or clinic. It isn't the same as blocking conversation or music through a shared wall, a distinction illustrated by the assembly-specific ratings in this acoustic specification sheet.
Get the wall ready before the finish goes up
If the project needs drywall repair, insulation, metal stud framing, or a paint-ready surface first, contact CS1 Real Interiors and request a free estimate. Professional preparation is especially useful when water damage, uncertain backing, or an acoustic upgrade makes this more than a panel installation.
Read Slat Wall Failures Before They Spread
A rocking panel, loose hook, or musty smell is a reason to investigate, not an invitation to add trim. Remove the load first. The visible defect may be the smallest part of the repair.
Slat wall symptoms, causes, and first fixes
| What you see | Likely cause | First fix |
|---|---|---|
| Panel bows or rocks | Wall isn't flat, or supports are farther apart than the panel permits | Repair the drywall and add blocking or furring anchored to framing |
| Screws spin or hooks pull out | Fasteners engage gypsum rather than suitable backing, or the connection is damaged | Unload the panel and establish a verified connection to studs or blocking with the specified embedment |
| End gaps grow or the center buckles | Movement clearance is missing, or slotted fasteners were tightened against the flange | Restore the manufacturer's end clearance and fastener-head allowance |
| Shelf or bracket sags | Load, shelf depth, or insert doesn't match the panel rating | Remove the load, inspect damaged parts, and redesign the accessory and backing combination |
| Musty odor behind the slats | A leak, wet drywall, or persistent moisture was covered | Remove panels, investigate the moisture source, and replace damaged drywall before reinstalling |
Don't assume every bowed panel needs replacement immediately. Remove enough material to check whether the substrate, battens, or panel itself caused the distortion. Replacing the face without correcting the support can produce the same result.
A sagging bracket also deserves more than a stronger screw. Inspect the groove, insert, accessory, and surrounding panel for damage. Once a groove has fractured or an insert has pulled loose, unloading it doesn't necessarily restore its original condition.
Repair in the right order
Structure comes before cosmetics. Heavy bikes, cabinets, and retail displays may call for continuous blocking or a structural plywood backer connected to framing. Keep heavy goods low and close to the wall, and don't treat an insert as permission to exceed the complete system's rating.
Stop and arrange controlled investigation if the drywall crumbles, you smell possible mold, or you can't prove a structural connection. Don't cut blindly into a suspect wall. Check for utilities, contain dust, and determine whether moisture or hazardous-material assessment is needed before disturbing older finishes.
Don't hide evidence of a leak behind a finish that makes the next inspection harder.
After the underlying problem is corrected, repair or replace the drywall and restore the surrounding finish. A localized opening may need texture matching; a broad remodel may need a smooth finishing approach. Level 4 and Level 5 finishes are finishing choices, not substitutes for sound framing or dry board.
For a property manager handling a rental turnover, photograph the repaired backing and keep the accessory limits with the unit records. The next resident shouldn't have to guess where heavy storage can safely go.
Decide Whether to DIY or Hire in Portland
A straight garage wall over sound wood framing, with light storage and no moisture problem, can suit a careful DIYer. The work becomes less forgiving when you need concealed blocking, repairs around utilities, or a load-bearing connection that the panel instructions don't clearly address.
Hire professional help when the wall is wet or cracked, the framing is metal, the load includes a cabinet or heavy bike, or the installation affects a restaurant, clinic, office, or multifamily property. A small decorative upgrade can still involve a rated wall or regulated interior finish.
Check fire documentation before buying
A flame-spread classification isn't the same as a fire-resistance rating for the wall. The fire-performance technical guidance distinguishes assembly fire-resistance testing from interior-finish flame-spread and smoke testing; the cited sample reports a Flame Spread Index of 20 and Smoke Developed Index of 450, within the cited Class A ranges of 0–25 and 0–450, respectively.
Those values apply to the tested sample and configuration. They don't establish that every wood, MDF, felt-backed, or PVC panel is suitable for the proposed occupancy.
Portland's interior-finish requirements depend on occupancy and location, so have the designer or building official verify the panel documentation, sprinkler conditions, mounting assembly, and any rated separation. For residential exterior-wall considerations, Portland's fire-rated walls guidance states that walls less than 3 feet from a property line require a fire-resistance rating under ORSC 302.1 and Table R302.1.
Gresham and Vancouver WA projects need jurisdiction-specific confirmation. Don't assume an approval or detail from a Portland project transfers across city or state boundaries.
Compare complete scopes rather than panel prices
A useful estimate separates the visible finish from the work needed behind it:
- Wall preparation: Crack repair, damaged-board replacement, ceiling transitions, and texture matching.
- Structural support: Blocking, backing, or metal-stud reinforcement for the intended accessories.
- Interior upgrades: Insulation, electrical coordination, drywall installation, and painting.
- Finish installation: Panels, compatible trims, accessories, cutting, and cleanup.
Measure the actual coverage and prepare a cutting layout rather than ordering from wall area alone. Openings, slat alignment, and corner returns can make an apparently usable offcut impractical. Ask for material and labor allowances tied to the selected product, not a generic square-foot price.
For local service planning, review the Portland-area service coverage, including Beaverton, Hillsboro, Tigard, Lake Oswego, Gresham, and Vancouver WA. Homeowners, builders, and small commercial clients can also explore drywall repair, installation, and interior painting services before deciding how much preparation to handle themselves.
A clear scope should identify who repairs the wall, who installs backing, and who leaves the surrounding surfaces paint-ready. That coordination matters more than rushing to hang the last panel.
CS1 Real Interiors provides drywall repair, drywall installation and finishing, interior painting, insulation, and metal stud framing to prepare a dependable surface for your slat wall project. Visit CS1 Real Interiors to discuss professional help for your home or small commercial interior, then request a free estimate with your wall photos, intended loads, and project location.


