If you're staring at a dated popcorn ceiling and thinking it's the one surface making the whole room feel old, you're not wrong. In Portland-area homes, especially remodels and resale prep in Beaverton, Hillsboro, Tigard, and Lake Oswego, ceiling texture is often one of the first things owners want gone. A smooth ceiling makes a room feel cleaner, brighter, and more current.
But popcorn removal isn't a simple scrape-and-paint job. It's messy, easy to damage, and in older homes it can create a serious health problem if asbestos is present. Most DIY guides stop at removal. That's only half the work. The actual result depends on what happens before the first scrape and after the texture comes down.
Table of Contents
- Updating Your Home Starts with Removing That Ceiling
- The Critical First Step Asbestos Testing
- How to Prepare and Contain the Mess
- Removal Methods Wet Scraping vs Power Sanding
- Repair and Skim Coating for a Smooth Finish
- Cost Time and When to Hire a Professional
Updating Your Home Starts with Removing That Ceiling
Most homeowners start this project for the same reason. They've updated the walls, changed the lighting, maybe replaced trim or flooring, and the ceiling still makes the room feel stuck in another decade. That contrast stands out even more in open living spaces and remodeled kitchens.
Learning how to remove popcorn ceiling texture starts with understanding what kind of ceiling you have. Some textures come off fairly well when they're unpainted and lightly applied. Others fight you the whole way because they've been painted, patched, or layered over years of touch-ups. That difference matters because the wrong removal method can tear the drywall face, leave gouges, and turn a cosmetic upgrade into a repair project.
There's also the bigger issue. Some older ceilings can't be treated like a weekend project until they've been tested. That's where many online tutorials fail homeowners. They jump straight to spraying and scraping without stopping at the safety question first.
A popcorn ceiling can be removed. A damaged ceiling can also be repaired. Disturbing suspect material without testing is the mistake that changes the whole job.
In practice, the work follows a full sequence:
- Test first: Older texture needs to be checked before anyone starts scraping.
- Contain the room: Dust and debris spread fast if the space isn't sealed properly.
- Choose the right method: Unpainted texture and painted texture do not behave the same way.
- Repair the substrate: After removal, the drywall usually needs patching, skim coating, and sanding.
- Prime and finish correctly: A smooth, paint-ready ceiling depends on proper prep, not just getting the texture off.
That full lifecycle is why many owners in the Portland metro decide to bring in a drywall contractor before the mess starts. The removal gets attention, but the finished surface is what people live with every day.
The Critical First Step Asbestos Testing
A popcorn ceiling job can go from messy to hazardous fast if the texture contains asbestos. Before any scraping starts, verify what is on the ceiling.
Why testing comes first
Asbestos was used in some ceiling textures installed before the 1980s. The EPA advises homeowners not to disturb suspected asbestos materials because scraping, sanding, or breaking the surface can release fibers into the air. Once that happens, the job changes from a finish update to a health and containment problem.
That risk matters in older Portland-area homes where original ceilings are still common. Age alone does not confirm asbestos, and appearance does not rule it out. A white, chalky, or lightly applied texture can still test positive. A painted ceiling can too.
Practical rule: If the home was built before asbestos phase-outs took hold, or the ceiling history is unknown, test the material before you touch it.
This is one of the biggest gaps in DIY advice. Many guides stop at removal. A proper plan starts earlier and goes farther. Test first, then decide whether the ceiling can be removed safely, and if it can, plan for the repairs and skim coating needed to get to a true Level 5 finish.
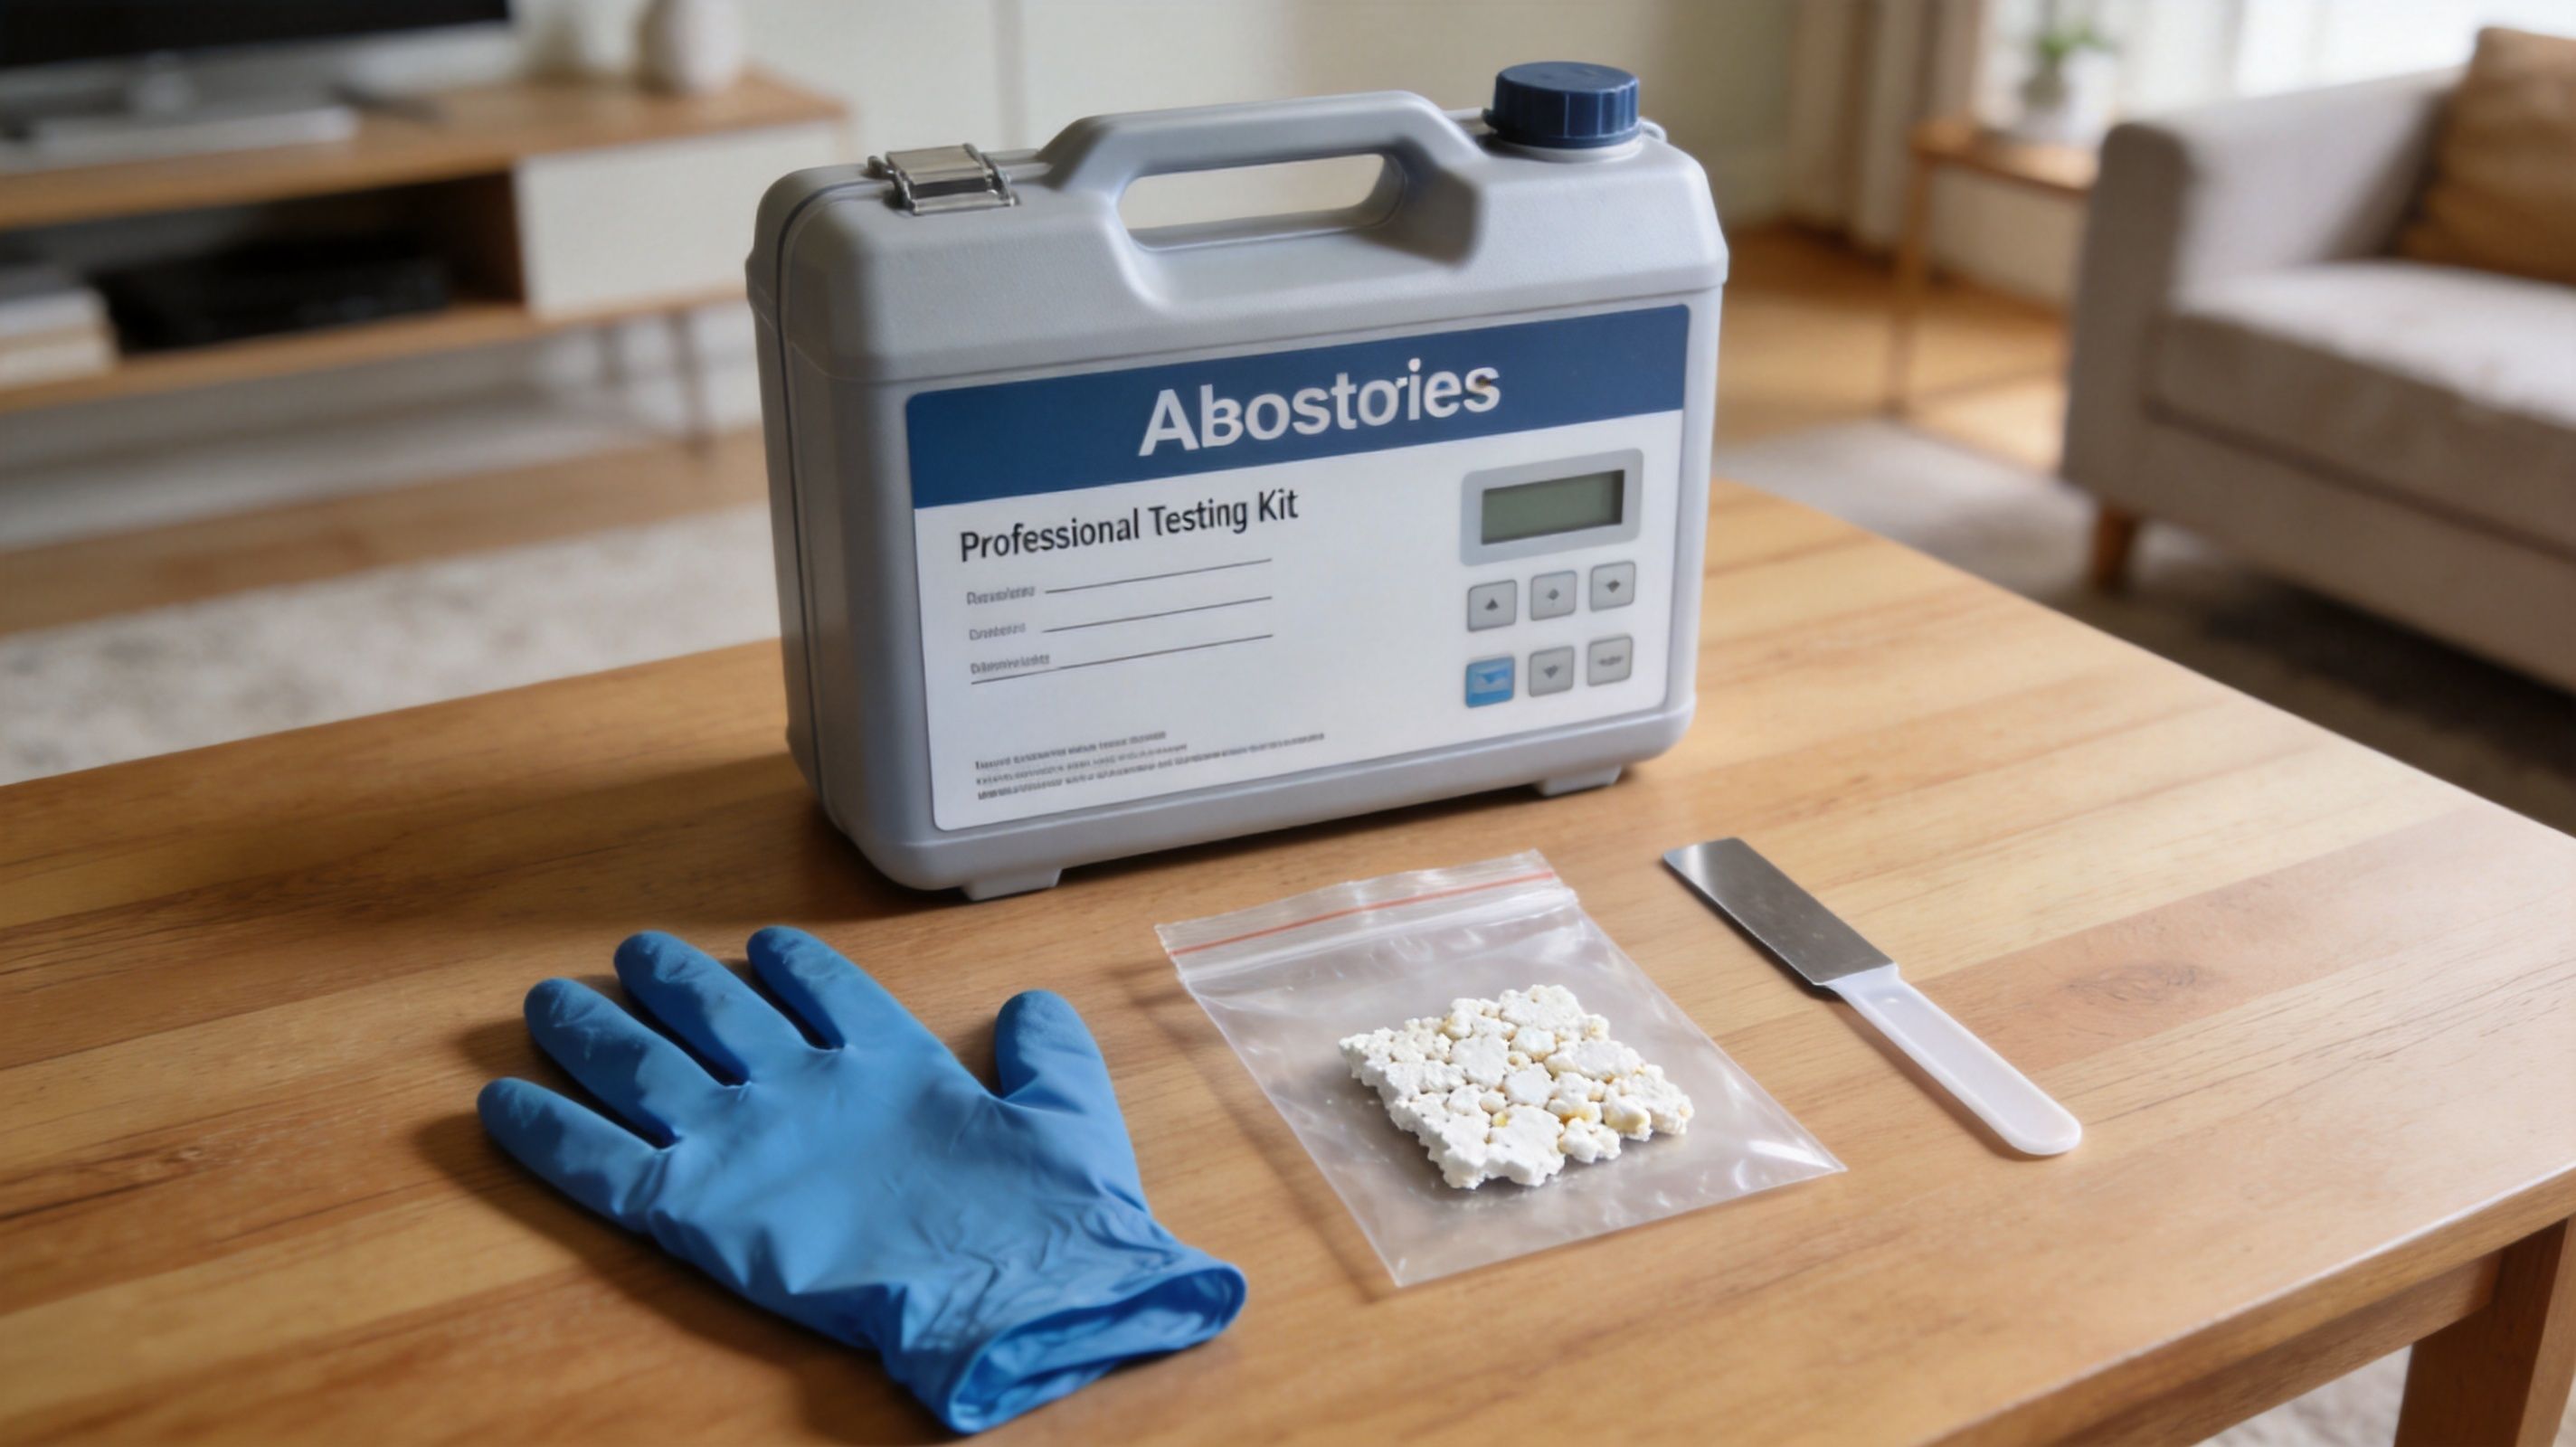
What to do before you disturb the ceiling
Do not scrape a test patch to "see how it comes off." Do not sand a corner. Do not soak the whole ceiling just to check whether the texture softens.
Use a controlled process instead:
- Leave the ceiling intact until testing is done. No result means no safe removal plan.
- Collect a small sample carefully, or hire a qualified tester. The goal is to disturb as little material as possible.
- Seal and label the sample properly. Containment starts at the first cut.
- Send it to an accredited lab for analysis.
- Wait for the result before choosing removal, encapsulation, or abatement.
If the result is negative, the project can continue with standard removal prep. If it is positive, stop there. At that point, the smart move is to bring in a licensed asbestos abatement contractor. Trying to push ahead with a shop vac, a scraper, and plastic on the floor is how a simple ceiling update turns into a much bigger cleanup and liability issue.
From a contractor's perspective, this step protects the rest of the project too. There is no point rushing to scrape if the essential work will later be containment, clearance, and re-finishing the ceiling correctly. Testing is how you protect the house, the people in it, and the finish quality you want at the end.
How to Prepare and Contain the Mess
Popcorn ceiling removal creates a mess even when the job goes well. Wet material drops in clumps. Dry residue travels farther than people expect. Fine dust gets on trim, inside vents, and into adjacent rooms if the setup is sloppy.
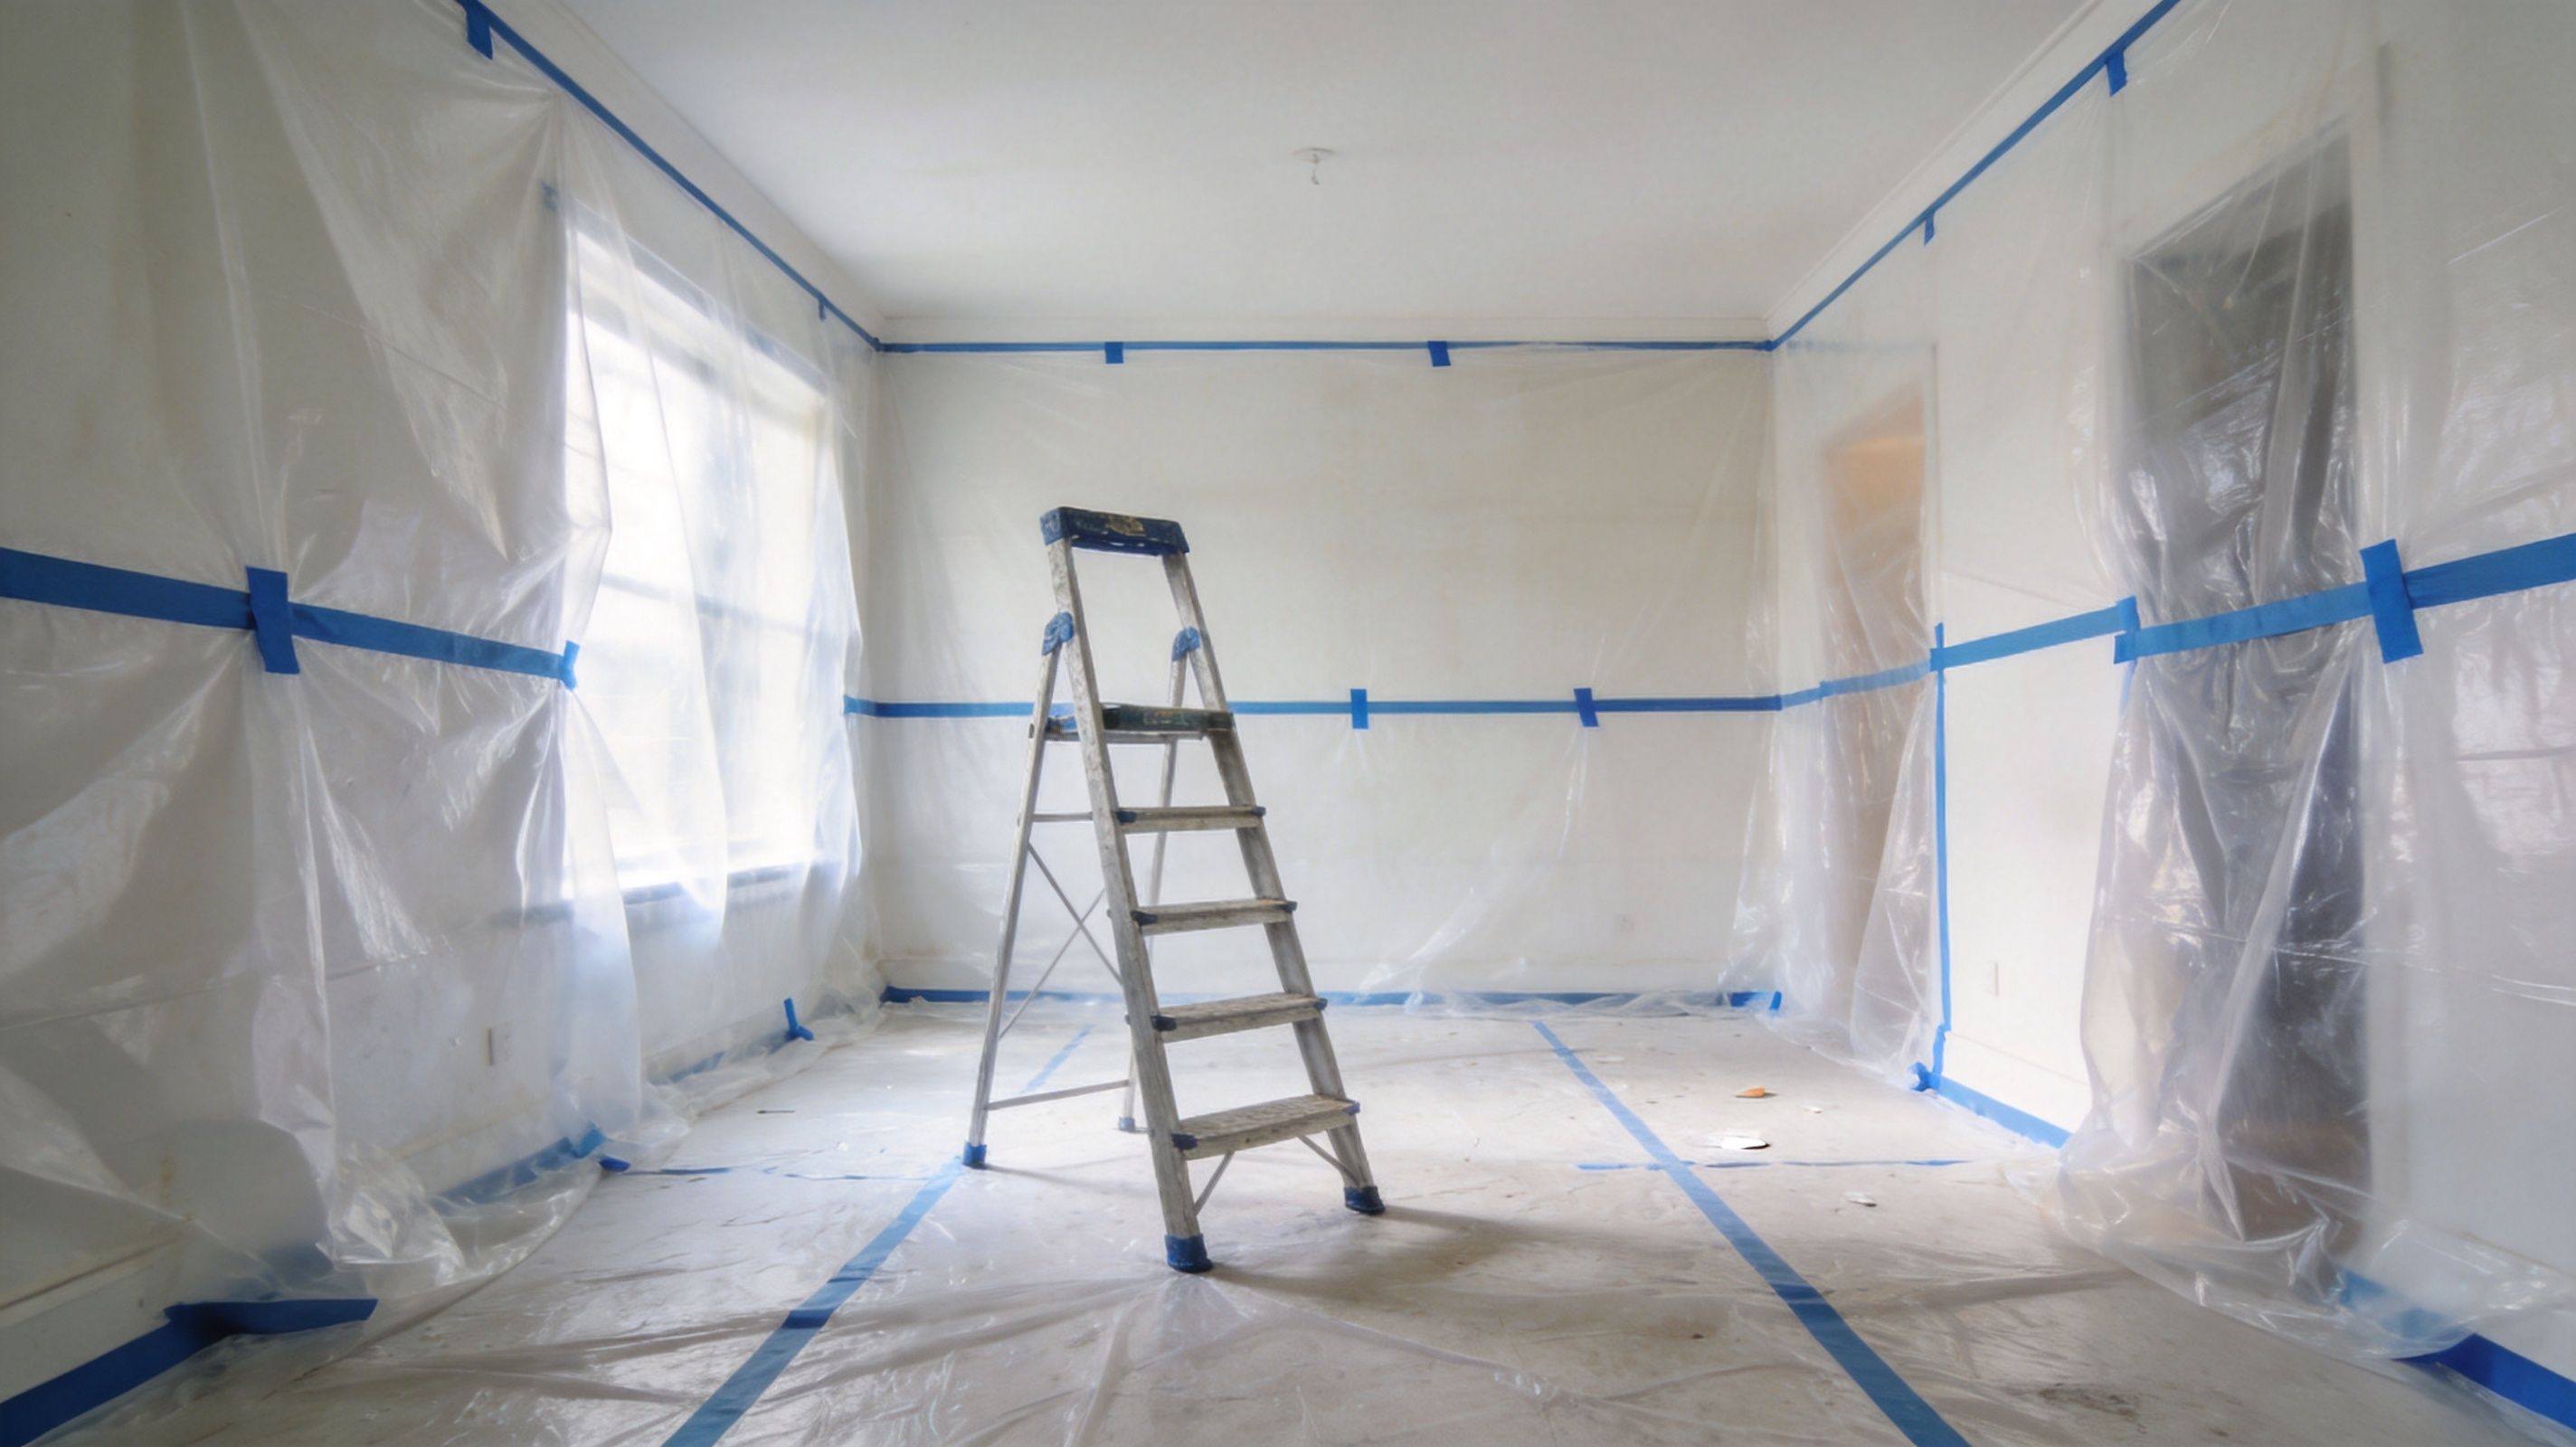
Set the room up like a containment zone
Good prep saves cleanup time and prevents damage to the rest of the house. Before removal starts, clear the room as much as possible and assume that anything left exposed will get dirty.
Use this checklist:
- Remove furniture completely: Don't just push it to the middle of the room unless there is no other option.
- Cover floors wall to wall: Use tarps or plastic that can hold wet debris without tearing.
- Seal openings: Tape off doorways, HVAC vents, and other paths where dust can migrate.
- Create a controlled path out of the room: You need one route for carrying debris without tracking it through the house.
- Take down light fixtures and fans if practical: They collect texture residue and get in the way of clean scraping lines.
Protect what people forget
The forgotten details are usually what make the cleanup drag on. Outlet covers, smoke detectors, recessed trim rings, and the tops of window casings all catch dust. If the ceiling has cracks or previous patches, expect loose material to fall unevenly.
A few habits make the job easier:
- Turn off power where fixtures are being removed: Ceiling work and exposed electrical parts don't mix.
- Tape plastic lower than you think you need: Falling material rarely drops straight down.
- Keep cleanup tools in the room: A broom, bags, and rags near the work area reduce trips back and forth.
Most removal jobs feel harder because the room wasn't prepared well enough, not because the scraping itself was impossible.
Clean containment is one of the biggest differences between a manageable project and a house that still feels dusty days later.
Removal Methods Wet Scraping vs Power Sanding
After the room is contained and the ceiling has tested clear for asbestos, the primary choice is method. Wet scraping is usually the right approach for unpainted popcorn. Power sanding is more useful when paint has sealed the texture or the surface is too stubborn to scrape cleanly.
The mistake I see on DIY jobs is choosing the method based on what sounds easier, not on what the ceiling will allow. That usually leads to torn drywall paper, heavy gouges, and a lot more finish work later.
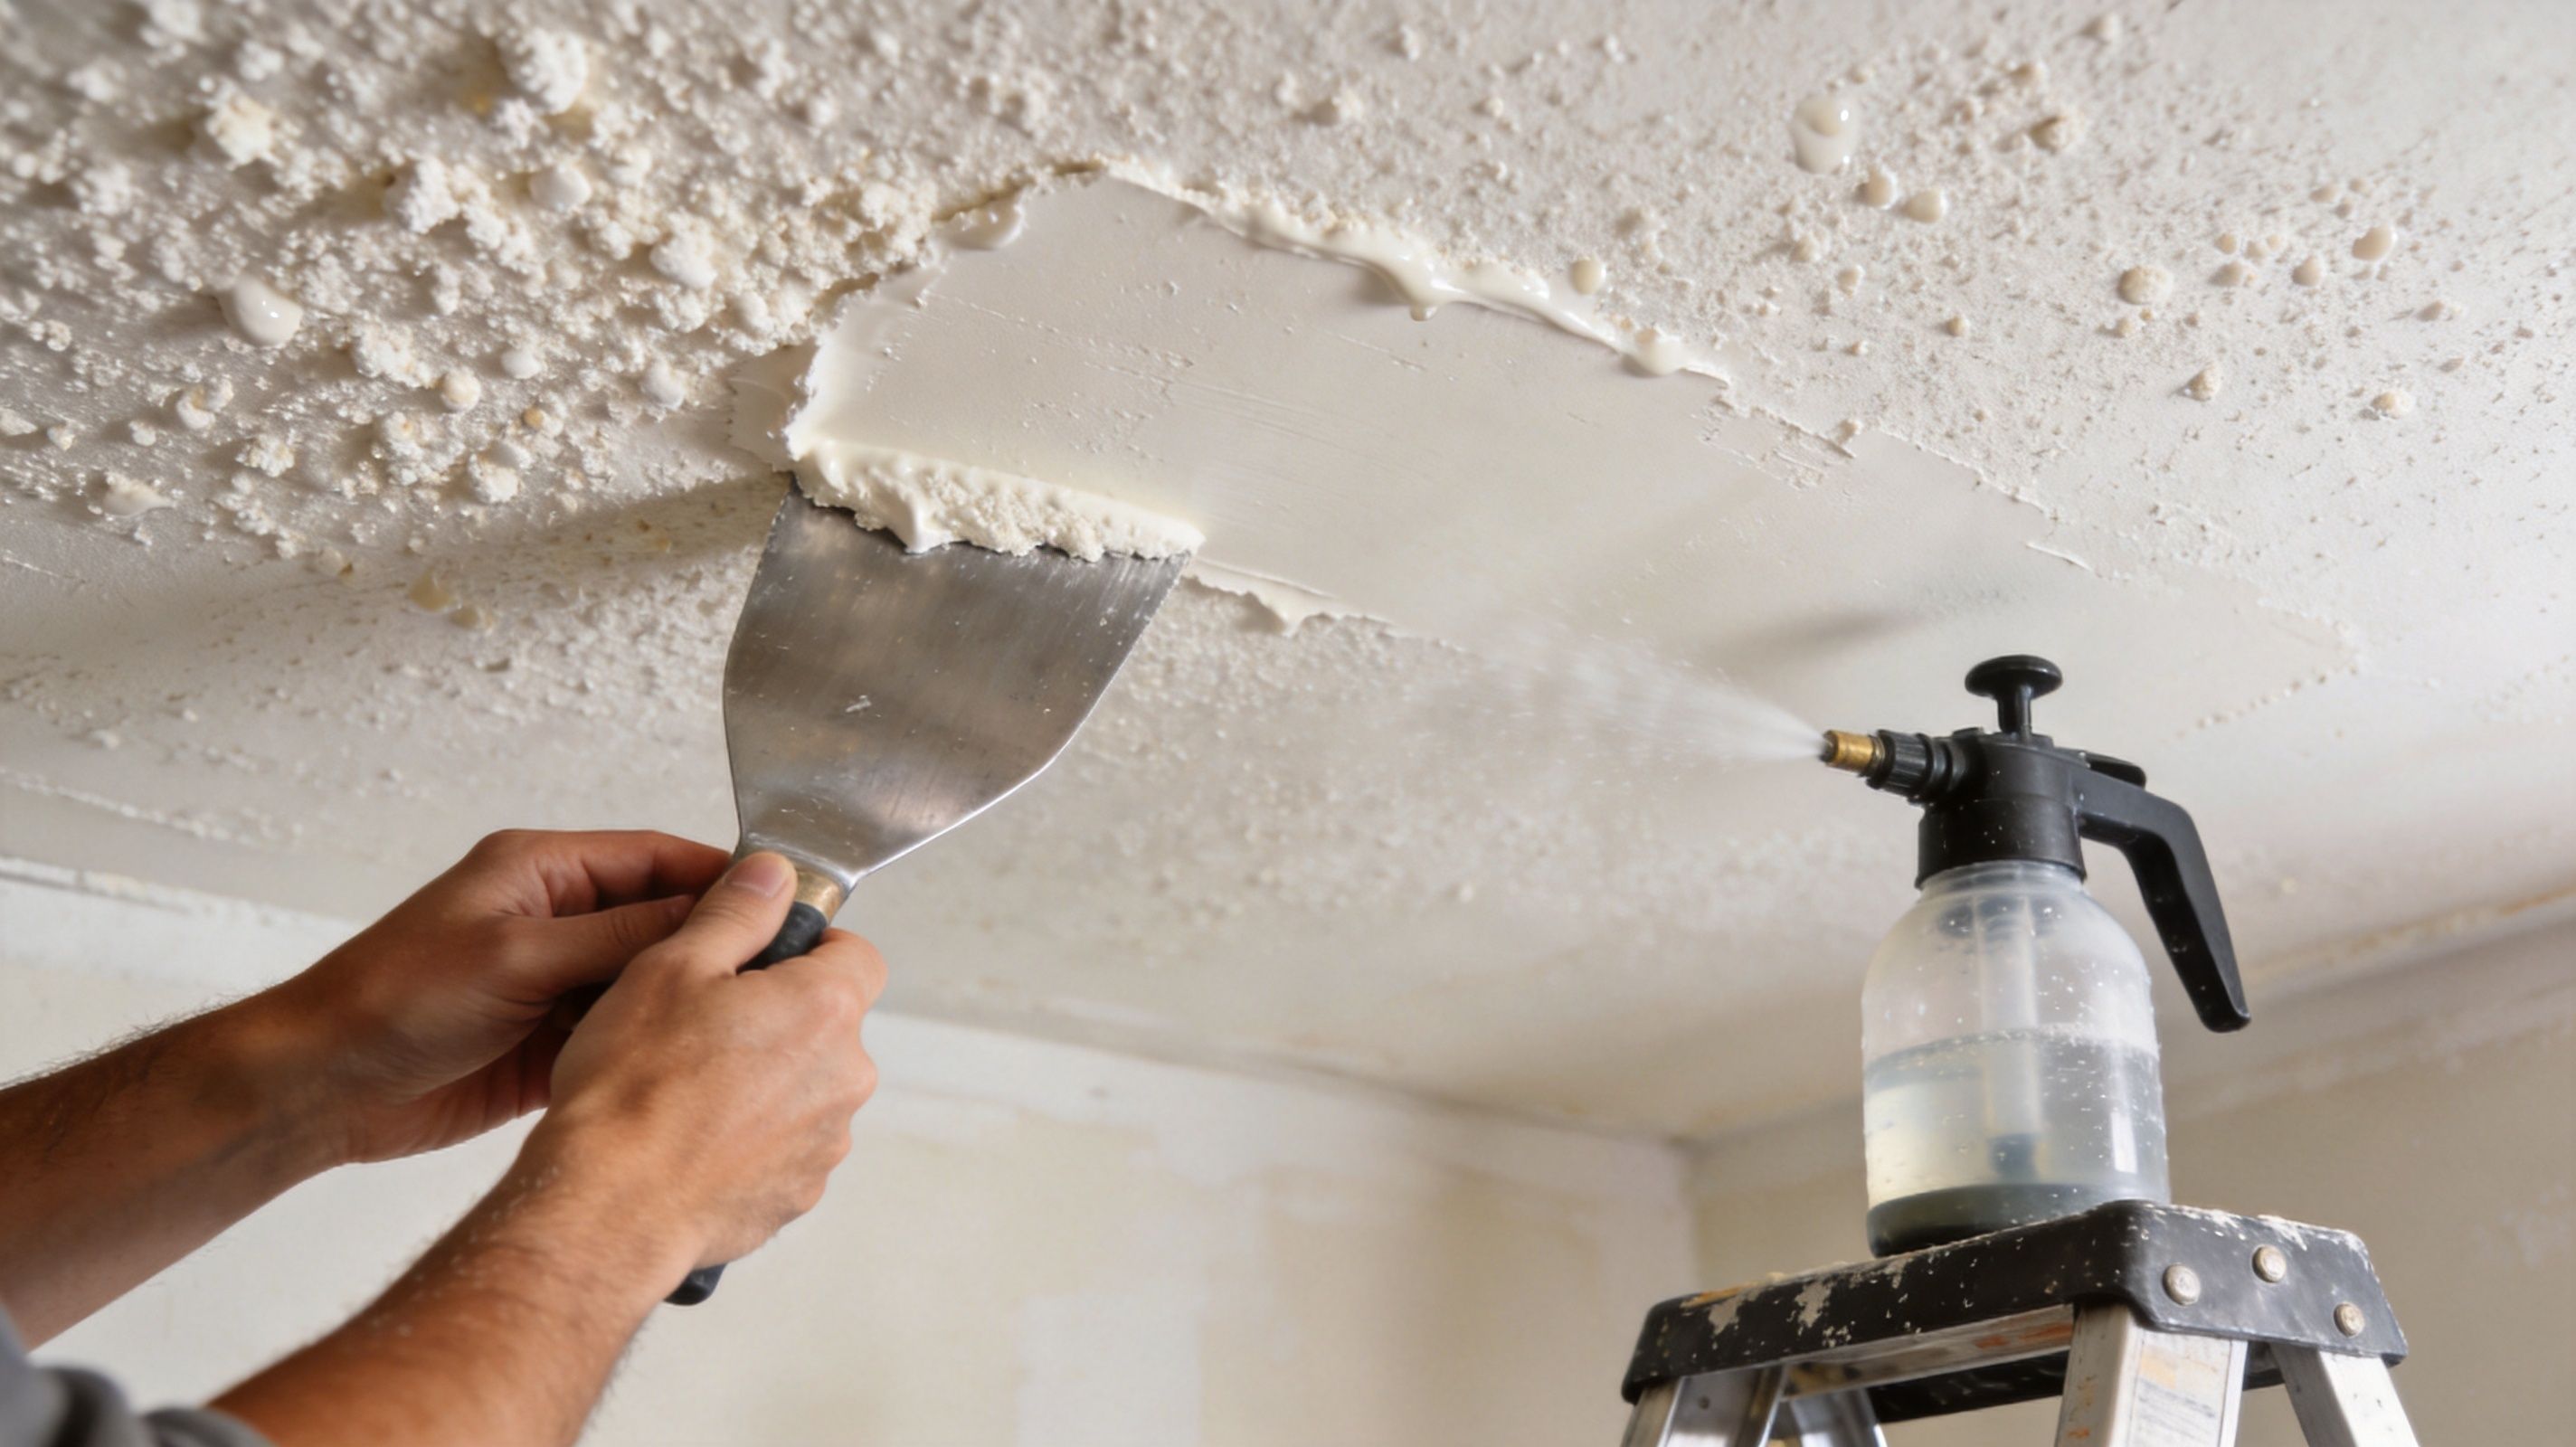
Wet scraping for unpainted texture
Wet scraping works because water softens the texture so it releases from the drywall face. It is simple, low-cost, and effective on many older ceilings that were never painted. It is also messy, and it only goes well when the material loosens easily.
Start with a test area of a few square feet. Spray it lightly, wait several minutes, then slide a wide drywall knife across the surface at a shallow angle. If the texture comes off in soft layers without much force, keep going. If it stays hard, peels the paper, or breaks off in dry chunks, stop and switch methods.
A workable process looks like this:
- Mist a small section at a time: Keep the area manageable so the water has time to soak in without drying out.
- Let the moisture do the work: The knife should lift the texture. It should not be used like a chisel.
- Use a wide blade and a low angle: That reduces digging and helps shave off texture more evenly.
- Watch the drywall face closely: If the paper starts to fuzz or tear, back off on water and pressure.
Wet scraping can save money on equipment, but it has a trade-off. A ceiling that looks fine from the floor can get chewed up fast once the knife starts catching on joints, old patches, or paint you did not know was there.
If the texture does not release with light pressure after a test patch, forcing it usually creates more repair than removal.
Power sanding for painted ceilings
Paint changes the job. Once popcorn has been coated, water often beads up on the surface instead of soaking through. Scraping still can work in spots, but it gets slower, rougher, and less predictable.
That is where power sanding earns its keep. With a drywall sander connected to proper dust extraction, a contractor can remove painted texture more evenly and keep the work under better control. It is still a dusty process. It just becomes a contained dust job instead of loose debris and powder drifting through the house.
Here is the practical comparison:
| Method | Best use | Main advantage | Main drawback |
|---|---|---|---|
| Wet scraping | Unpainted texture | Lower tool cost, effective when the material softens easily | Heavy mess, easy to gouge drywall |
| Power sanding | Painted or stubborn texture | Better control on sealed surfaces, more consistent removal | Requires specialized equipment, skill, and serious dust control |
This walkthrough helps illustrate what removal looks like in practice:
For occupied homes and remodels where the ceiling needs to end up smooth, power sanding is often the better call. It usually leaves a more uniform surface for the repair and skim-coat stages, which is the part many DIY guides skip. Getting the popcorn off is only one step. Getting from removal to a clean Level 5 finish is the full job.
CS1 Real Interiors handles this type of work as part of drywall finishing, interior painting, insulation, and metal stud framing projects across the Portland metro area.
Repair and Skim Coating for a Smooth Finish

A scraped ceiling is rarely ready for primer the same day. Once the texture is gone, every defect that was hidden for years shows up under normal room light, and side lighting makes it worse.
The repair stage determines whether the ceiling ends up looking clean and modern or patched and wavy. That is the part many DIY guides skip. Removal is only the front half of the job. The back half is turning damaged drywall into a surface that can carry a true smooth finish.
What the ceiling looks like after removal
After popcorn comes off, it is common to find old butt joints, nail pops, soft spots, torn paper, and random patchwork from past repairs. Some ceilings were textured because the board work was never finished to a smooth-ceiling standard in the first place.
The usual problems include:
- Scrape marks and gouges: These need filling before any broad skim coat goes on.
- Raised seams and tape lines: Joints that were acceptable under texture often stand out on a smooth ceiling.
- Torn drywall face paper: This has to be sealed and stabilized or it will blister under compound.
- Shallow waves and low spots: They may not look serious until primer and paint hit the surface.
- Old repairs flashing through: Previous patches often absorb differently and telegraph through paint unless they are blended out.
A lot of homeowners stop too early here. They get the texture off, see a mostly flat ceiling, and assume paint will hide the rest. It will not.
The Process for a Truly Smooth Finish
Good repair work starts with isolation of the damaged areas. Loose material gets cut out. Torn paper gets sealed. Cracks, gouges, and exposed joints get repaired before any full skim begins. If that prep is rushed, the finish coat ends up chasing defects instead of covering them.
From there, the ceiling is skim coated in thin passes across the full field, not just patched in spots. Thin coats give better control and dry more predictably. Heavy coats shrink more, sand harder, and make it easier to leave edge lines. On ceilings, that difference shows fast.
A typical finish sequence looks like this:
- Stabilize the substrate: Seal torn paper, remove loose compound, and secure any failed tape or weak areas.
- Pre-fill damaged sections: Fill gouges, deep knife marks, and low spots so the skim coat stays uniform.
- Apply broad skim coats: Use long, controlled passes to flatten the plane across the ceiling.
- Sand with restraint: Knock down ridges and tool lines without scarring the surface or exposing paper again.
- Prime and inspect under light: Primer reveals flaws that bare drywall can hide.
- Touch up as needed for a Level 5 result: Final detail work is what separates acceptable from clean.
Smooth ceilings are unforgiving. Every lap mark, ridge, shallow dip, and seam reflection becomes visible once the paint dries and daylight hits the room.
In older Portland homes, this is often where the actual labor is. The asbestos test may come back clear, the texture may come down fine, and the ceiling can still need serious finish work to look right. That full lifecycle matters. Safe removal is one phase. Delivering a uniform Level 5 surface is the finished product people are paying for.
Professional help earns its value here because the margin for error is small. A contractor can usually tell within a few minutes whether the ceiling needs spot repair, a full skim, or multiple correction passes to get it flat enough for modern paint. CS1 Real Interiors handles that finish work as part of the complete process, from post-removal repair through final smooth-ceiling prep.
Cost Time and When to Hire a Professional
A lot of ceilings look like a cheap weekend project until the floor is covered in wet texture, the drywall paper starts tearing, and the room still needs skim coating before it can take paint. That is usually the point where homeowners realize scraping was only one phase of the job.
Cost depends on the full scope. The actual comparison is not DIY scraping versus hired scraping. It is testing, setup, protection, removal, debris handling, repairs, skim coating, sanding, priming, and the standard of finish you expect at the end.
What professional pricing usually looks like
In my experience, pricing rises or falls on three things: whether the material tests clear, how much protection the home needs, and how much finish work the ceiling requires after the texture comes down.
A small, empty room with an unpainted ceiling is one kind of project. An occupied older home with furniture, HVAC registers, light fixtures, painted texture, and uneven drywall is another. The second job takes longer, creates more cleanup, and usually needs more repair work to get to a smooth, modern ceiling.
The part many DIY guides miss is the finish stage. If you want a true smooth ceiling, removal alone does not get you there. Many ceilings need patching, broad skim coats, detail sanding, primer, and a final inspection under light. That is where labor adds up, and it is also where a professional crew can protect the result.
When DIY stops making sense
DIY can make sense on a small ceiling if the material has tested clear, the room is empty, and you are comfortable repairing drywall afterward.
It usually stops making sense when any of these are true:
- The home was built in an era where asbestos is a concern
- The texture has been painted and does not scrape cleanly
- You want a flat ceiling instead of a scraped-but-patched look
- The room is furnished, occupied, or hard to isolate from the rest of the house
- There is existing damage, sagging tape, cracking, or previous patchwork overhead
- You need predictable timing for a sale, move-in, tenant turnover, or other remodel work
There is also a quality trade-off. A homeowner can often remove texture successfully and still end up with visible seams, gouges, or flashing once the paint dries. Ceilings are less forgiving than walls. Daylight and ceiling paint expose every low spot.
Hiring a contractor is the smart call when you want the full lifecycle handled correctly, from asbestos testing through final Level 5 prep. CS1 Real Interiors handles that process for homeowners who want the mess contained, the schedule controlled, and the finished ceiling ready for primer and paint.
If you want help removing popcorn texture, repairing damaged ceilings, or finishing your space with smooth, paint-ready drywall, CS1 Real Interiors serves homeowners and small commercial clients across Portland, Beaverton, Hillsboro, Tigard, Lake Oswego, Gresham, and Vancouver, WA. Reach out to request a free estimate and get professional help for your drywall, painting, insulation, or interior finishing project.