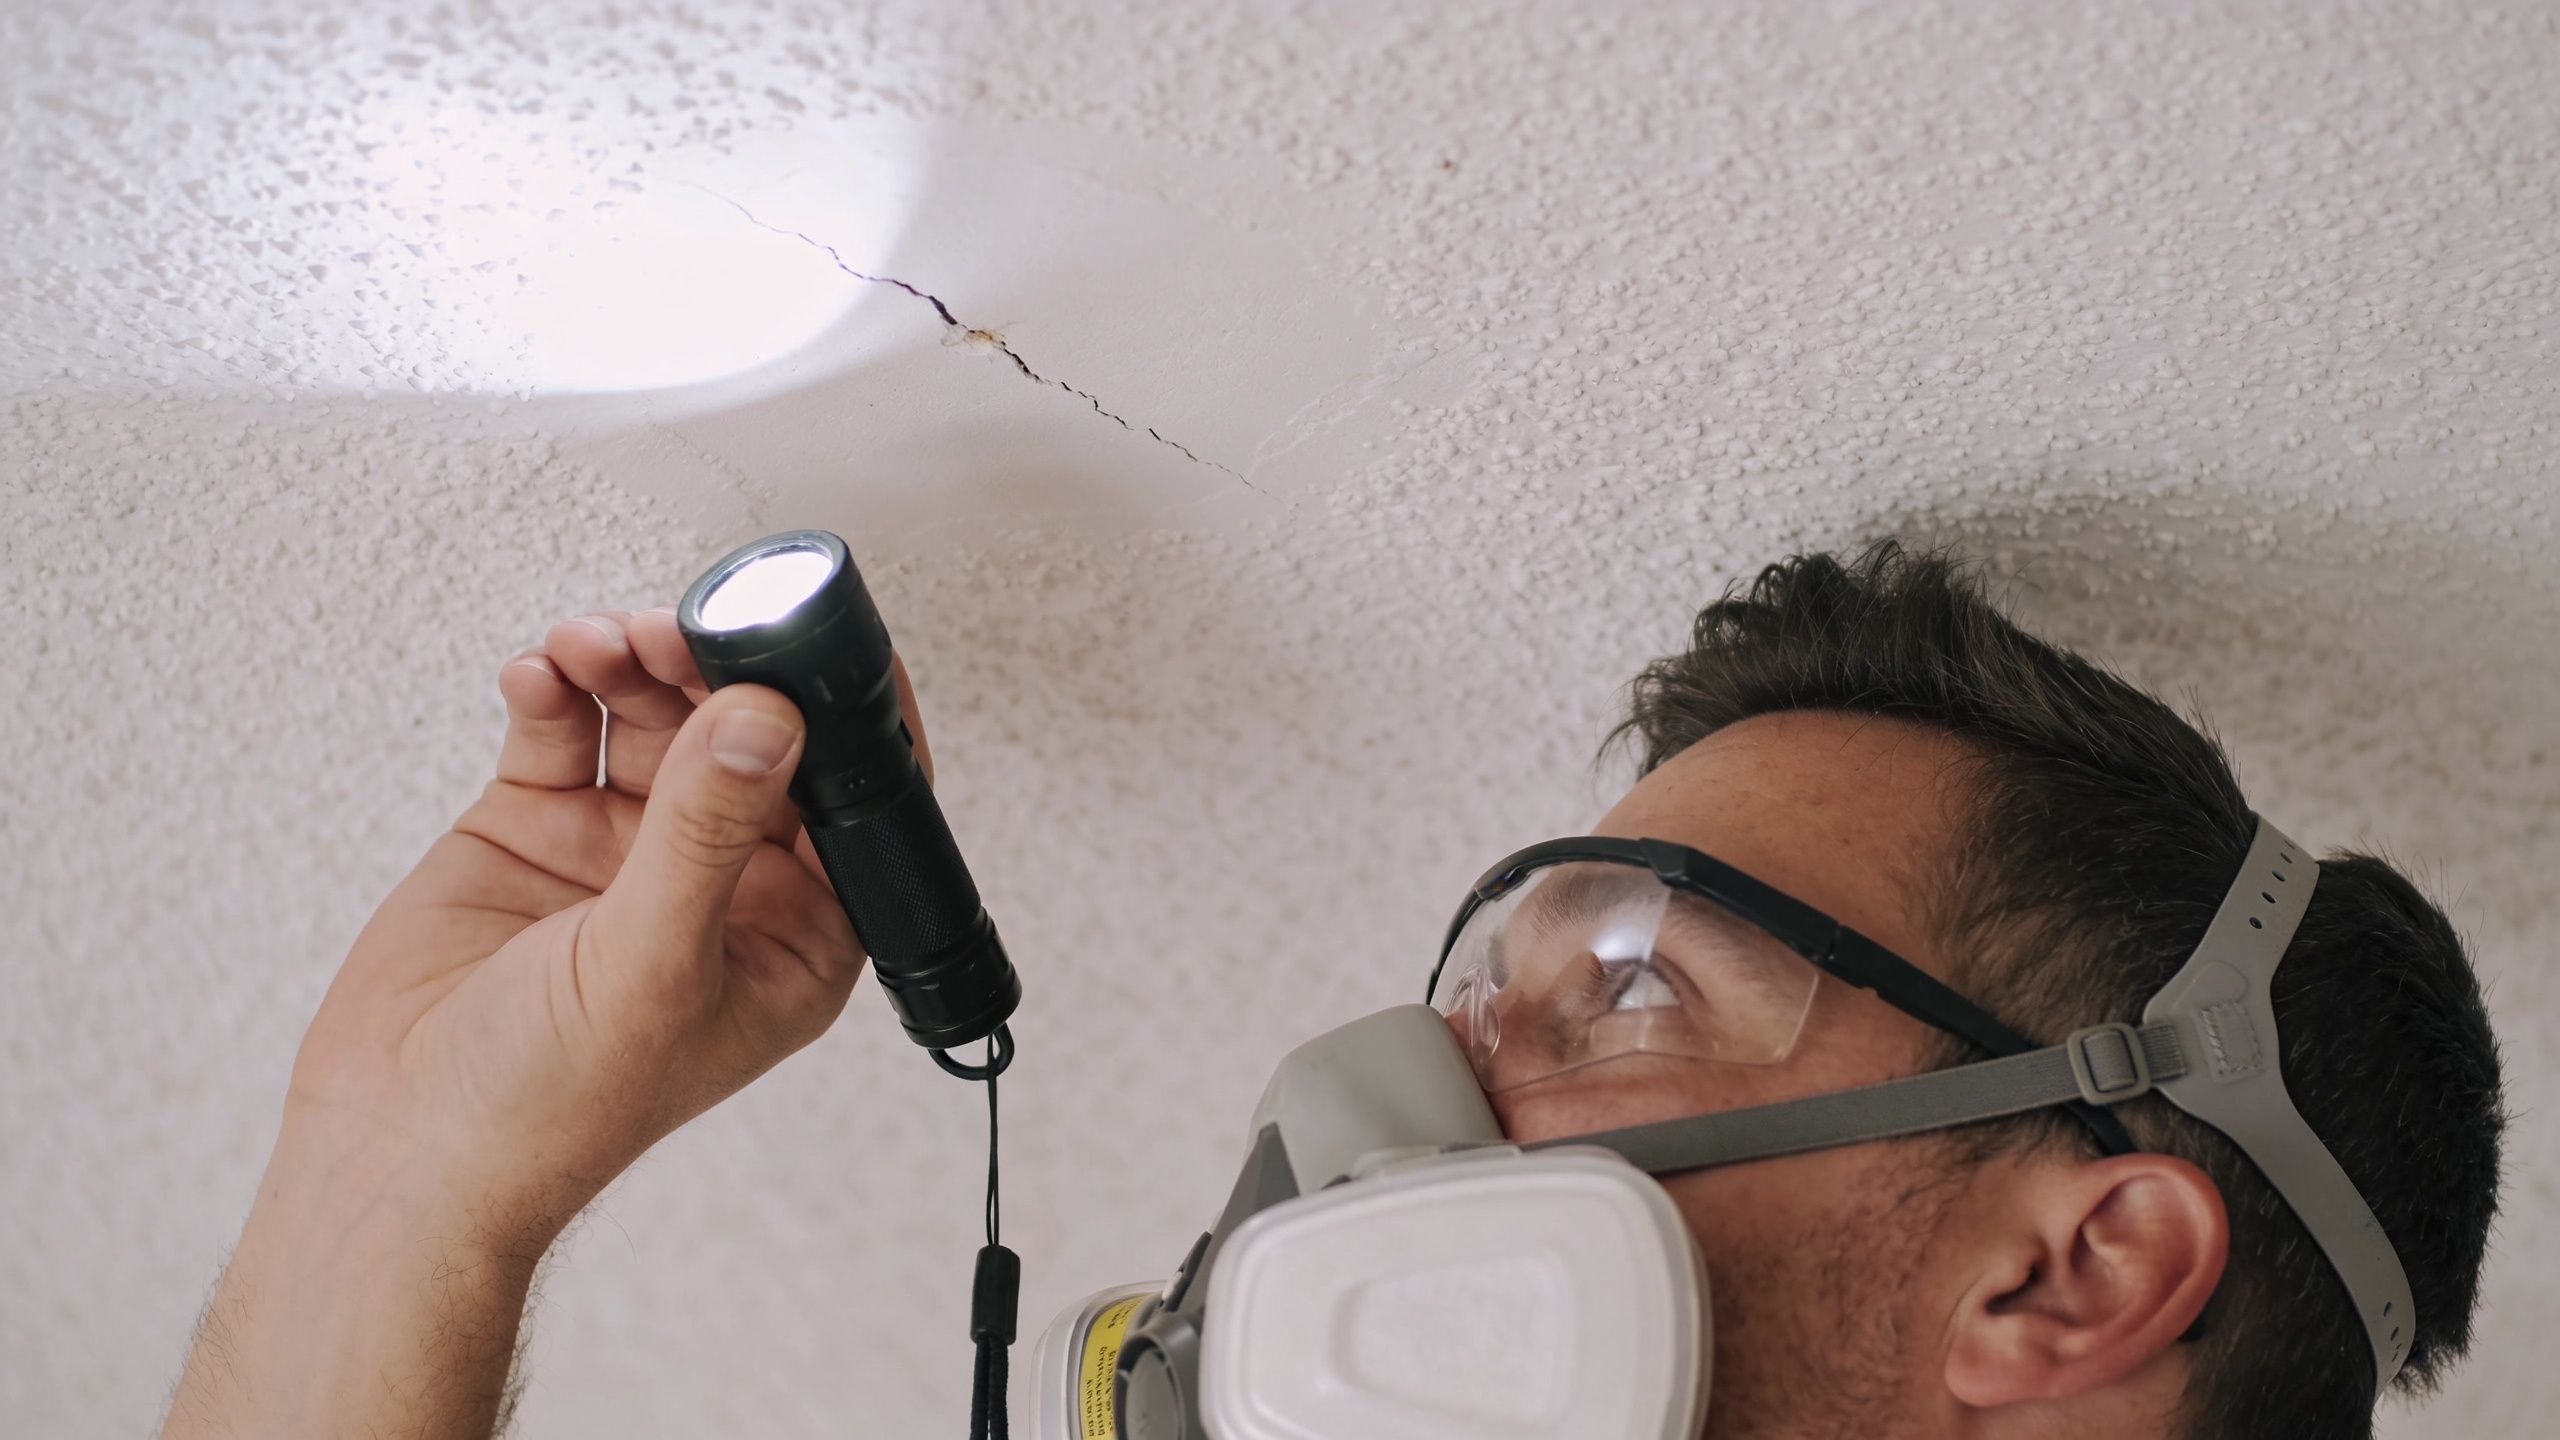
A textured ceiling problem usually starts small. You notice a hairline crack over the hallway light. Then a yellow ring shows up after a rainy Portland week. Or a moving box clips the ceiling during a remodel and leaves a rough patch that somehow looks worse after you “fix” it.
That's why fixing textured ceilings frustrates so many homeowners. The patch itself often isn't the hardest part. The hard part is making the repair blend so it doesn't catch your eye every time you walk into the room.
In older homes around Portland, Beaverton, Lake Oswego, and Vancouver WA, there's another layer to it. Safety matters just as much as appearance. If the ceiling is older, you can't assume it's safe to scrape, sand, or spray without checking what you're disturbing first. And if the ceiling has water damage, the texture repair won't hold unless the leak issue is solved before any mud goes on.
Table of Contents
- That Ugly Spot on the Ceiling What Now
- First Steps Assess the Damage and Prioritize Safety
- Gathering Your Tools and Materials for a Flawless Repair
- Feeling Overwhelmed Get a Perfect Finish Without the Mess
- A Step-by-Step Guide to Common Ceiling Repairs
- The Art of Texture Matching and Professional Finishing
- When a DIY Fix Isnt Enough Know When to Call a Pro
That Ugly Spot on the Ceiling What Now
Homeowners rarely go looking for ceiling damage. They spot it by accident. You lean back on the couch and see a split line over the dining room. You're replacing a light fixture in Tigard and notice a soft spot around the box. You're getting a rental ready in Hillsboro and realize an old repair is flashing through the paint because the texture never matched.
Textured ceilings hide minor flaws well until they don't. Once the surface breaks, the repair tends to stand out more than it would on a smooth ceiling. Popcorn, knockdown, and orange peel all have one thing in common. A rushed patch leaves a visible island in the middle of the room.
Homeowners often start with the wrong question. They ask, “What do I use to cover this?” The better question is, “Why did this happen, and what kind of ceiling am I dealing with?” That answer tells you whether you need a simple patch, a stain-blocking primer, a drywall cutout, or a full professional repair.
Practical rule: If the damage changed shape, got darker, or feels soft, don't treat it like a cosmetic issue.
The other reality is that ceiling work is unforgiving. Gravity fights every step. Dust falls everywhere. Texture matching takes trial and error. In Portland-area homes with older finishes, disturbing the wrong material can also create a safety problem.
A careful repair can absolutely work on minor damage. But the process has to be clean, controlled, and honest about limits. If you want the patch to disappear, the prep matters as much as the final texture.
First Steps Assess the Damage and Prioritize Safety
Before you buy mud or texture spray, stop and inspect the ceiling like a contractor would. A textured ceiling can crack from normal movement, stain from a leak, or fail because the drywall itself softened and lost strength. Those are different problems, and they need different fixes.
Start with the cause not the patch
Look for clues before touching the surface.
- Brown or yellow staining: Usually points to moisture. Check the attic, roof penetrations, bathroom plumbing, or anything above the ceiling.
- Straight hairline seams: Often show tape movement or framing movement.
- Circular damage or dents: Common after fixture work, attic access mistakes, or moving furniture.
- Soft or sagging areas: Treat this as structural damage to the drywall surface until proven otherwise.
If water caused the damage, fix the leak first and let the area dry fully. A patched wet ceiling often fails again, and the stain can bleed back through fresh paint if it isn't sealed later.
Know what texture you are dealing with
Texture type affects both repair method and blend strategy.
| Texture type | What it looks like | Common repair challenge |
|---|---|---|
| Popcorn | Raised acoustic texture with a bumpy surface | Hard to patch without disturbing surrounding material |
| Knockdown | Flattened splatter pattern | Patch edges often flash if the knockdown timing is off |
| Orange peel | Fine to medium pebbled finish | Small patches can look smoother than the field |
| Stomp or slap brush | Repeating brush pattern | Matching the rhythm and depth takes practice |
If you can't identify the texture, look at the ceiling under side lighting. Shadows tell you more than overhead light does. The profile of the pattern matters more than the paint color at this stage.
Older ceilings need an asbestos check first
In Portland, Beaverton, and other nearby cities, older homes need extra caution. For homes built from the 1950s to the mid-1980s in markets like Portland, OR, pre-disturbance asbestos testing is mandatory under EPA guidelines. Failure to properly test and handle materials can lead to significant health risks and fines under Oregon DEQ rules, as many older popcorn ceilings contain asbestos, as noted in this asbestos warning for older textured ceiling repairs.
That means no scraping, sanding, cutting, or aggressive patch prep until you know what you're dealing with. This isn't optional. If the home falls into that age range and the ceiling texture looks original, have it tested before disturbing the finish.
Don't assume a small repair is automatically safe. A small disturbed area can still create a serious contamination problem.
If the ceiling tests clear, move ahead with normal repair prep. If it doesn't, bring in qualified help and follow proper handling procedures. Safety comes first, especially in older Portland homes where original acoustic texture may still be in place.
Gathering Your Tools and Materials for a Flawless Repair
Good ceiling repairs start before the first scoop of mud hits the knife. The tools you choose affect how flat the patch dries, how much dust you create, and how close you can get the repaired area to the surrounding texture.
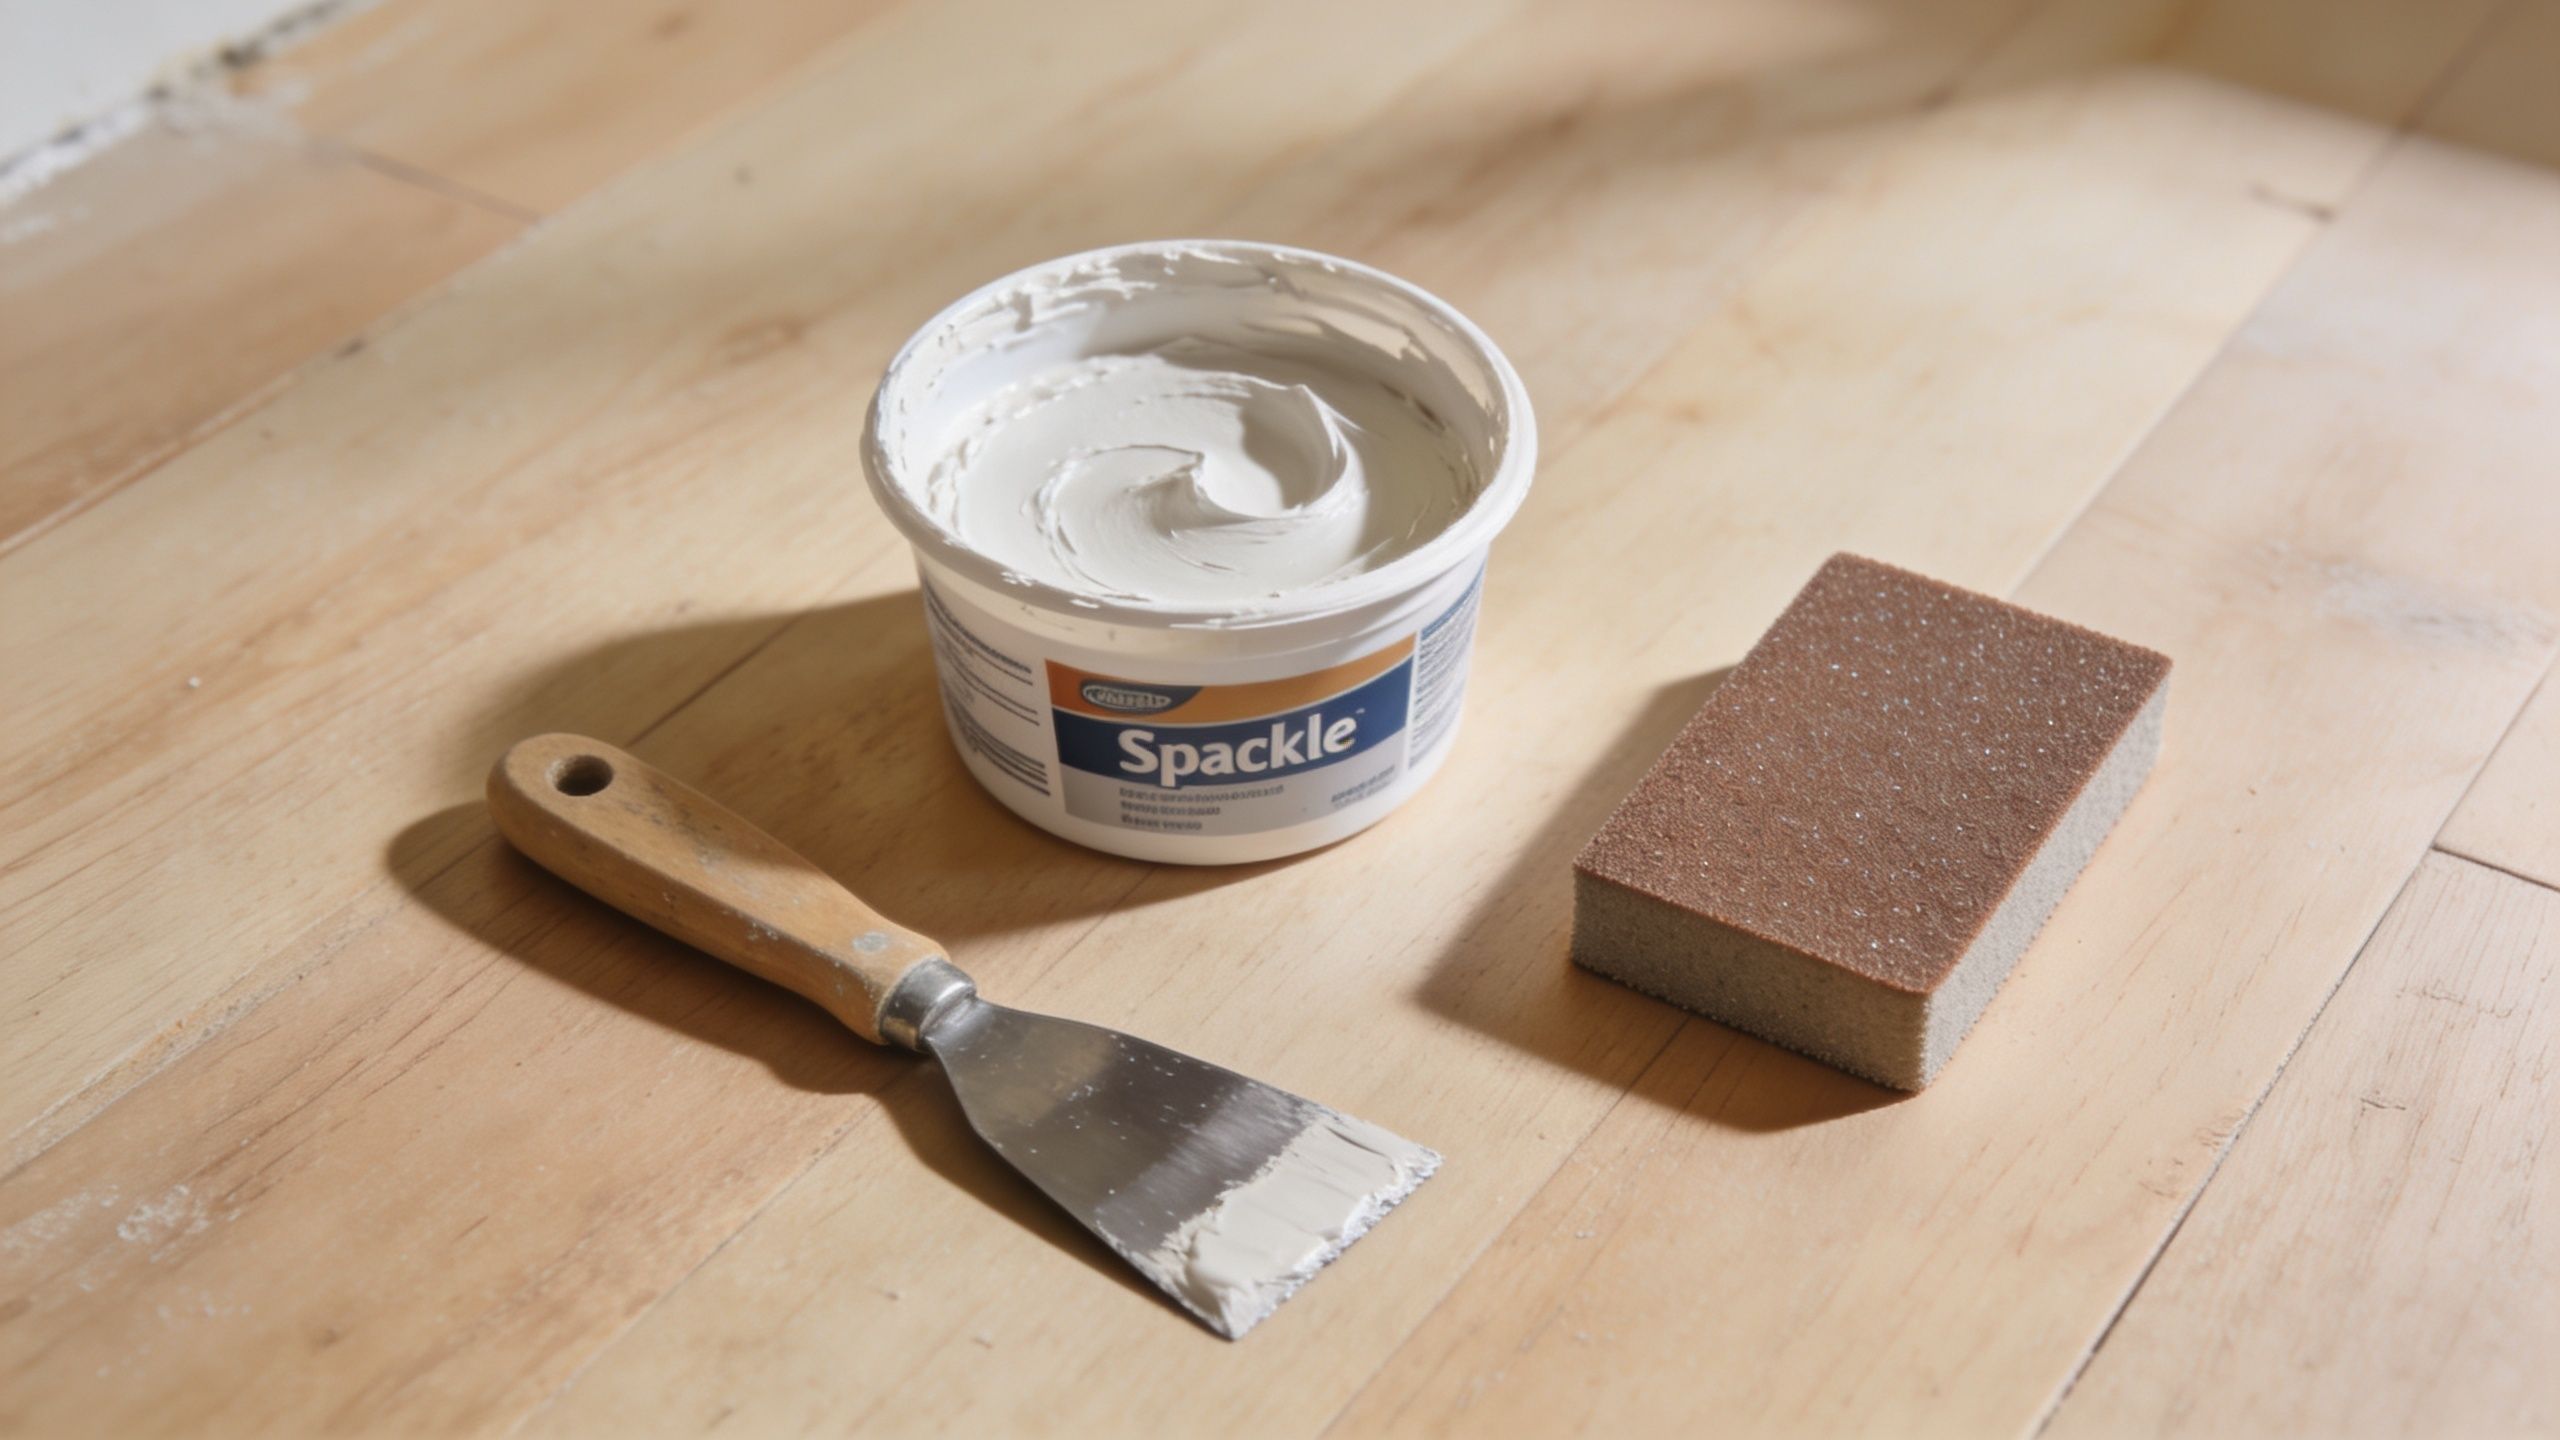
A hairline crack, a soft water-damaged spot, and a cut-out drywall patch do not use the same material stack. That is where DIY repairs often go sideways. Homeowners buy one tub of lightweight compound, one cheap knife, and expect it to handle every stage. It usually leaves a swollen patch, soft edges, and extra sanding overhead.
Core repair kit
Keep the kit simple, but choose each item for a reason:
- Putty knives in multiple widths: A small knife packs compound into damage. A wider knife feathers the repair so the patch stays flat across the field of the ceiling.
- Setting-type joint compound: Better for ceiling repairs that need strength, faster hardening, and less shrinkage than all-purpose mud.
- Mesh tape or paper tape: Mesh works well on some crack repairs and patches, but paper tape can lay flatter in skilled hands. The right choice depends on the repair and how well you bed it.
- Sanding sponge or fine sanding block: More control, less gouging, and easier touch-up around a small patch.
- Drop cloths, plastic, and painter's tape: Ceiling work throws dust and spatters farther than people expect.
- Stain-blocking primer and ceiling paint: If you repaired water damage, primer matters as much as the patch itself.
- Utility knife and drywall saw: Needed when damaged board has to come out cleanly instead of being filled over.
If the repair is overhead for more than a few minutes, add eye protection, a proper dust mask or respirator rated for the task, and stable step access. A wobbly chair turns a small repair into a much bigger problem fast.
Texture specific supplies
Texture matching takes more than a can labeled "ceiling texture." The patch may be sound and still look bad if the pattern, density, or edge transition is off.
For popcorn, small repairs sometimes respond well to a ready-to-use patch product. Larger repairs are harder to hide because the old texture has usually been painted more than once, and new material often dries with a different size and spread.
For knockdown or stomp, control comes from compound consistency, application method, and timing. If the mud is too wet, the pattern slumps. If it is too dry, it stands proud and catches light. That matters a lot on ceilings near windows, where Portland's gray daylight still shows every ridge.
For orange peel, use a lighter hand than you think you need. Heavy application creates a repair halo that stands out after paint. Small test sprays or practice passes on scrap drywall save a lot of rework.
The edge of the patch decides whether the repair disappears. The center is usually the easy part.
One more practical note from the field. On older Portland homes, texture can vary from room to room because repairs were done at different times by different crews. Matching the existing ceiling often means making a few sample textures first, then adjusting the mix and tool pressure before touching the actual repair area. That extra setup time is what gives pros a cleaner final result.
Feeling Overwhelmed Get a Perfect Finish Without the Mess
You start with a small ceiling patch on a Saturday morning. By lunch, the furniture is wrapped, dust is drifting past the plastic, and the repair already looks flatter or heavier than the surrounding texture. In older Portland homes, that is usually the point where a simple fix turns into a finish problem.
The hard part is rarely filling the damaged spot. The hard part is controlling dust, protecting the room, and matching the texture closely enough that the repair does not flash under paint or side light. If the home was built before asbestos bans took full effect, there is another risk DIY guides often skip. Disturbing a textured ceiling without proper testing can create a safety issue, not just a cosmetic one.
That is why many homeowners stop here and bring in a drywall contractor. A pro can isolate the work area, keep sanding debris contained, confirm whether testing should happen before any scraping or cutting, and blend the repair so it does not leave a clean square in the middle of an older ceiling.
I tell clients this all the time. If the ceiling has been painted multiple times, has an older popcorn texture, or sits in a room with strong window light, getting an invisible patch takes patience and a practiced hand. The material itself is only part of the job. Timing, edge control, and finish sanding decide whether the repair disappears.
If you want the repair done cleanly and with less guesswork, CS1 Real Interiors can inspect the ceiling, explain the safest path, and handle the texture match with a guaranteed result.
A Step-by-Step Guide to Common Ceiling Repairs
Most ceiling repairs follow the same basic order. Stabilize the area. Reinforce the patch. Build it in thin layers. Then recreate the texture without leaving a hard outline around the repair.
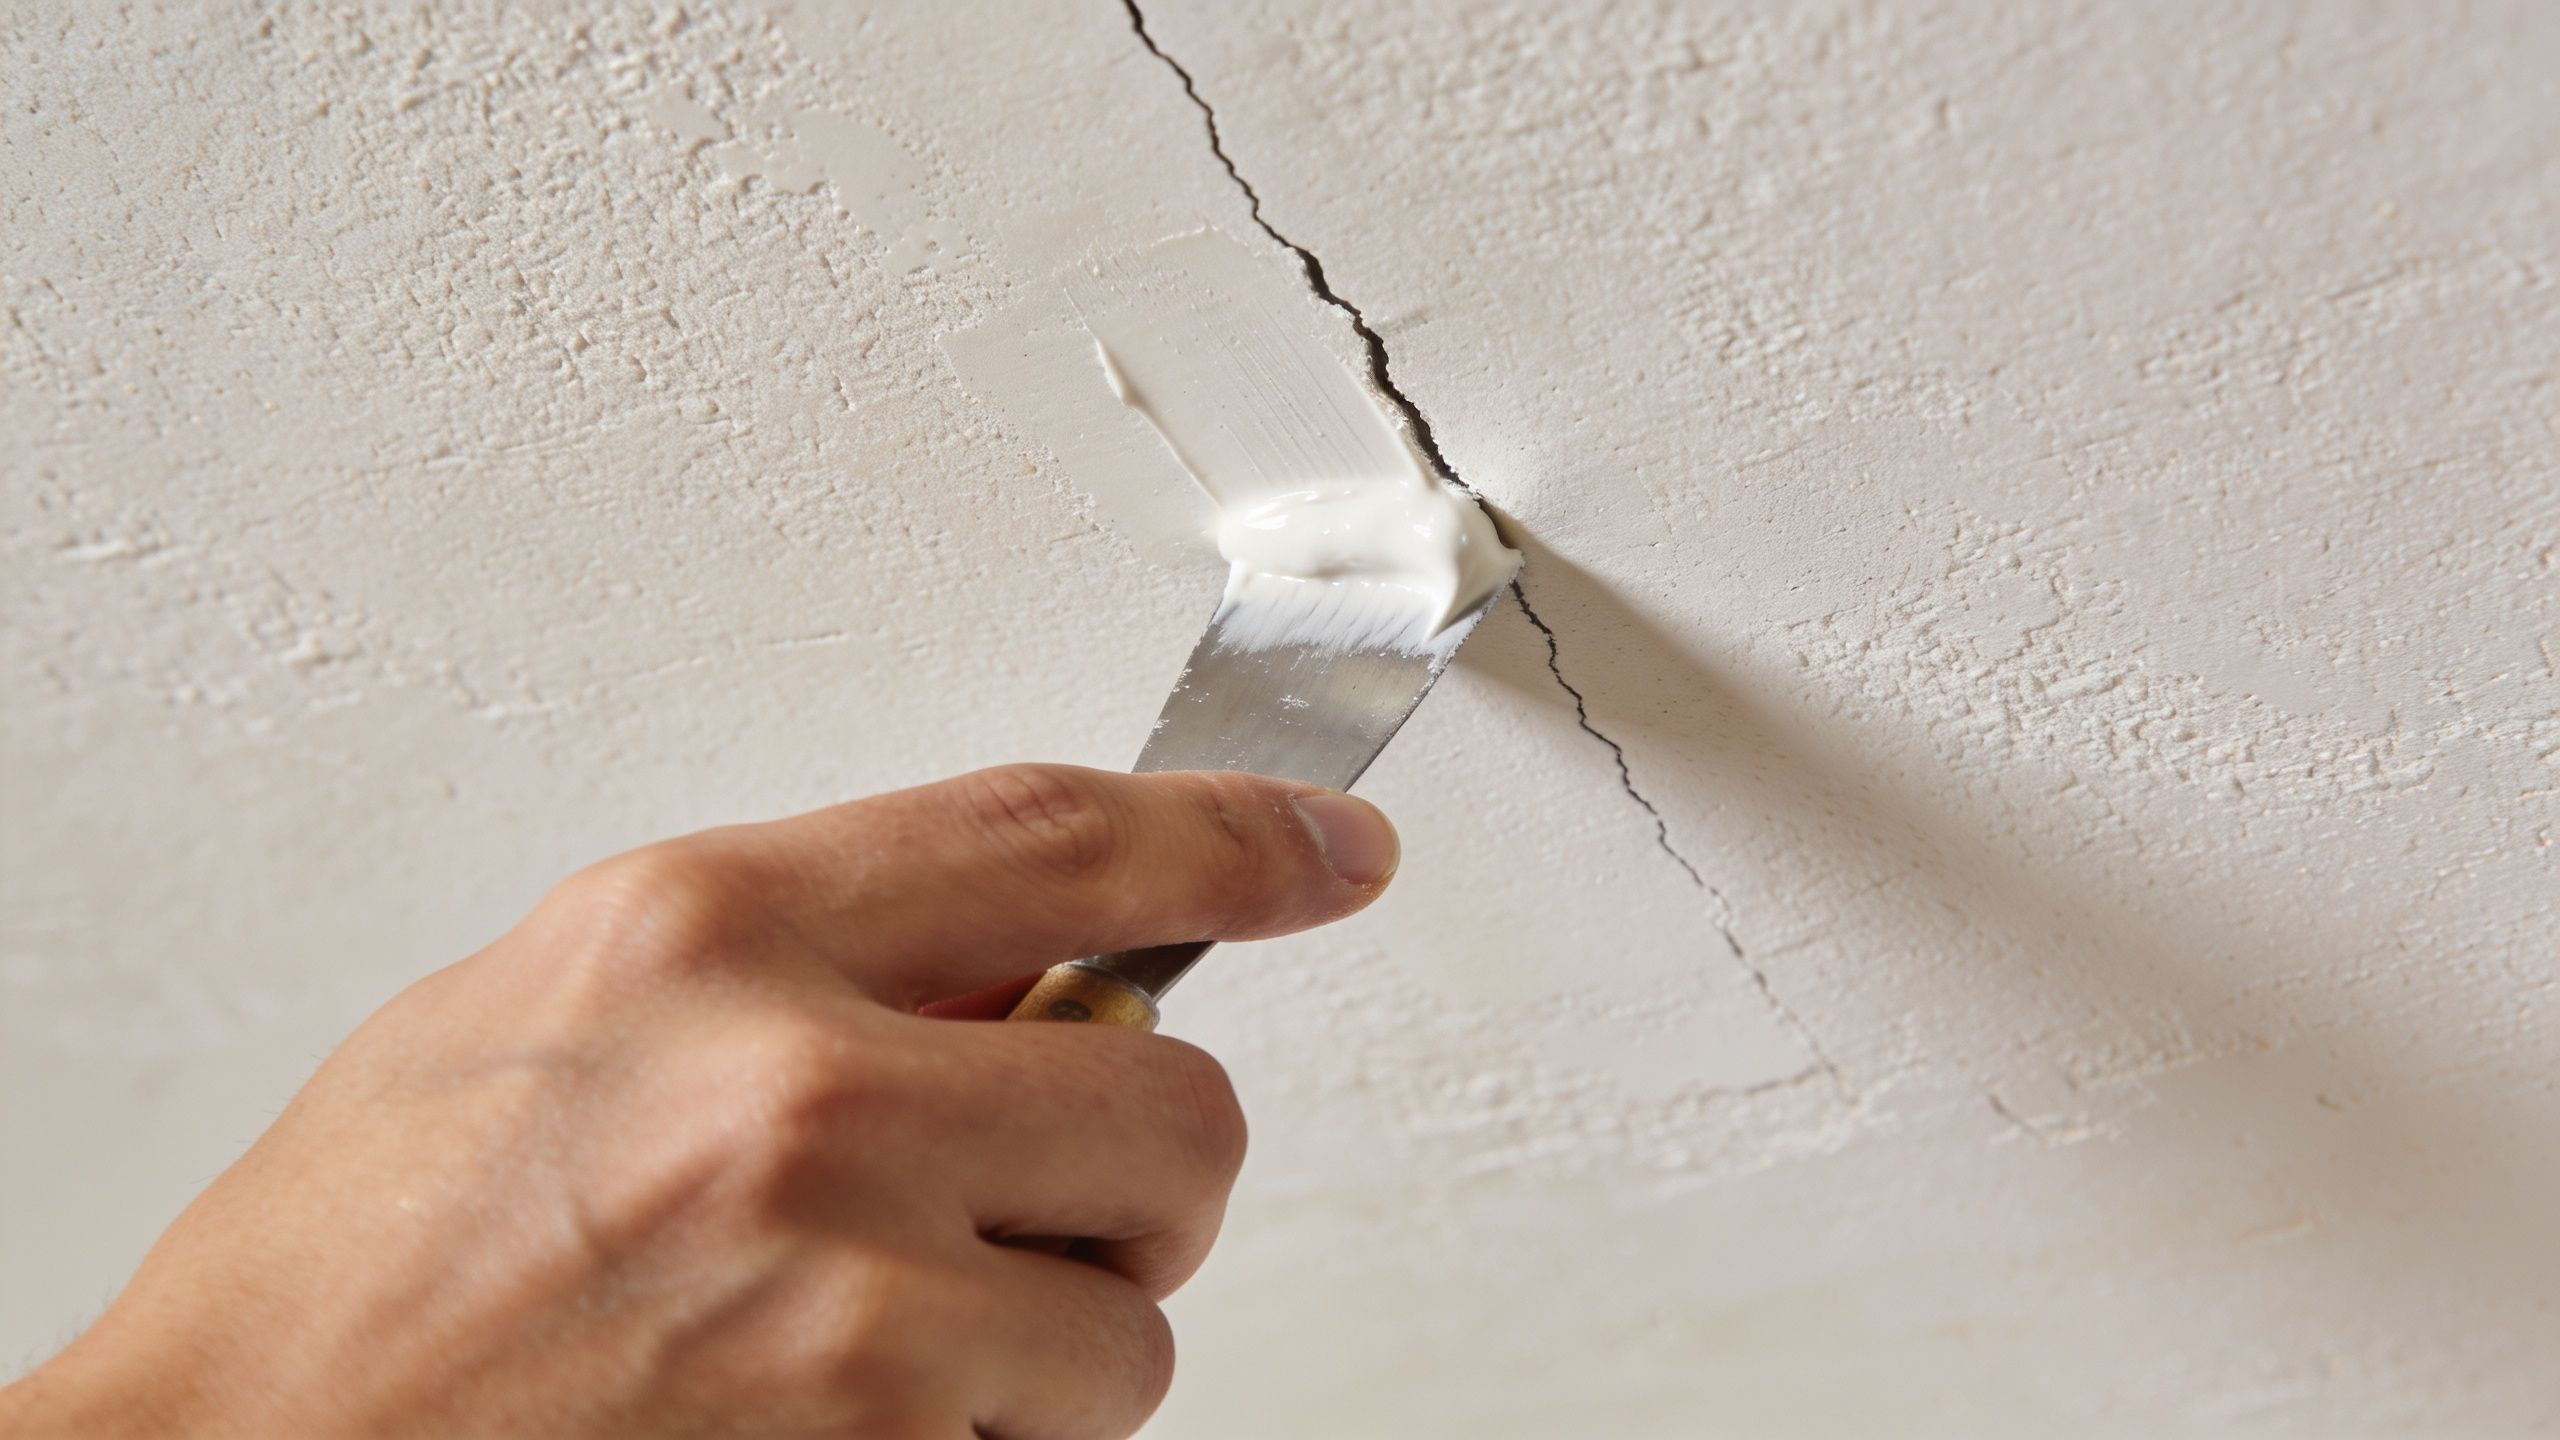
Fixing small cracks and shallow damage
For minor cracks, loose tape lines, or small gouges, start by scraping away anything loose. Don't widen the damage more than needed, but do remove fragile material that won't hold a new coat.
Then reinforce the area. For a professional-grade patch, especially in humid Pacific Northwest climates, always embed mesh tape in a setting-type compound. This method provides nearly 100% crack prevention, compared to a 25% failure rate when using standard pre-mixed drying compound alone. For holes, square-cut the damage and back it with wood strapping for a solid repair, based on this repair guidance for textured ceiling patches.
Use thin coats. Let each coat set before adding the next. On ceilings, thick mud sags, shrinks, and leaves a hump that becomes obvious once the texture and paint go on.
A good sequence looks like this:
- Clean the crack or shallow damaged area
- Apply mesh tape if the crack has movement or reopened before
- Embed the tape with setting compound
- Feather the patch wider than the visible damage
- Sand lightly only after the patch is hard and flat enough
Thin coats win on ceilings. Heavy coats look faster, but they create more sanding and a worse final profile.
Treating water stains the right way
Water stains fool people because the surface may look dry long before the ceiling is ready for repair. If the leak source is still active, or if the drywall core stayed wet too long, the patch can fail and the stain can bleed through the new paint.
Work through it in this order:
- Stop the moisture source: Roof leak, plumbing issue, tub overflow, or attic condensation.
- Check firmness: If the drywall feels soft or crumbly, cut it out instead of trying to skim over it.
- Remove loose texture: Anything flaking or swollen has to go.
- Patch and texture the area: Build a stable surface first.
- Seal the stain before paint: A stain-blocking primer keeps discoloration from coming back through the finish coat.
A common mistake is painting directly over a water mark with ceiling paint. It may look covered for a short time, then the ring comes back and ruins the repair.
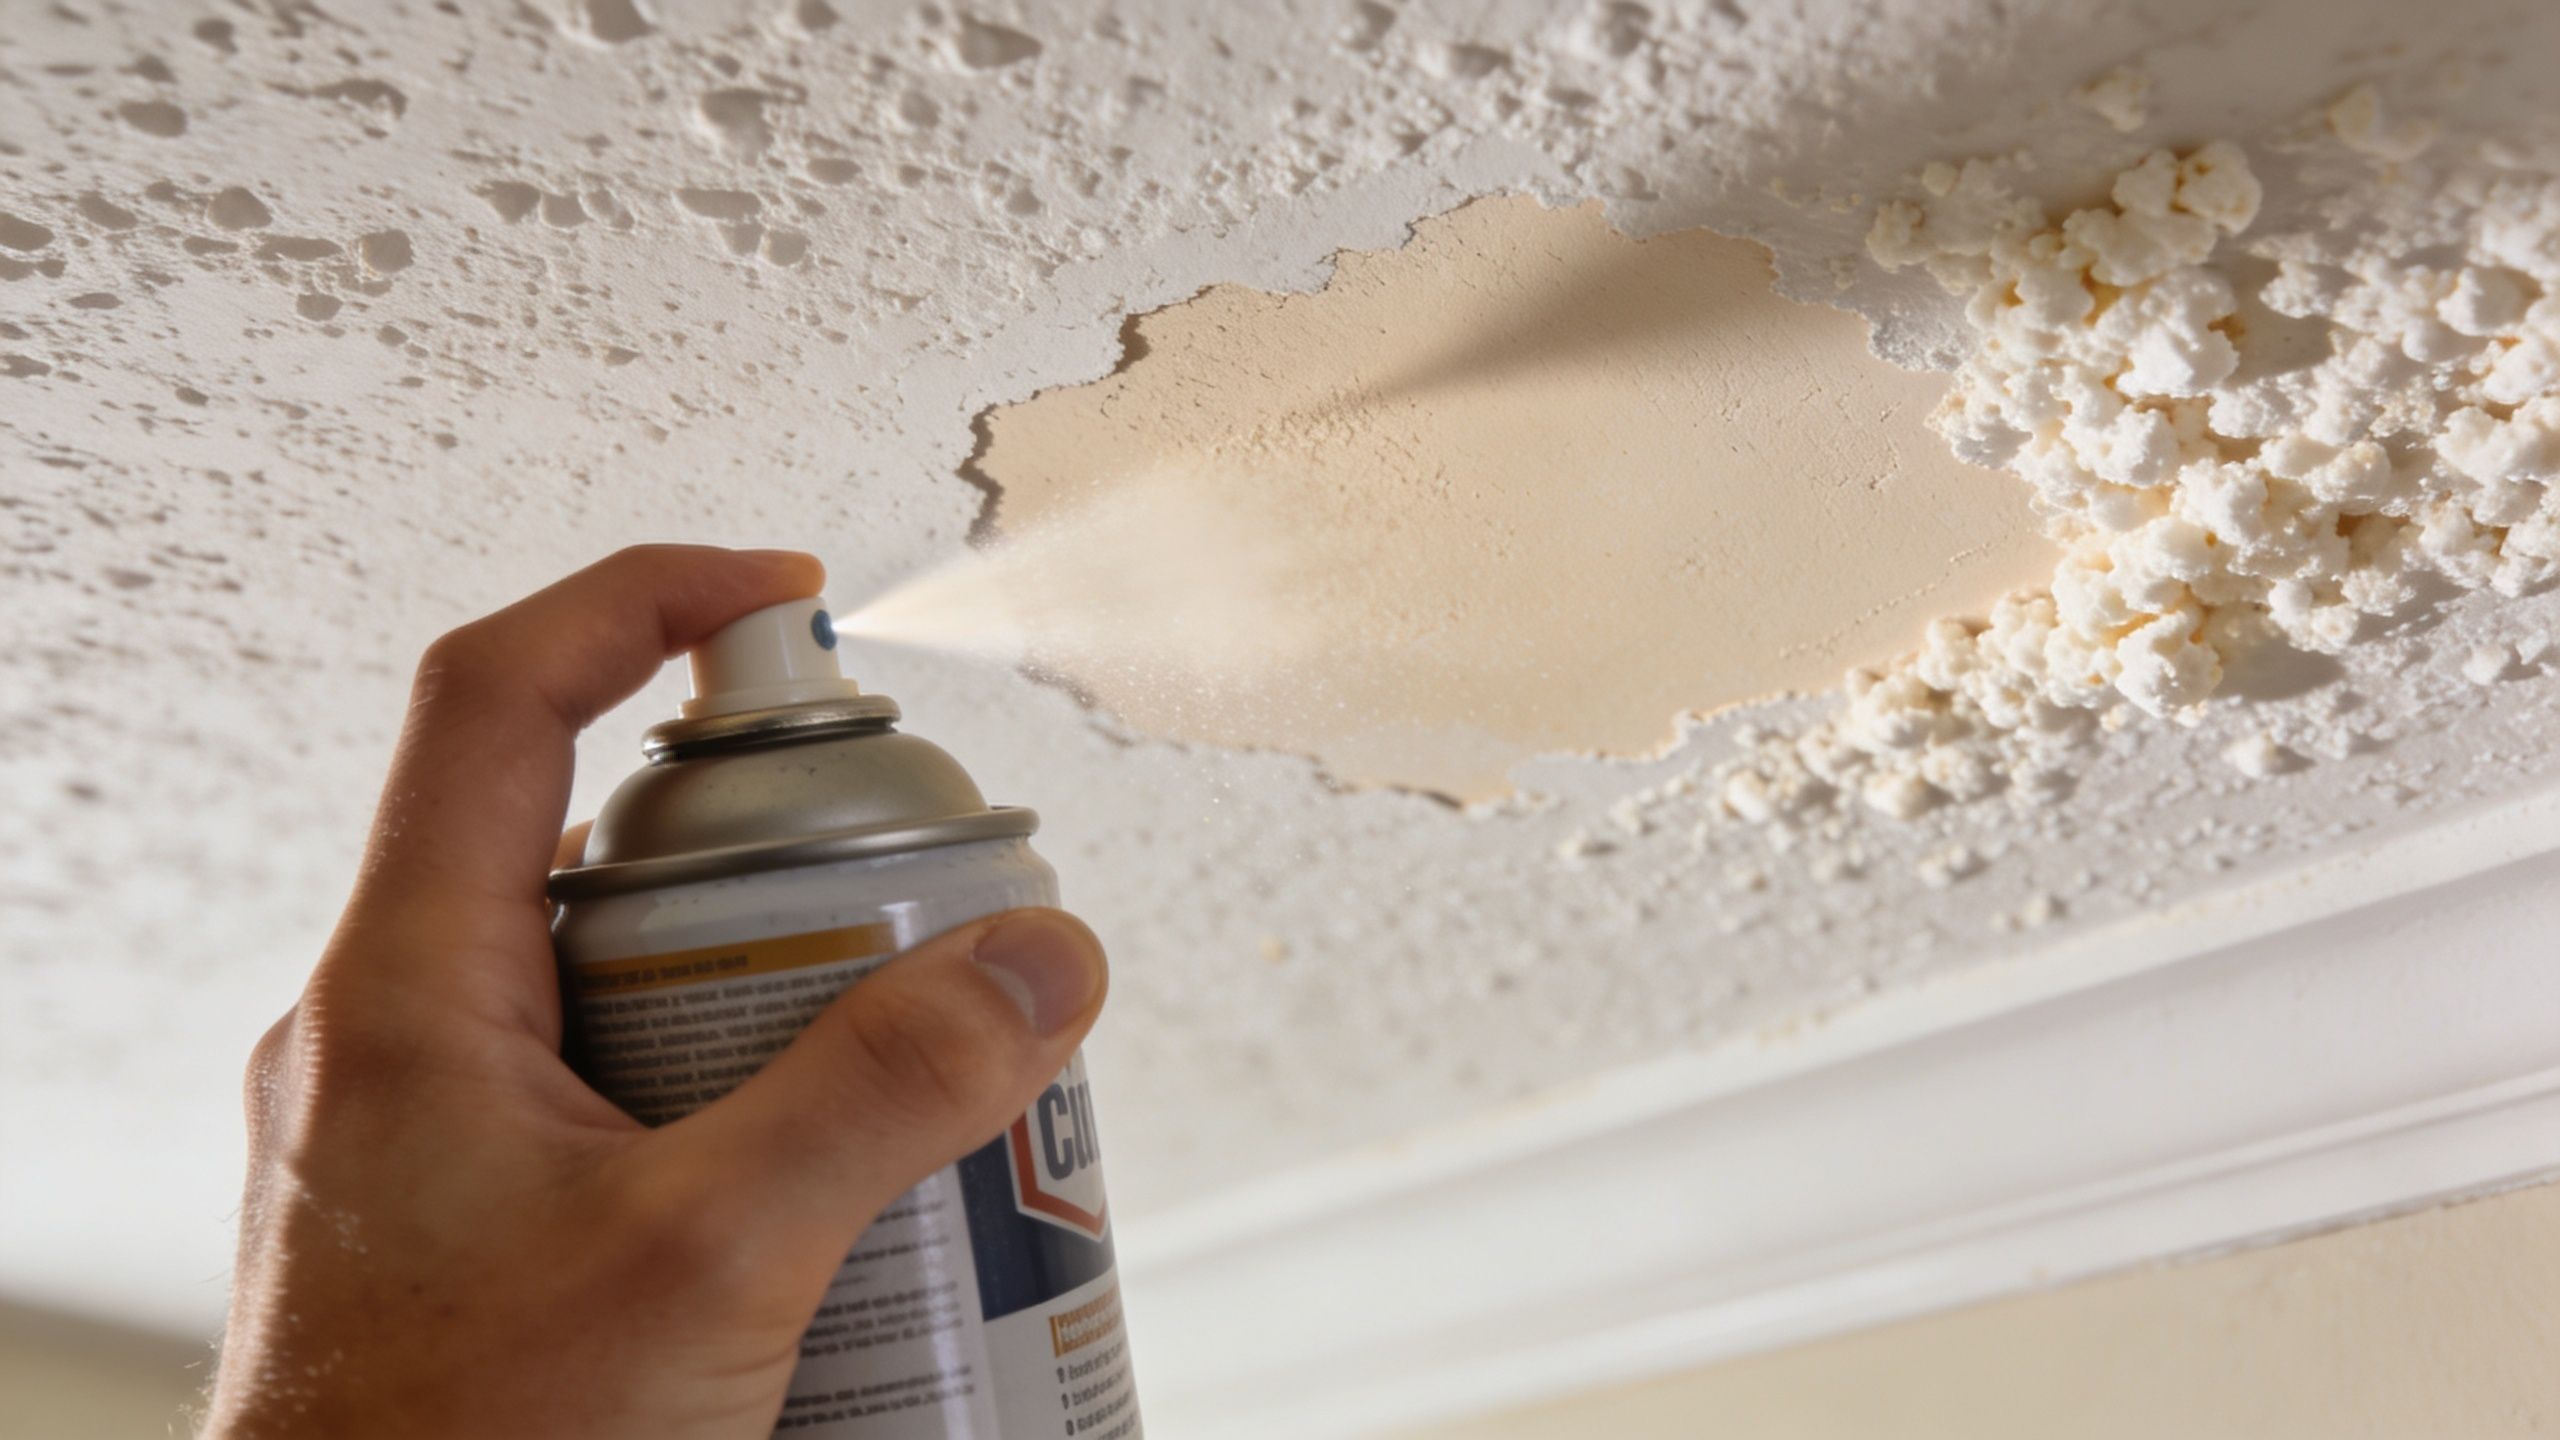
Patching larger holes and broken drywall
When the damage goes beyond a crack and into broken board, treat it like a drywall repair first and a texture problem second. A weak patch under a perfect texture still fails.
Cut the damaged area into a clean shape. Jagged holes are harder to reinforce. Add solid backing behind the opening so the patch piece has something firm to fasten to. Once the new piece is in, tape the seams and build out the finish coats gradually.
Here's the practical approach contractors use:
| Repair stage | What matters most | Common mistake |
|---|---|---|
| Cutout | Clean edges and removal of weak drywall | Leaving soft material in place |
| Backing | Solid support behind the patch | Trying to float a patch with no reinforcement |
| Taping | Strong seam reinforcement | Skipping tape and hoping mud alone will hold |
| Feathering | Wide smooth transition | Keeping the patch too tight and visible |
| Texture | Matching depth and spread | Applying texture before the patch profile is correct |
On bigger repairs, stop checking the patch from directly underneath only. Step back and view it from the room entry, windows, and side angles. That's where ridges and mismatched edges show up.
For Portland homes with repeated ceiling cracks, recurring water spots, or multiple repairs from past trades, this is often the point where professional drywall work pays off. It's not just about patching the hole. It's about getting the ceiling flat enough that the texture can hide the repair instead of highlighting it.
The Art of Texture Matching and Professional Finishing
Texture matching is where most DIY ceiling repairs go wrong. The patch may be solid, smooth, and fully dry, but if the pattern is off, your eye goes straight to it every time.
Matching popcorn texture
Popcorn repairs need restraint. If you spray too heavily, the patch looks newer and coarser than the surrounding field. If you spray too lightly, the patch flashes smooth.
The best habit is simple. Test first on scrap cardboard or another disposable surface before you touch the ceiling. Adjust the density until the pattern is close, then apply it to the patch area in light passes rather than one heavy burst.
Blend the perimeter carefully. On a real repair, the surrounding texture often needs a soft overlap so the patch doesn't have a defined circle around it.
No spray options for small knockdown and orange peel patches
For small repairs, expensive spray tools often aren't necessary. A common DIY failure is texture mismatch. For knockdown or orange peel textures on small repairs, you can often avoid expensive spray tools. Try thinning joint compound to a paint-like consistency and applying it with a sea sponge or a coarse-bristle brush, then lightly knocking it down with a putty knife. Practice on scrap cardboard first to match the existing pattern, according to this guidance on matching ceiling texture without spray tools.
That approach works best on small isolated patches where the surrounding texture is consistent and you can control the edges. It's much less forgiving on broad repairs or ceilings with heavy repeated patterns.
A few trade-offs matter here:
- Sea sponge method: Good for subtle random texture. Easy to overdo if the mud is too thick.
- Coarse brush application: Better for broken-up stipple patterns. Harder to keep uniform.
- Light knockdown with a knife: Works only if you catch the compound at the right moment. Too soon and it smears. Too late and it tears.
This visual gives a decent overview of texture blending methods before paint.
If the patch still stands out after texture, don't rush to paint. Fix the pattern first. Paint tends to lock in a bad match, not hide it.
Prime and paint for a uniform ceiling
After the texture dries, prime the repair so porosity is even across the patched area and the existing ceiling. Then paint the section or, when needed for uniformity, repaint the full ceiling plane.
Many repairs finally come together at this stage. Primer reduces flashing, and ceiling paint evens out minor variation. But paint won't fix a bad patch profile or a texture that doesn't match. The finish coat is the last step, not the rescue plan.
When a DIY Fix Isnt Enough Know When to Call a Pro
You cut out the stain, patched the hole, matched the color as close as you could, then the ceiling still catches your eye every time you walk into the room. That usually means the repair crossed the line from basic patching into finish work that takes more control than many DIY guides admit.
The jobs that give homeowners the most trouble are rarely the small ones. Trouble starts when the drywall feels soft, the ceiling sags between framing, old repairs keep cracking back through, or the texture may date to a period when asbestos was still used in acoustic finishes. In older Portland homes, that last point matters more than many people realize. If the texture was installed before asbestos was phased out, testing should happen before anyone scrapes, sands, or cuts into it. Disturbing a suspect ceiling without checking it first is not a cosmetic mistake. It is a safety mistake.
A pro is usually the right call in these situations:
- Sagging or soft areas: The drywall may be water-damaged, loose, or failing at the fasteners.
- Cracks that return after patching: The joint often needs better reinforcement, not more mud.
- Suspected asbestos texture: Sampling and handling need to be done carefully and in the right order.
- Large repairs in open, well-lit rooms: Texture mismatch shows hard under natural light and ceiling-plane lighting.
- Pre-sale, rental turnover, or recently remodeled spaces: A patch that is technically repaired can still look unfinished.
Texture matching is where many DIY repairs fall apart. A ceiling can be structurally sound and still look patched from across the room. Good repair work means matching the pattern, the density, the peak height, and the way the texture breaks at the edges. On older ceilings, you also have to account for paint buildup and years of settling. That is slow, detail-heavy work, and there is a reason experienced finishers test the pattern before committing to the full repair.
If you need help with drywall repair in the Portland area or want to confirm service coverage in Portland and nearby cities, get a professional assessment before opening up a larger section of ceiling. CS1 Real Interiors handles ceiling repairs for homeowners, property managers, and small commercial clients who want the repair done safely and finished to match.