That Small Wall Stain Could Be a Big Problem
In the Pacific Northwest, wet weather isn't a short season. It lingers. A faint brown spot on drywall, a little bubbling paint near a window, or a musty smell in a hallway can look minor at first, but those are often early signs of water damage in walls.
Once water gets behind drywall, it rarely stays a cosmetic issue. A crack as small as one-eighth of an inch in a pipe can leak up to 250 gallons of water in a single day. Hidden leaks can quickly saturate drywall and show up as discoloration, peeling paint, bulging surfaces, softened wallboard, sagging ceilings, loose baseboards, and white mineral deposits. In a Portland winter, that timeline gets even shorter when rain, plumbing failures, and poor drying conditions all stack up.
Homeowners in Portland, Beaverton, Hillsboro, and Vancouver, WA often call after they notice one visible symptom. By then, the wall cavity may already be wet. Mold can begin growing within 24 to 48 hours in dark, moist conditions, which is one reason fast action matters.
This guide breaks down the most common signs of water damage in walls, what each one usually means, what you can check yourself, and when a professional drywall repair crew should step in. If you're seeing anything on this list, it's worth treating it as a repair issue, not just a paint issue.
Table of Contents
- 1. 1. Discoloration and Staining on Drywall
- 2. 2. Peeling, Bubbling, or Blistering Paint
- 3. 3. Soft, Spongy, or Deteriorating Drywall
- 3. 3. Soft, Spongy, or Deteriorating Drywall
- 5. 5. A Persistent Musty or Damp Odor
- 5. 5. A Persistent Musty or Damp Odor
- 6. 6. Warped, Sagging, or Bulging Walls
- 7. 7. Efflorescence White Powdery Deposits
- 8. 8. Failing Drywall Joints or Cracks
- 8-Point Comparison: Wall Water Damage Signs
- Your Next Steps From Detection to Restoration
- Restore Your Walls with Portlands Drywall Experts
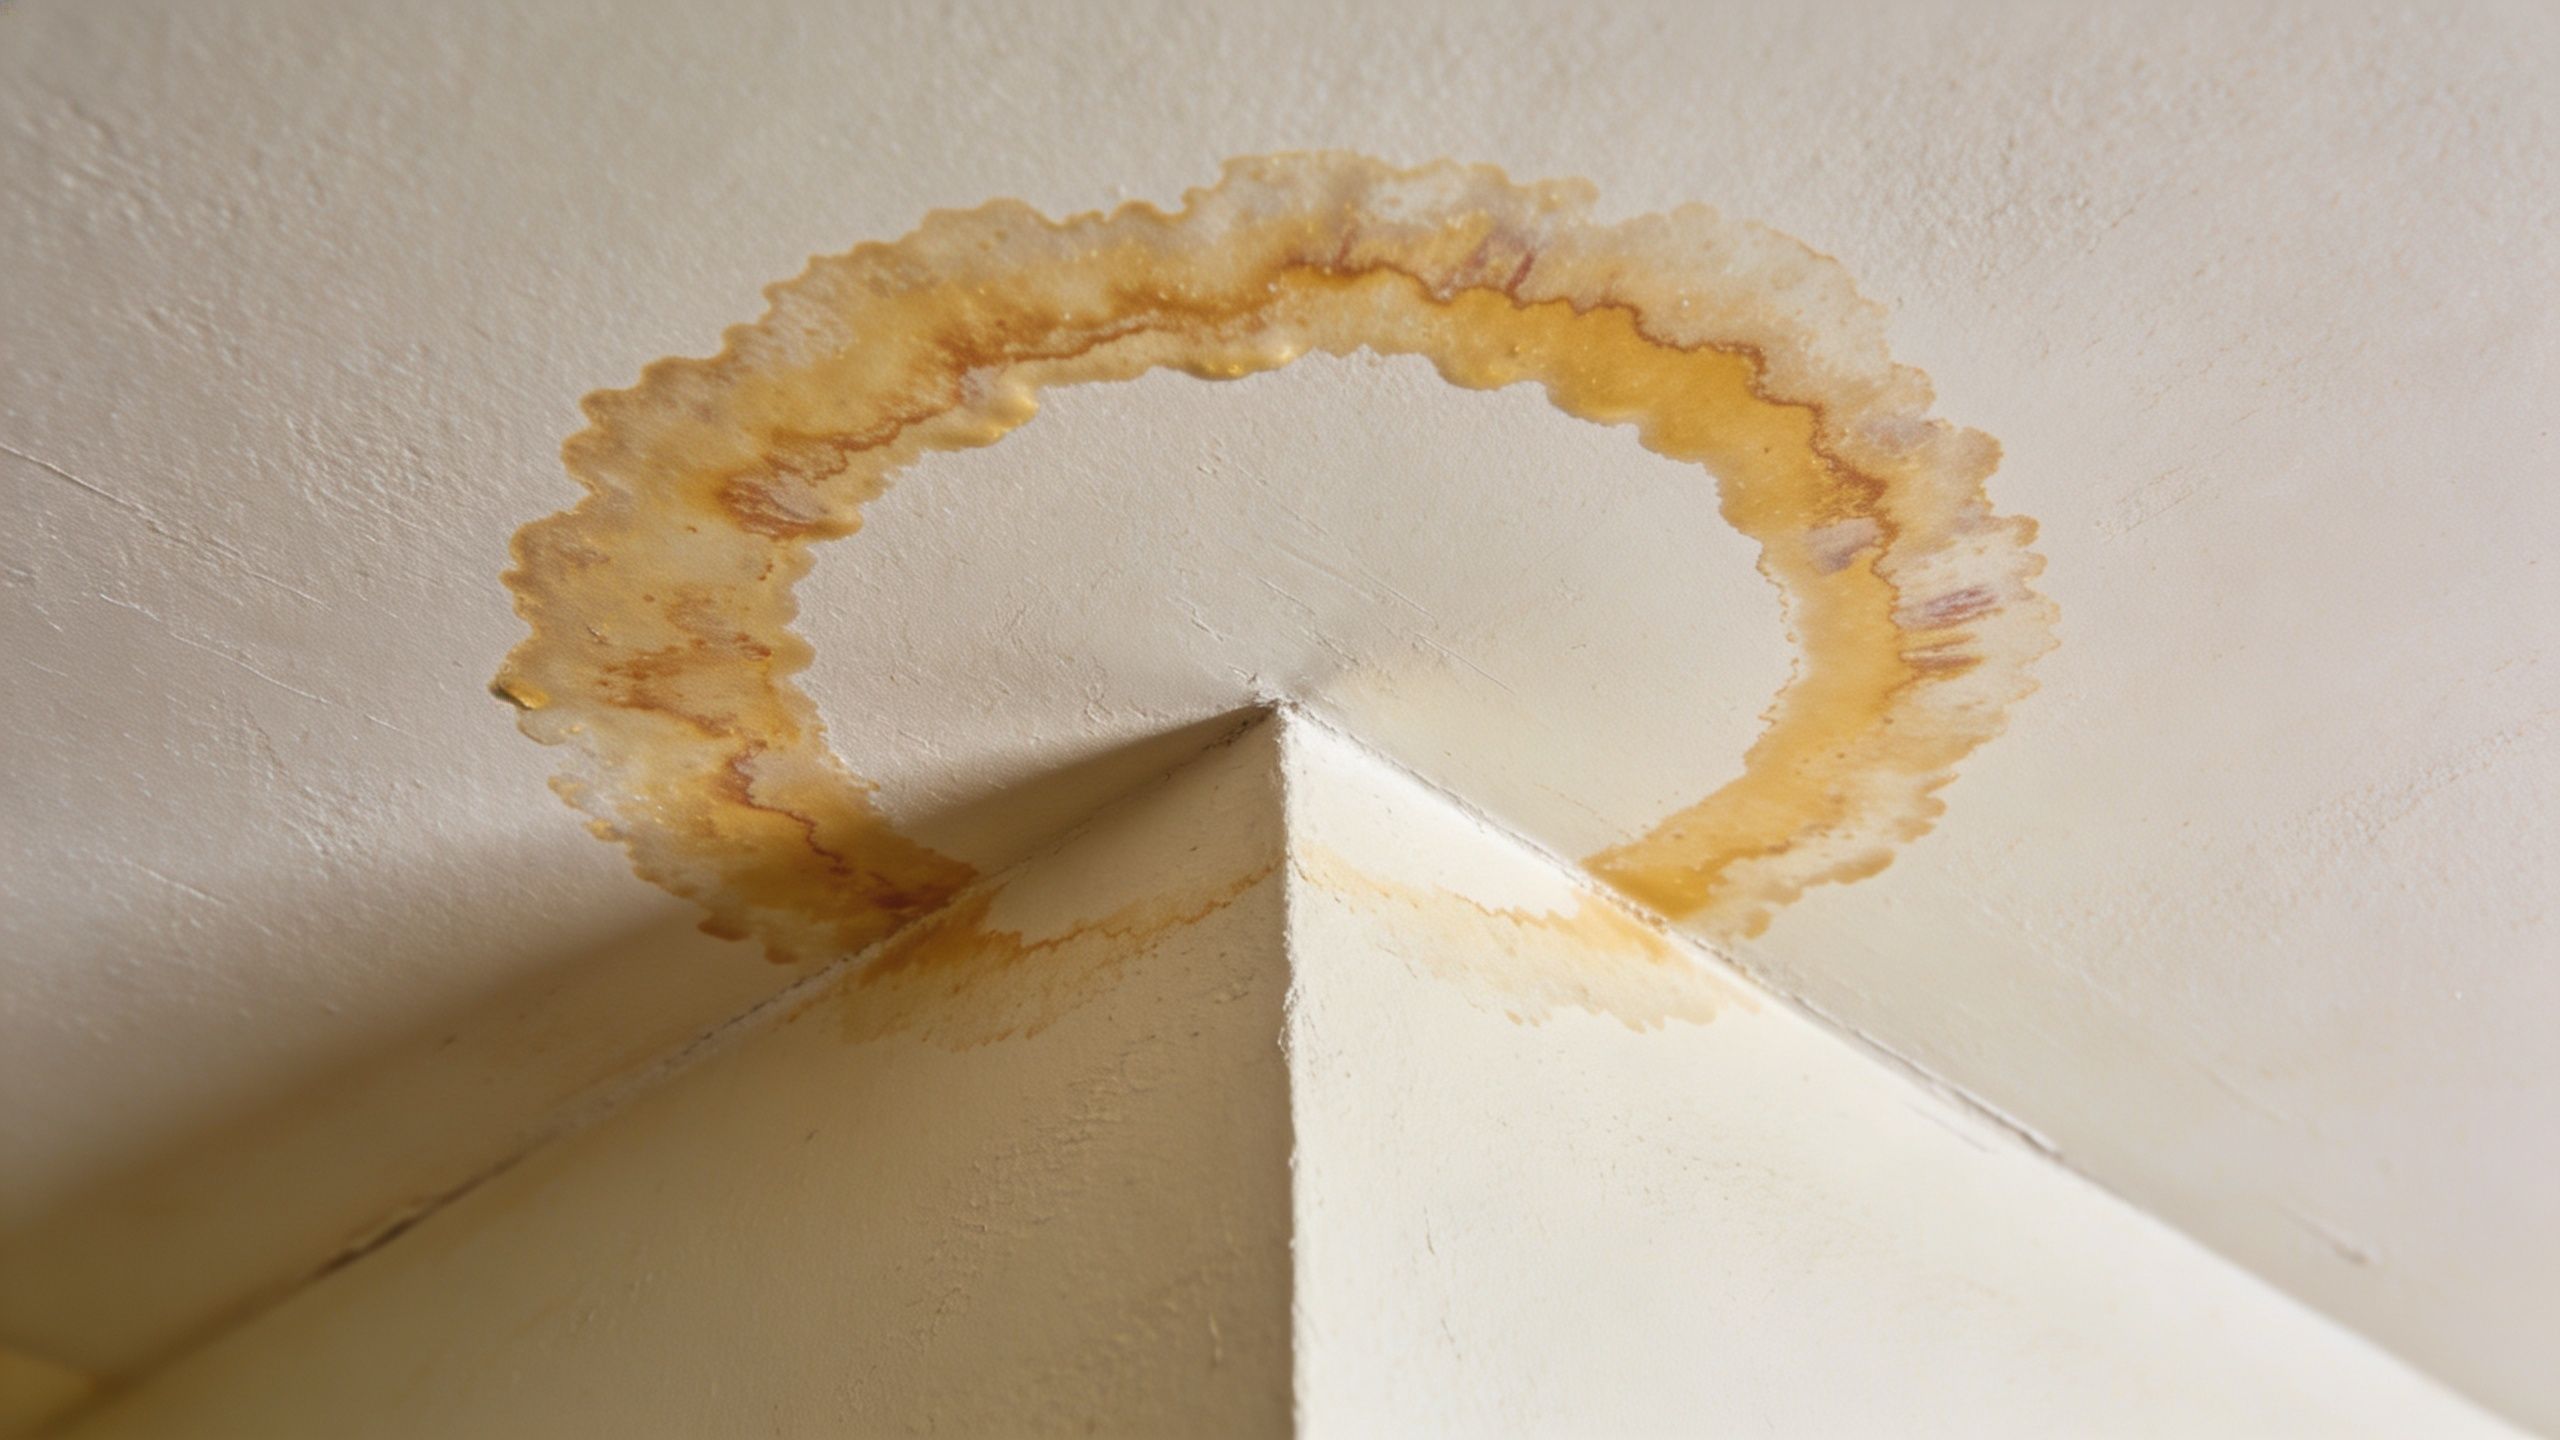
1. 1. Discoloration and Staining on Drywall
A water stain usually shows up before the wall feels damaged. It may look like a yellow-brown patch, a gray shadow, or a faint ring that keeps getting darker around the edges. On ceilings, stains often form below bathroom plumbing or roof leaks. On walls, they tend to show up near windows, exterior corners, and baseboards.
In Portland homes, I see this often after long winter rains, clogged gutters, failed caulking at windows, and slow plumbing leaks from bathrooms above. A stain in the same spot after repainting usually means moisture is still getting in, even if the surface looks dry for a few days.
What stains usually mean
Staining means water has already moved through the drywall paper, joint compound, or paint layer. The color change is the clue. The harder part is figuring out whether the leak is active, intermittent, or old damage that was never repaired correctly.
That distinction matters. If the source is active, cosmetic work will fail. Primer and paint can hide the mark for a short time, but they do not stop moisture migration, and the stain usually bleeds back through.
Start with a few practical checks:
- Take dated photos: Compare the stain over several days, especially after rain or after using nearby plumbing.
- Touch the area carefully: If it feels cool, damp, or slightly swollen, treat it as current moisture until proven otherwise.
- Look for a pattern: A round ceiling stain often points upward to plumbing or a roof issue. Vertical streaking near a window can point to exterior water entry.
- Check nearby trim and flooring: Baseboards that are separating, cupping floors, or soft trim often confirm that water is traveling farther than the visible spot.
A simple homeowner test is painter's tape and foil. Tape a small square of foil over the stained area for a day or two. If moisture collects behind it, the wall is still releasing moisture. It is not as accurate as a professional moisture reading, but it can help you decide whether this is an old mark or a current problem.
Small stain, big clue.
If the stain grows, returns after rain, or sits below a bathroom, roof penetration, or window, it is time to stop treating it like a paint defect. At that point, the job is finding the entry point, drying the cavity, and replacing any drywall that has lost its strength or started to support mold growth.
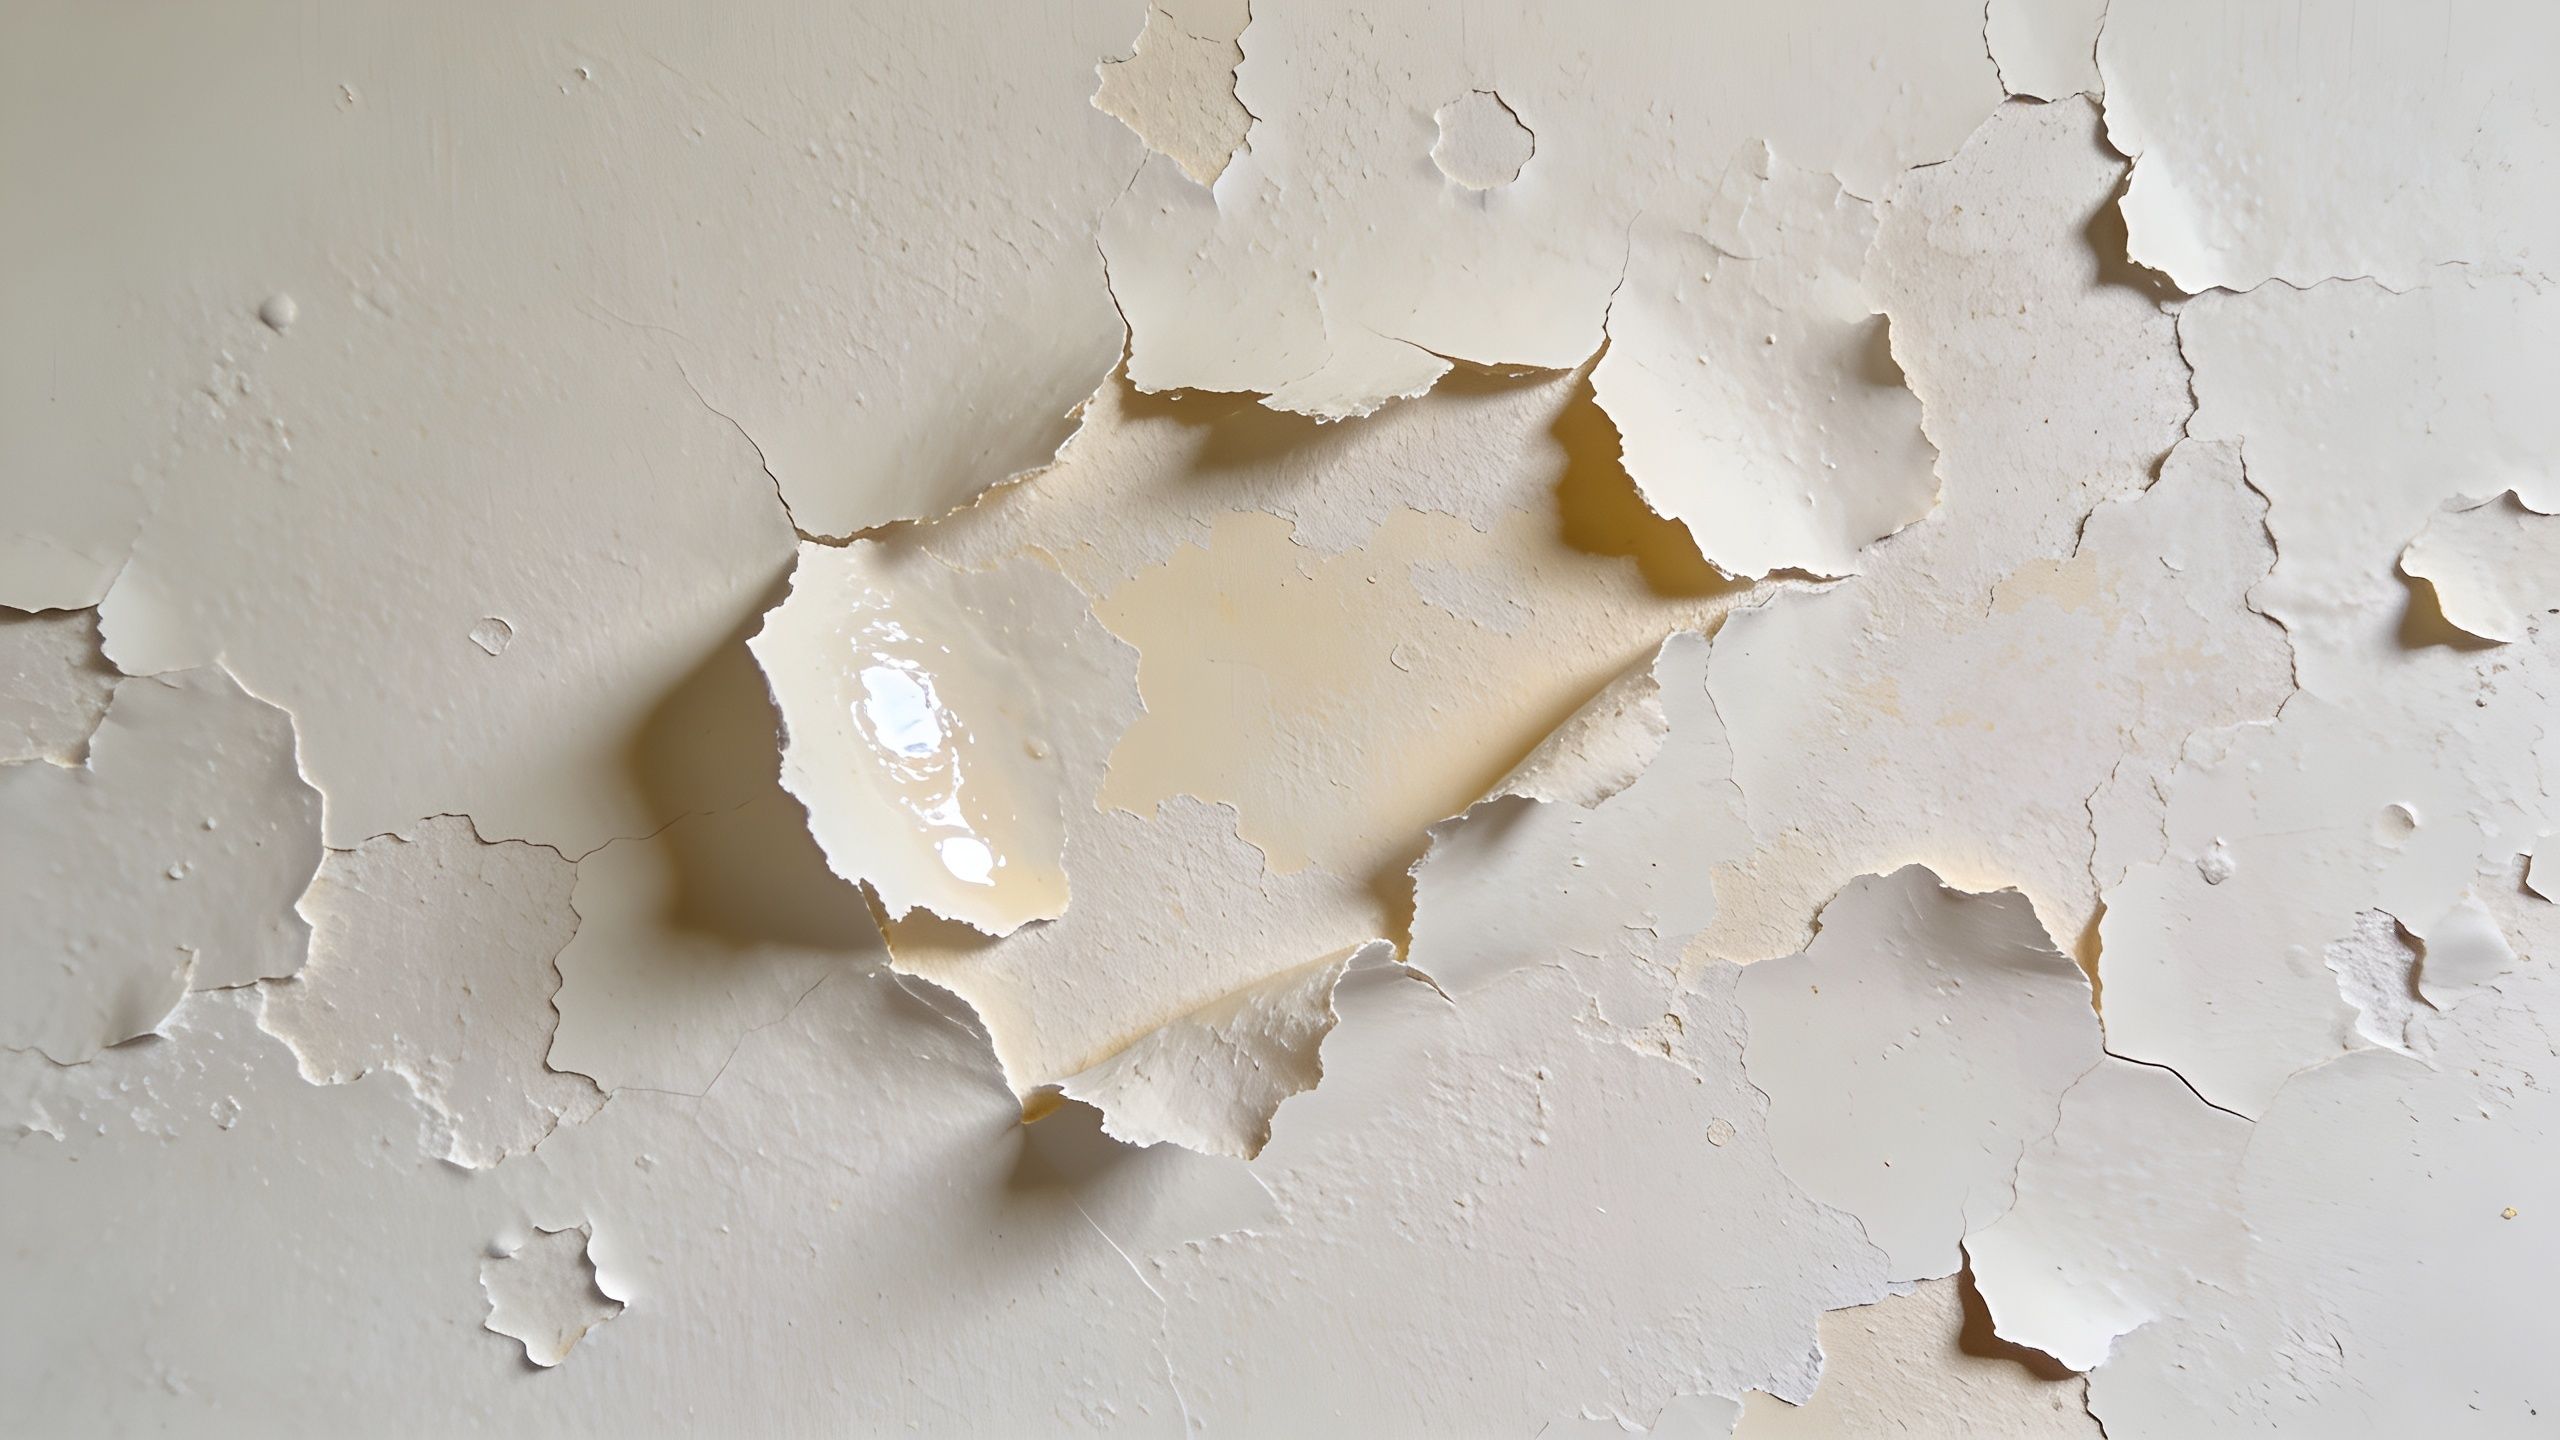
2. 2. Peeling, Bubbling, or Blistering Paint
A lot of homeowners first notice water damage when paint starts lifting near a window after a week of winter rain, or above a shower that gets used every day. The paint looks like the problem, but the underlying issue is usually behind it.
Paint bubbles and blisters form when moisture gets between the wall surface and the paint film. In a Portland house, that often shows up around bathrooms, laundry rooms, kitchen plumbing, exterior walls, and window trim that takes repeated weather exposure. In older homes, several layers of paint can hide the pattern for a while, so the wall looks mostly fine until the top coat starts to pucker.
The condition of the paint gives you clues. Small, tight bubbles can come from humidity or minor moisture intrusion. Larger blisters, peeling edges, or paint that comes off with damp drywall paper attached usually mean water has been there long enough to weaken the surface below.
A simple homeowner check helps sort out whether this is just a finish problem or a wall problem. Press lightly on the area with your fingertips. If the wall feels firm and the paint alone is loose, the repair may stay near the surface once the moisture source is handled. If it feels soft, spongy, or gritty, stop scraping aggressively. At that point, the drywall face may already be breaking down.
A few practical checks help:
- Look at the location: Bubbling under a window often points to failed exterior caulk, flashing issues, or wind-driven rain. Bubbling on an interior wall near a bathroom may point to plumbing or poor ventilation.
- Check after weather or water use: If the area changes after rainfall, showers, or dishwasher runs, that pattern matters.
- Peel back only a small loose edge: If the backside of the paint is damp or the paper facing comes with it, the wall needs more than patching.
- Use a fan, not a heater: Gentle airflow can help you see whether the surface dries. Direct heat can hide the symptom without fixing the cause.
Repainting too soon creates extra work. Fresh paint can trap residual moisture, fail early, and leave the next repair with more scraping, more patching, and a larger finish area to blend.
I see this a lot in Portland winters. A homeowner wipes down condensation or repaints a bubbled spot, then the same section lifts again because the wall cavity never dried or the exterior leak path stayed open. Once the paper face of the drywall starts separating, cosmetic work stops being reliable.
Practical rule: If paint is bubbling and the wall underneath feels soft, treat it as moisture damage first and a paint repair second.
Common trouble spots include paint lifting above shower surrounds, below window corners, beside dishwasher supply lines, and on exterior-facing walls that stay cool and damp for long stretches. If the area keeps returning, spreads, or exposes damaged drywall paper, professional drywall repair is usually the cleanest way to get back to a stable surface.
3. 3. Soft, Spongy, or Deteriorating Drywall
A wall should feel firm. If it flexes when you press it lightly, dents too easily, or crumbles at the surface, moisture has already changed the drywall itself.
That matters because drywall loses strength fast once water gets into the gypsum core and paper facing. Screws loosen, corners crush, and the surface stops holding a clean repair. In Portland, I see this most often below windows after a wet stretch, behind toilets and vanities, and low on exterior walls that stay cool for long periods.
How to tell if the wall is still sound
Use a simple touch test first. Press with your fingertips, not your full hand. Sound drywall feels solid and spring-free. Damaged drywall may feel soft, rough, or slightly hollow.
A small screwdriver can help confirm what you are feeling. Pick an inconspicuous spot near the damaged area and press gently. If the tip sinks in with very little effort or the face paper tears instead of resisting, the board is no longer reliable.
Look at the edges too. Baseboards that pull away, soft inside corners, or swollen outlet cutouts usually mean the damage extends farther than the stained area suggests.
When patching stops making sense
Once drywall turns soft, filler will not bring back its strength. Joint compound can smooth a stable surface, but it cannot rebuild soaked wallboard.
The order of work matters:
- Stop the moisture source: Check plumbing, window leaks, roof entry points, siding gaps, or drainage issues first.
- Cut back to solid material: Remove all softened or crumbling drywall, not just the visibly stained center.
- Inspect and dry the cavity: Wet insulation, damp framing, and hidden mold all need attention before the wall is closed.
- Rebuild with new board: Tape, finish, texture, and paint only after the area is dry and stable.
Homeowners sometimes try to save a soft section because it looks small. That shortcut usually creates a larger repair later, especially during Oregon's rainy season when trapped moisture dries slowly inside the wall.
If the damaged area spreads beyond a small spot, feels weak around fasteners or seams, or sits near plumbing or an exterior wall, professional drywall repair is usually the cleanest path back to a solid finish.
3. 3. Soft, Spongy, or Deteriorating Drywall
Press gently on the suspect area. If the wall gives under light pressure, feels soft, or starts crumbling, the drywall has taken on too much water. At that point, you're beyond a simple cosmetic fix.
Gypsum loses strength when it stays wet. The paper face can separate, corners can crush easily, and screws can lose holding power. In kitchens and bathrooms, this often happens near supply lines, drains, and valve penetrations. In basements around Tigard or Gresham, it can happen low on the wall where moisture sits longer.
When drywall is past the point of patching
Soft drywall usually needs removal, not filler. Joint compound is for finishing stable surfaces. It isn't structural, and it won't restore strength to soaked wallboard.
The repair sequence matters:
- Stop the source first: Plumbing, roofing, window leaks, or exterior drainage all need to be addressed before drywall work.
- Remove compromised sections: Cut back to solid, dry material.
- Dry the cavity: Insulation, framing, and backing need inspection before closing the wall.
- Rebuild correctly: New board, proper taping, and matched finish.
Professional help saves time and false starts. CS1 Real Interiors provides drywall repair for water-damaged walls and ceilings, including texture matching and smooth paint-ready finishes.
In homes with prolonged moisture exposure, softened drywall can also buckle under pressure and lead to cracks, loose trim, and adjacent finish damage. Once the wall has lost integrity, replacement is usually the cleaner and more durable option.
5. 5. A Persistent Musty or Damp Odor
A room can smell wrong long before the wall shows a stain. In Portland, I see this a lot after a stretch of winter rain, especially in basements, laundry rooms, and closets that back up to plumbing walls.
That musty smell usually means moisture is hanging around where air does not circulate well. It can be inside the drywall cavity, under baseboards, behind a washer, or in insulation that stayed damp after a small leak.
Closed rooms make the pattern easier to notice. If the odor gets stronger after the door has been shut for a few hours, check the walls in that area first.
How to narrow down the source
Start with the simplest test. Walk the room slowly and note where the smell is strongest at nose level and near the baseboard. Then look for smaller clues homeowners often miss, like trim pulling away slightly, paint that looks dull in one patch, or a cold, clammy section of wall.
A moisture meter can help confirm what your nose is picking up. Use one set for drywall and compare a suspect area to a wall in a dry part of the house. The goal is not to diagnose everything from one reading. It is to confirm whether the smell is tied to active moisture or leftover odor from an older issue.
Good places to check first:
- Behind appliances: Washing machines, refrigerators with water lines, and dishwashers often hide slow leaks.
- Inside sink cabinets: Supply stops, P-traps, and drain connections can drip for a long time without making a puddle on the floor.
- Walls shared with bathrooms or laundry rooms: These are common problem areas in older Portland homes.
- Basement corners and exterior walls: Oregon's wet season keeps these areas damp longer than homeowners expect.
A persistent damp odor rarely goes away on its own. If the smell keeps returning after cleaning, or if meter readings and visible clues line up, opening the wall is often the practical next step. That lets you find out whether the issue is a minor localized leak or a larger repair involving insulation, framing, and drywall replacement.
5. 5. A Persistent Musty or Damp Odor
Sometimes the wall looks fine, but the room tells on itself. A musty smell in a closet, hallway, laundry room, or basement often means moisture is trapped where you can't see it.
This shows up a lot in older Portland homes with tight closets against plumbing walls, in Gresham basements after long wet stretches, and around laundry hookups where a small leak goes unnoticed. If the smell gets stronger when the room is closed up, that's a strong clue the problem is inside the wall or just below the surface.
How to narrow down the source
Your nose is useful, but it isn't enough on its own. Track where the odor is strongest and look for related clues like baseboard separation, paint changes, or soft trim.
A moisture meter helps confirm whether the wall is wet. Industry guidance referenced in the verified data recommends pin-type meters calibrated to drywall, with readings above 17% moisture content indicating actionable damage. That's useful when the room smells damp but there isn't a visible stain yet.
Here are a few places worth checking first:
- Behind appliances: Washing machines, dishwashers, and refrigerators with water lines.
- Inside sink cabinets: Supply valves and drain connections can leak slowly for a long time.
- Shared plumbing walls: Closets or hallways on the opposite side of bathrooms are frequent problem spots.
A room that smells damp for weeks almost never fixes itself. It usually means moisture is still present somewhere.
Odor-only situations can be tricky because homeowners often try candles, deodorizers, or extra cleaning first. Those might mask the smell, but they don't dry a wall cavity or stop a leak.
If you're noticing odor along with any visible finish damage, that's a good time to request a professional assessment. CS1 Real Interiors offers help with drywall repair, painting, insulation, and other interior repairs after the source issue is addressed.
Request a free estimate from CS1 Real Interiors if you're seeing signs of water damage in walls anywhere in Portland, Hillsboro, Tigard, Lake Oswego, or nearby areas.
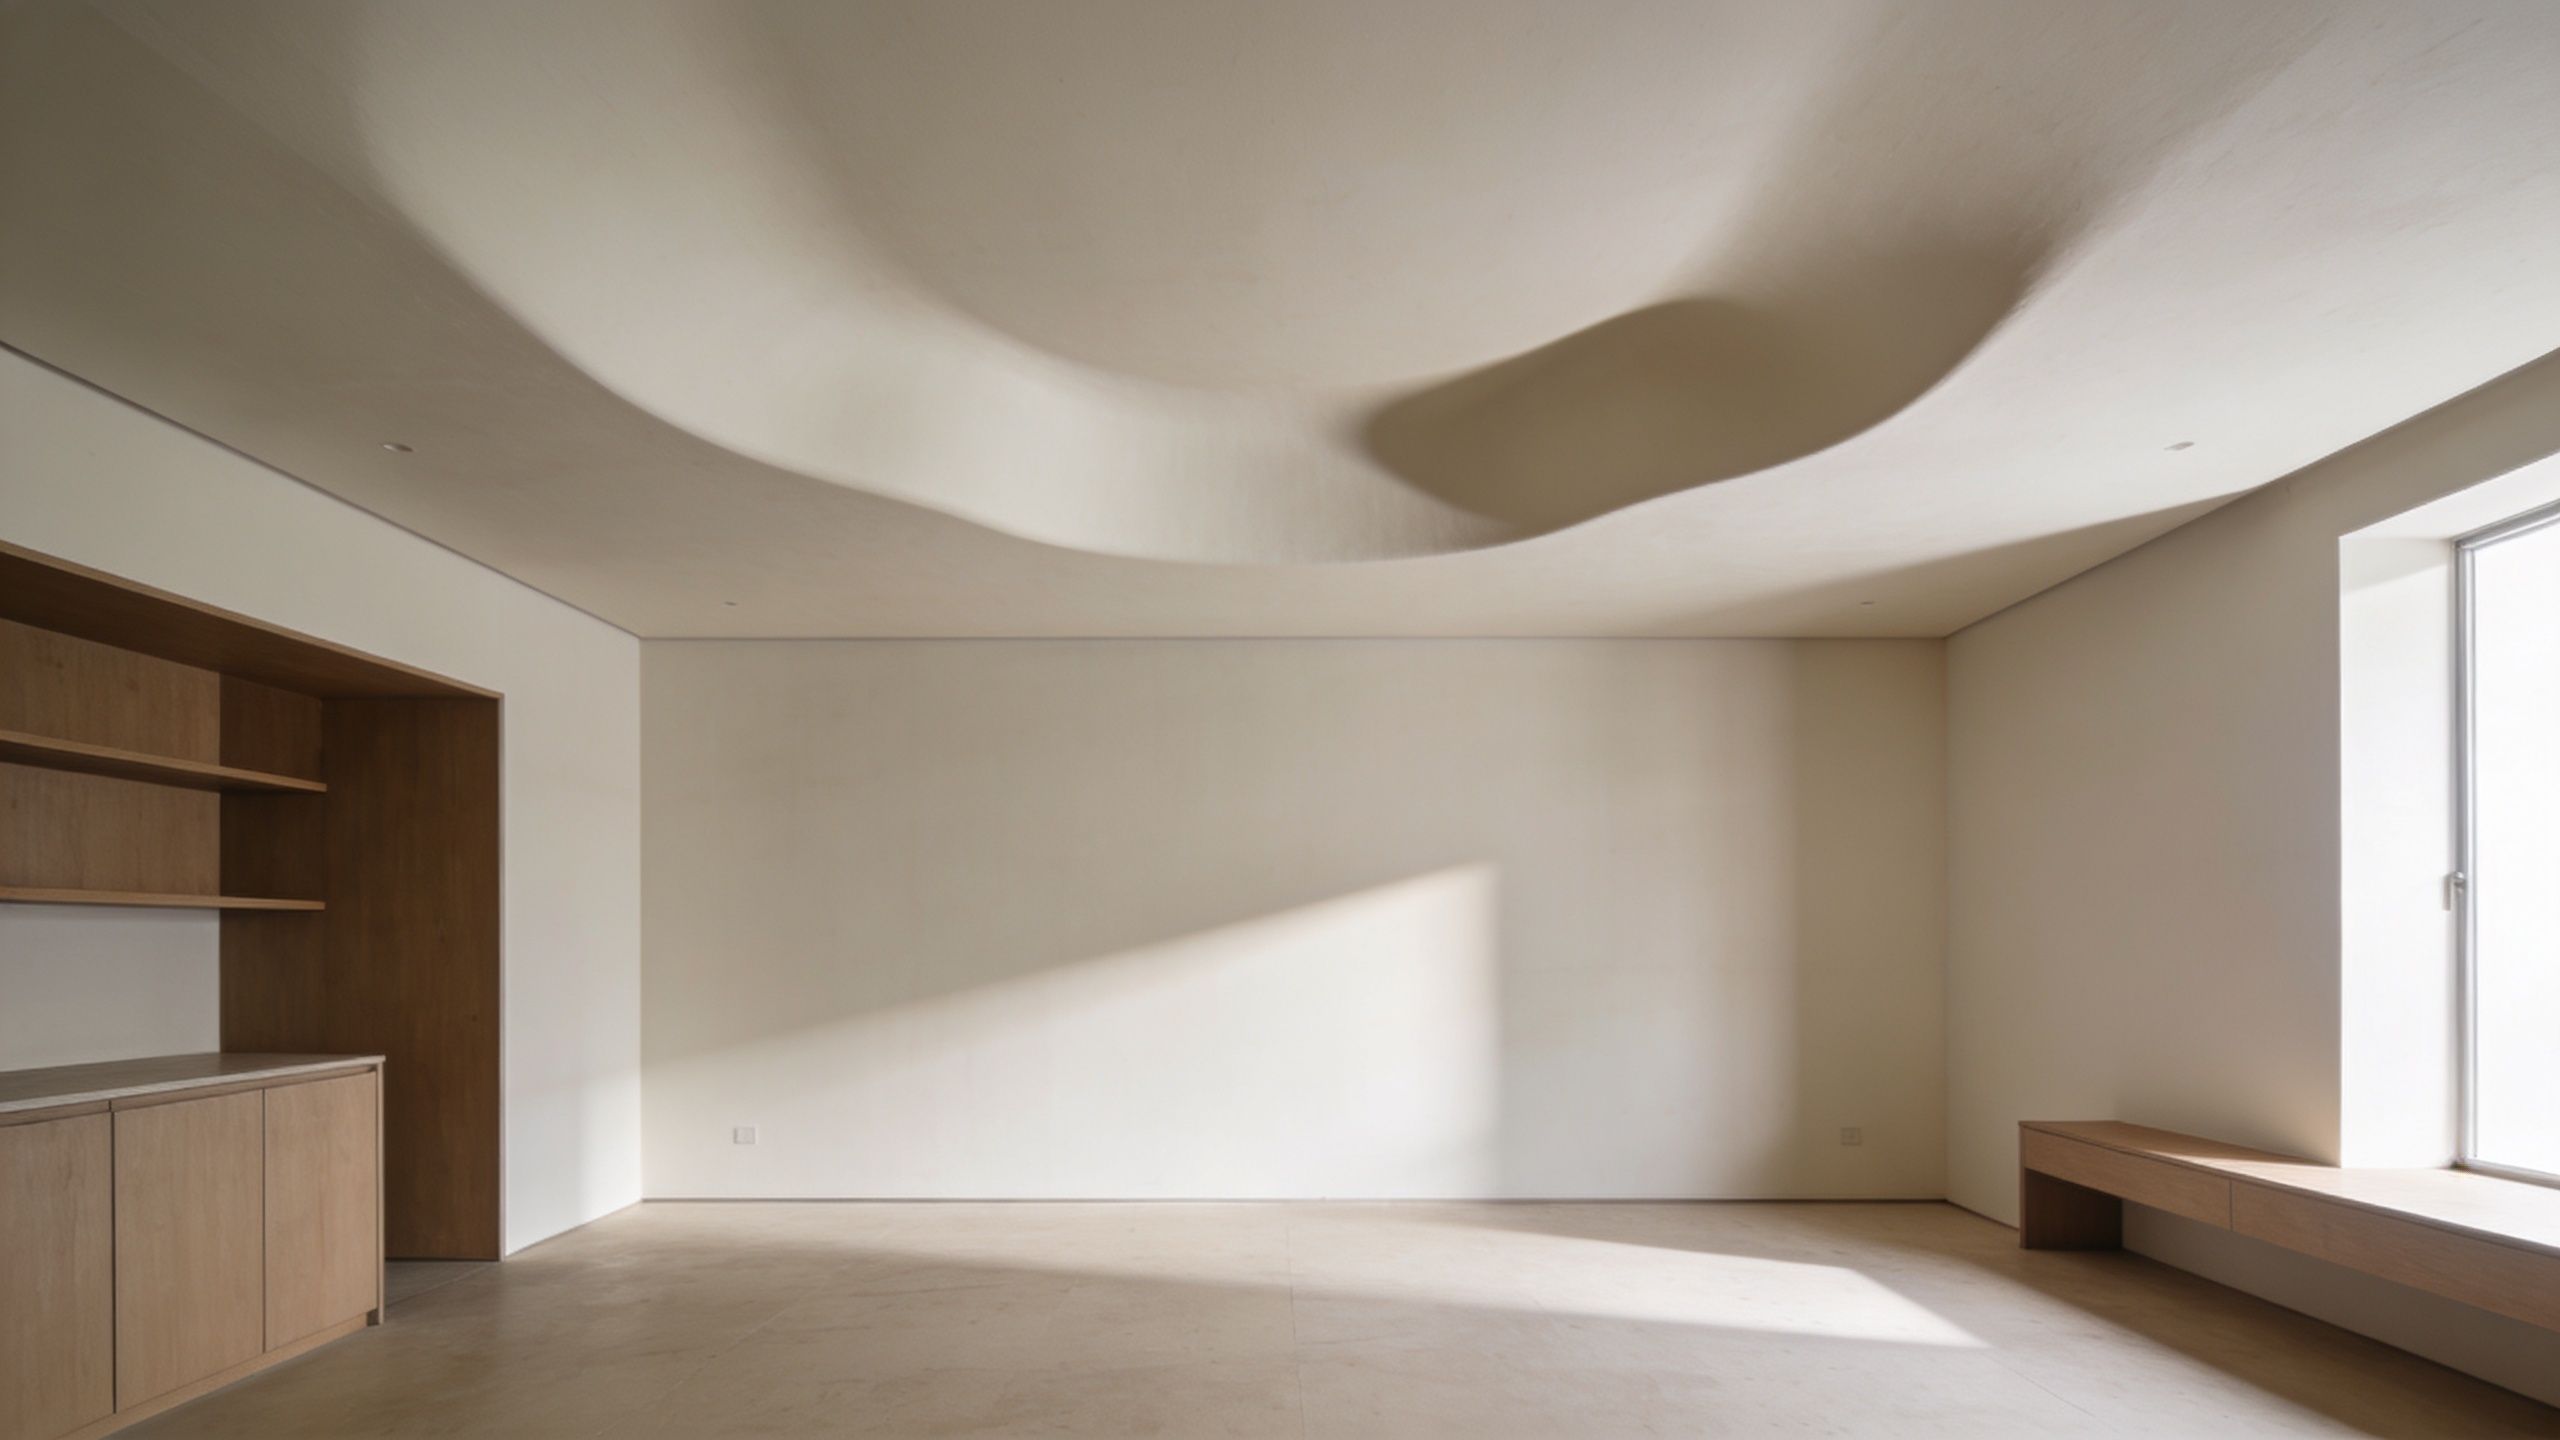
6. 6. Warped, Sagging, or Bulging Walls
Bulging drywall usually means the material has absorbed enough moisture to deform. Sagging ceilings are even more serious because weight is now part of the problem.
This can happen below a bathtub drain, under a slow roof leak, or on an exterior wall where water has been entering for a while. The drywall swells, fasteners loosen, seams shift, and the surface stops sitting flat.
Treat sagging as a safety issue
A bowed wall isn't just ugly. It can hide soaked insulation, damaged framing, and loose drywall overhead. If a ceiling looks swollen or drooping, keep people clear of the area until someone evaluates it.
In water-damaged assemblies, the visible bulge is often smaller than the actual wet area. Water travels. It can soak insulation, run along framing, and collect well away from the original entry point.
Best next moves:
- Clear the area: Don't place furniture or people under a sagging section.
- Check for active leaks: Shut off water if plumbing is involved.
- Avoid puncturing blindly: Opening a bulge without a plan can release trapped water and spread the mess.
At this stage, repair usually includes more than finish work. The damaged board has to come down, the cavity has to be dried, and the framing may need inspection before new drywall goes up. CS1 Real Interiors handles removal, drywall replacement, finishing, and coordination for clean, paint-ready restoration on homes and small commercial spaces across the Portland metro.
7. 7. Efflorescence White Powdery Deposits
If you see a chalky white residue on masonry, foundation walls, or near lower wall areas, you're likely looking at efflorescence. It happens when water moves through porous material and leaves mineral deposits behind as it evaporates.
This is common in basements, crawlspace-adjacent walls, and lower-level rooms around Portland and Vancouver, WA where exterior drainage or seepage is part of the problem. On its own, the white residue isn't usually the main issue. The water movement behind it is.
Why scrubbing it off is not a fix
A lot of homeowners clean the surface and assume they solved it because the wall looks better. If moisture is still coming through, the deposit returns.
Earlier verified data notes efflorescence as one of the visible signs that water has been moving through wall materials. In practical terms, that means you should be thinking about drainage, seepage, condensation, or an exterior water path.
Start with the building, not the powder:
- Check gutters and downspouts: Make sure roof water is being moved away from the foundation.
- Look at grading: Soil that pitches toward the house can keep feeding the problem.
- Inspect lower wall finishes: Drywall installed against a damp lower wall often has to be replaced after the moisture issue is corrected.
White residue on a wall is a moisture clue, not a cleaning problem.
When lower drywall has wicked up water, replacement with the right materials and proper drying matters more than any surface treatment.
8. 8. Failing Drywall Joints or Cracks
Not every drywall crack means water damage. Houses settle. Corners move a little. Seasonal expansion happens. But when tape lifts, seams swell, or cracks show up with staining, softness, or paint failure, moisture becomes the likely cause.
Water weakens joint compound and tape adhesion. Once that bond lets go, seams open up, corner beads can shift, and the wall starts looking rough even if the framing hasn't moved much.
How moisture cracks differ from normal settling
A normal settlement crack is usually dry, stable, and limited. A moisture-related crack often comes with other warning signs nearby.
Look for combinations like these:
- Peeling tape plus discoloration: Common below roof leaks or second-floor bathrooms.
- Cracks with softness: The drywall core may already be compromised.
- Repeated seam failure in the same spot: That usually points to an unresolved moisture source, not bad luck.
One reason professionals test before repairing is to avoid closing up a damp wall. Verified benchmark data notes that paired diagnostic tools can reduce unnecessary drywall removal by 40% while helping crews target the actual wet areas more accurately. In finish work, that matters. You want to remove enough damaged material to solve the problem, but not tear out solid areas that can stay.
For final repair, don't just re-mud over loose tape. The failed section should be cut back, dried, retaped, and refinished properly. CS1 Real Interiors specializes in Level 4 and Level 5 drywall finishes, which is especially important when the repaired area sits in a smooth-wall room where every seam shows under paint and daylight.
8-Point Comparison: Wall Water Damage Signs
| Sign / Issue | Implementation complexity | Resource requirements | Expected outcomes | Ideal use cases | Key advantages |
|---|---|---|---|---|---|
| Discoloration and Staining on Drywall | Low → Moderate, cosmetic easy, leak fixes may be harder | Moisture meter, patching materials, stain-block primer; possible plumbing/roof repair | Stain removal and repaired finish if source fixed; recurrence if not | Early leak detection on ceilings, walls, corners | Highly visible; easy to document; directs targeted repairs |
| Peeling, Bubbling, or Blistering Paint | Moderate, strip and address trapped moisture before repainting | Paint removal tools, moisture testing, ventilation upgrades, painter | Durable finish after drying, prep, and repainting; prevents paint failure if source resolved | Bathrooms, kitchens, laundry areas with humidity | Clear active-moisture indicator that prompts investigation |
| Soft, Spongy, or Deteriorating Drywall | High, removal and full replacement usually required | PPE, demolition tools, replacement drywall, drying equipment, contractor | Full drywall replacement and cavity inspection; mold remediation if present | Advanced water saturation where drywall yields to touch | Confirms need for complete remediation; reveals hidden damage |
| Visible Mold or Mildew Growth | High, requires certified remediation and containment | Certified mold remediator, containment, remediation, repair contractors | Mold removal and restored safe indoor environment after remediation | Visible mold patches, recurring odors, health symptoms | Unambiguous sign prompting urgent professional action to protect health |
| Persistent Musty or Damp Odor | Low → Moderate, investigation and targeted fixes | Moisture meter, inspection tools, dehumidifiers, ventilation improvements | Identification of hidden moisture; early remediation prevents escalation | Basements, closets, walls adjacent to wet rooms with no visible damage | Non‑destructive early warning detectable by occupants |
| Warped, Sagging, or Bulging Walls | Very high, structural assessment and likely reconstruction | Structural engineer/contractor, framing repair, full drywall replacement | Structural stabilization and complete area rebuild; safety restored | Visible sagging/bulging or ceiling depressions indicating severe moisture | Clearly indicates severe structural compromise needing immediate action |
| Efflorescence (White, Powdery Deposits) | Low → Moderate, surface cleaning plus moisture control | Cleaning supplies, exterior drainage fixes, vapor barriers, foundation work | Deposit removal and reduced water migration after barrier/drainage fixes | Basements and masonry where salts appear after wet seasons | Indicates active water movement and helps locate entry paths |
| Failing Drywall Joints or Cracks | Moderate, remove damaged tape and properly re-tape/finish | Moisture meter, joint compound, tape, professional taping for high finishes | Seam stability and smooth finish after drying and correct taping | Cracks or tape separation near leaks or high-humidity areas | Identifies seams affected by moisture and guides scope of repair |
Your Next Steps From Detection to Restoration
Spotting the signs of water damage in walls is the easy part. Choosing the right response is what protects the house. The wrong response is usually cosmetic first, investigative second. That order causes repeat damage.
If you see staining, bubbling, softness, mold, sagging, or failing seams, start with the source of moisture. A drywall repair only holds when the wall behind it is dry and stable. In Portland-area homes, the cause is often a plumbing issue, roof leak, window leak, clogged gutter overflow, or lower-level seepage.
Quick DIY Tests to Confirm Water
A moisture meter is one of the most useful homeowner tools for basic screening. In the verified data, moisture meters are noted as widely adopted among professional restoration firms because they help detect hidden wall saturation beyond what you can see. If you're using one, readings need context, but they can quickly tell you whether a suspicious area is dry or still active.
You can also do a basic water meter check for plumbing leaks. Turn off faucets, appliances, and fixtures that use water, then look at the home's water meter. If it continues moving, there's a good chance water is escaping somewhere in the system.
Use these tests carefully:
- Moisture meter: Best for comparing suspected wet areas to known dry areas nearby.
- Water meter test: Helpful when you suspect a hidden plumbing leak behind a wall.
- Touch test: Useful for obvious softness, but not reliable for hidden moisture by itself.
Common Causes of Wall Water Damage
In this region, water usually gets in through a short list of familiar paths. Leaky supply lines, failed tub or shower connections, roof flashing problems, poorly sealed windows, clogged gutters, and foundation seepage are common culprits.
Portland's wet winters make exterior issues more noticeable, while year-round plumbing leaks can stay hidden for a long time. Property managers in Beaverton, Hillsboro, and Tigard often run into a mix of both. An exterior moisture issue leaves one pattern. A plumbing issue often leaves another. Either way, the wall needs diagnosis before repair.
Why Professional Repair is Crucial
Drywall is a finish material, but it also depends on what's behind it. If insulation is wet, framing is damp, or mold has developed in the cavity, a surface patch won't solve the underlying problem.
Professionals use moisture meters, visual inspection, and targeted opening of the wall when needed. The goal is to find the source, remove what can't be saved, dry what can, and rebuild the surface so it stays fixed. For homeowners, that saves a lot of frustration compared with repainting, re-patching, and watching the same area fail again.
Restore Your Walls with Portlands Drywall Experts
A lot of Portland homeowners get to this point after the leak is already fixed. The stain is dry, the room smells better, and the wall looks like it only needs paint. Then the paper face starts to lift, a seam opens up, or the patch flashes through the finish. That usually means the wall needs more than a cosmetic touch-up.
Good repair work brings the wall back to a condition that looks right and holds up. That can mean replacing softened drywall, correcting damaged texture, sealing affected areas properly, and finishing the surface so it blends with the rest of the room. In older Portland homes, matching existing wall texture and paint transitions often takes as much care as the drywall repair itself.
CS1 Real Interiors serves homeowners and businesses throughout the Portland area, including Beaverton, Hillsboro, and Tigard. We repair water-damaged drywall and ceilings, match texture, handle interior painting, and address related insulation or framing needs on residential and small commercial projects.
If you have noticed staining, bubbling, softness, sagging, or recurring cracks, schedule a professional assessment after the moisture source is addressed. That is the point where a clean repair plan saves time, avoids repeat patching, and gets the room back to normal use.