You scraped the popcorn. The room looks brighter already. Then you look up and see what’s left behind: torn paper, shallow gouges, old tape lines, patched seams, stains, and a ceiling that looks worse now than it did with texture on it.
That’s the point where a lot of homeowners stall out.
What to do after popcorn ceiling removal comes down to one decision: are you stopping at “texture is gone,” or are you finishing the ceiling correctly so it looks smooth, clean, and intentional? Those are not the same thing. A scraped ceiling is only the starting point. The final quality comes from testing, repair, skim work, primer, and paint done in the right order.
In Portland, Beaverton, Hillsboro, Tigard, Lake Oswego, Gresham, and Vancouver WA, this is one of the most common turning points in an interior upgrade. The messy part feels like the hard part. In reality, the part that shows is what comes next.
Table of Contents
- The Hard Part Is Over So Now What
- First Steps Safety Testing and Cleanup
- Achieving a Flawless Surface Drywall Repair and Skim Coating
- Need a Perfect Finish Without the Mess
- The Final Transformation Priming and Painting
- DIY vs Hiring a Professional The Smart Decision
- Get Your Professional Ceiling Finish Today
The Hard Part Is Over So Now What
You finish scraping, the floor is covered, the room looks brighter, and then the ceiling finally comes into full view. That is the moment a lot of homeowners realize removal was only half the job.
A scraped popcorn ceiling almost never looks ready for paint. The texture was hiding years of seams, patches, roller marks, minor water damage, and scrape damage from the removal itself. Once that camouflage is gone, the standard changes. A ceiling can be technically stripped and still look rough, uneven, and unfinished.
That gap between done and done right is where many projects go sideways.
A typical post-removal ceiling often shows several problems at once:
- Surface gouges: Scrapers dig into the drywall face and leave shallow cuts that flash under paint.
- Raised joints: Old tape lines and uneven seams start showing through.
- Exposed drywall paper: Wet scraping and aggressive passes can tear the paper face.
- Old patchwork: Repairs that disappeared under texture stand out fast on a smooth ceiling.
I see the same surprise all the time in Portland homes. Homeowners expect a little sanding and paint. What they usually have is a ceiling that needs repair, leveling, and full-surface finishing if they want a modern smooth look that holds up in real light.
Light is the truth test. Morning window light, evening lamps, and recessed cans all hit the ceiling from different angles. A ceiling that looks acceptable from the doorway can show every seam and ridge once the sun shifts or the lights come on. That is why professional finishing matters so much. Smooth ceilings are judged by reflection, not by how they look from six feet away during cleanup.
The good news is the path is clear once you know what you are looking at. Start by treating the ceiling like a finishing project, not a cleanup project. Get the room safe, get the dust under control, repair the substrate correctly, and build the surface back to a consistent plane. If the goal is a true Level 5-style smooth finish, the quality of the repair and skim work will determine whether the ceiling looks crisp and modern or patched and wavy for years.
First Steps Safety Testing and Cleanup
The ceiling is scraped. Furniture is covered in dust. You want to grab a sander and get it over with. Hold off for a minute.
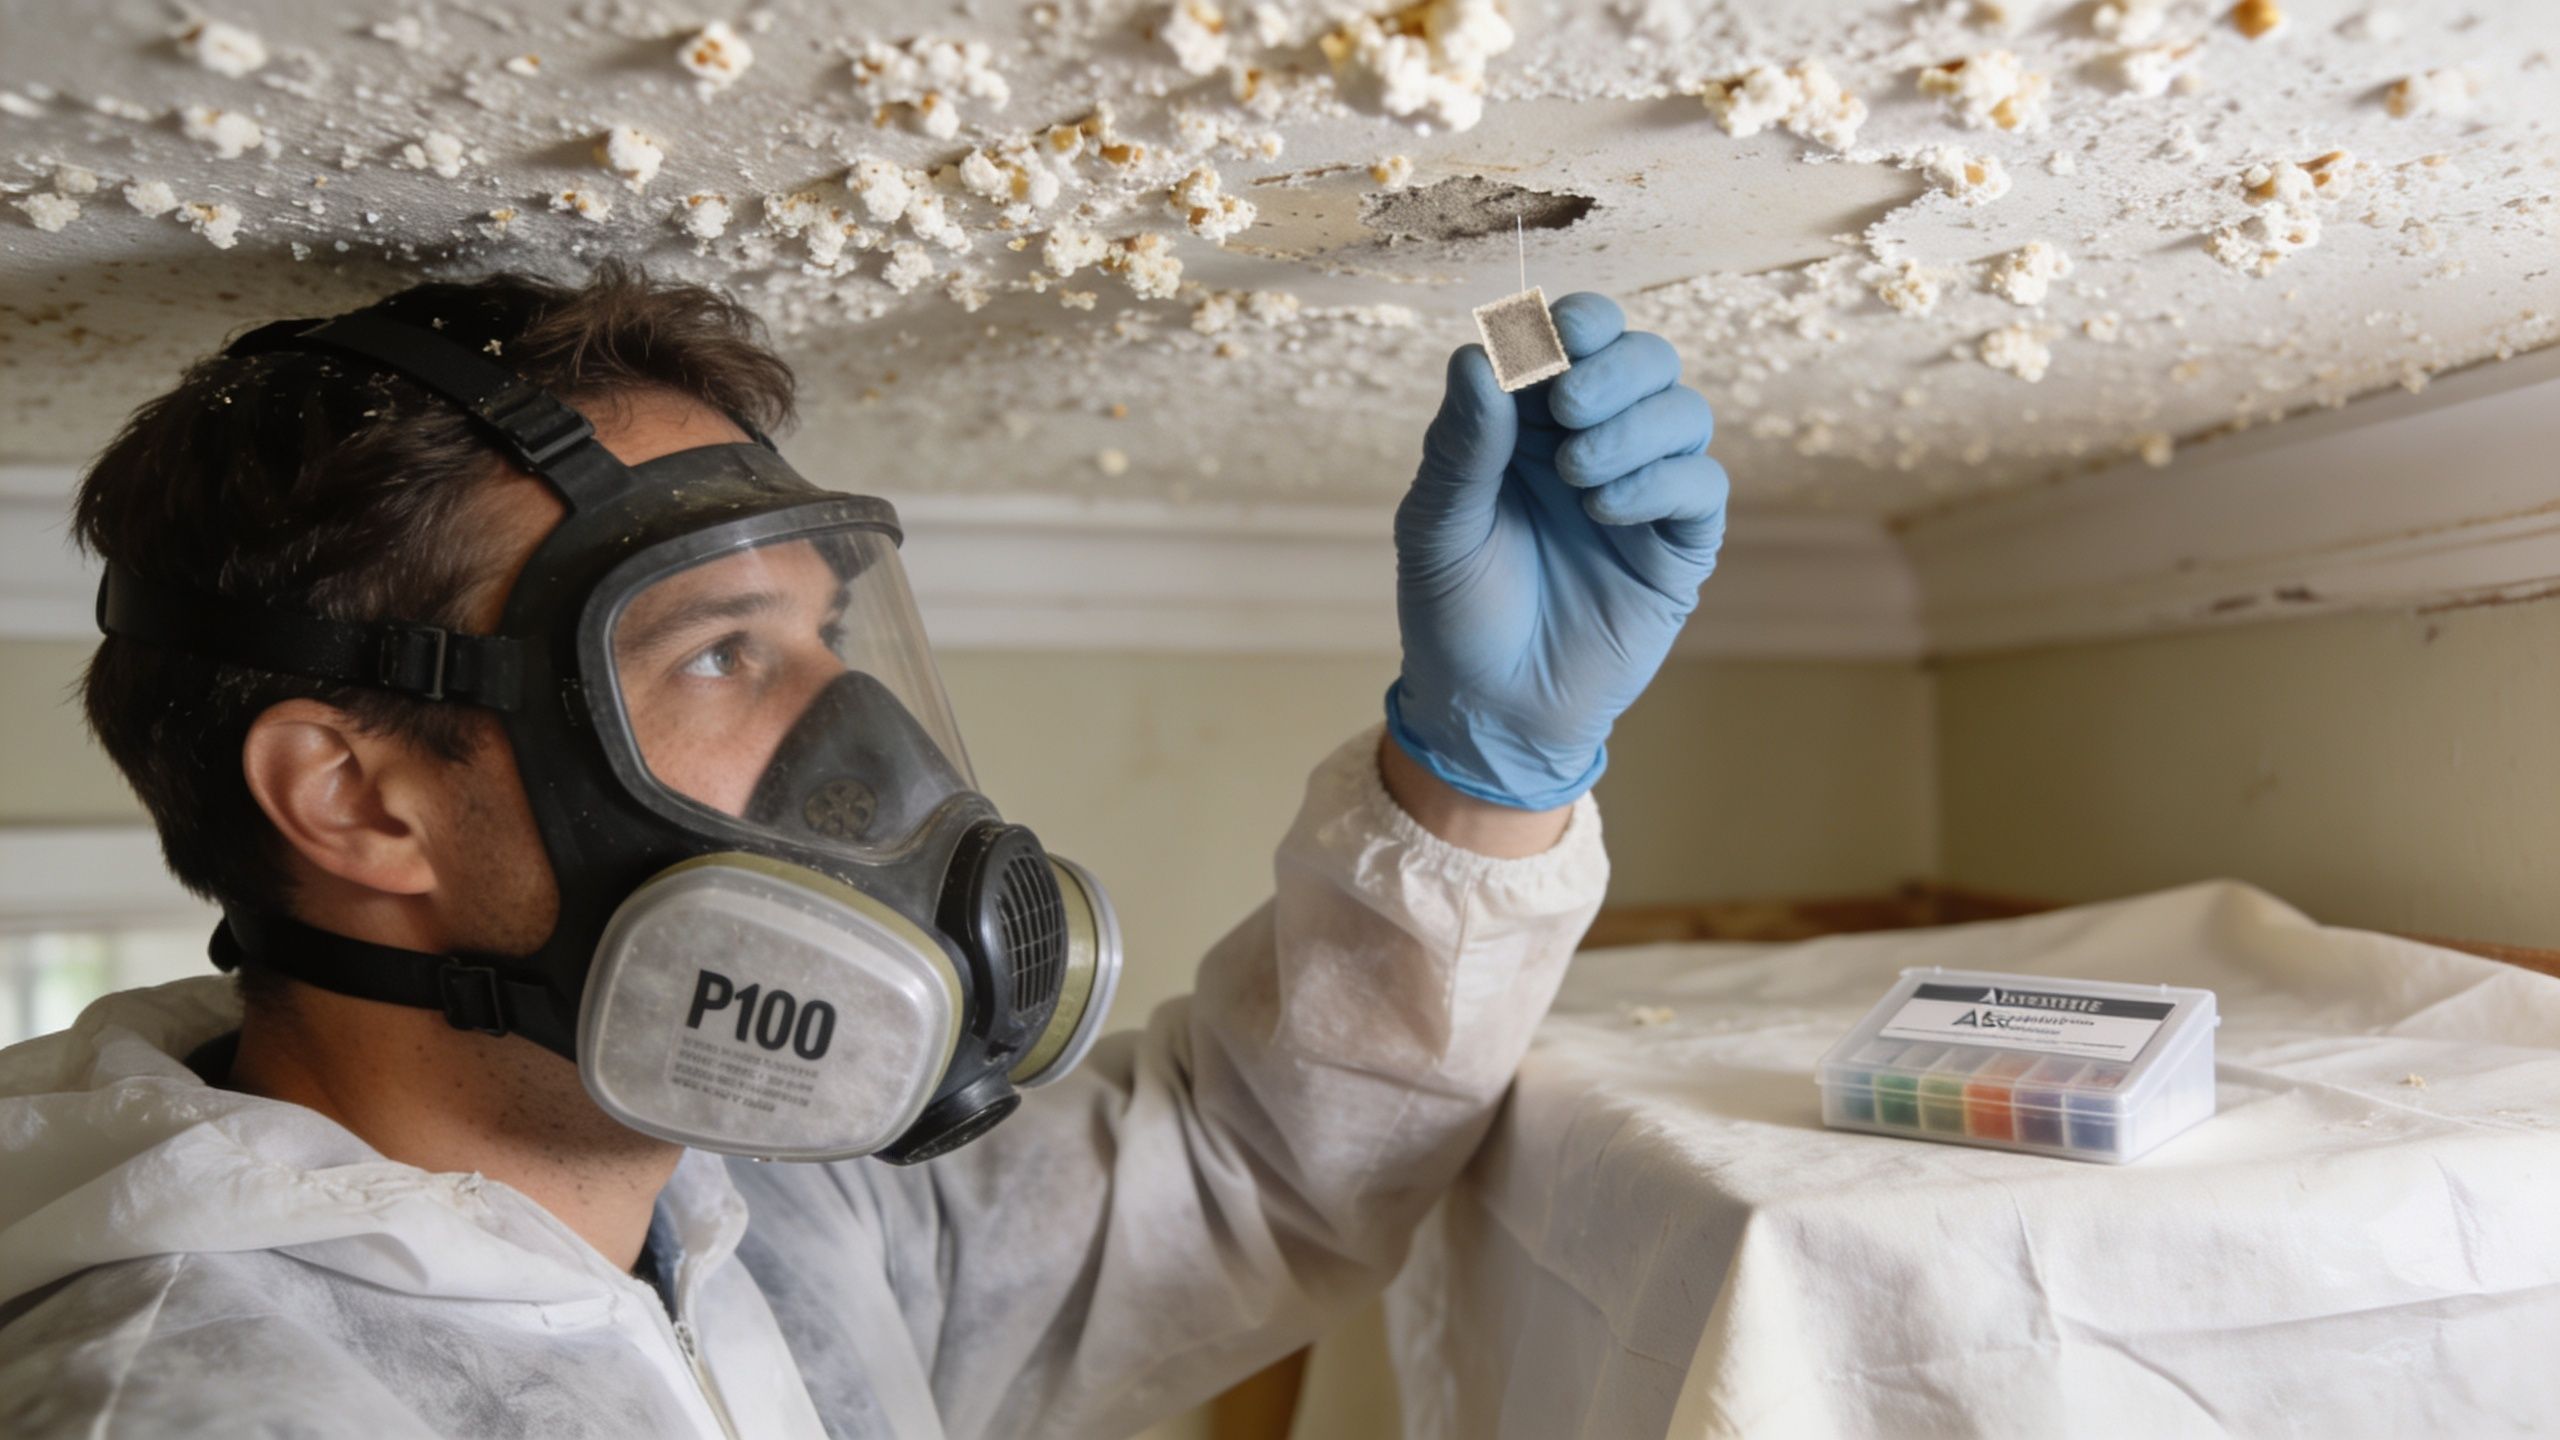
Before 1980, asbestos was common enough in acoustic ceiling texture that any older Portland home deserves a careful pause. If you do not know what was on that ceiling, do not sand it, sweep it dry, or run a shop vacuum over the room. Get the material identified first. That one decision affects every step after it, from cleanup method to who should handle the remaining work.
I have walked into plenty of homes where the scraping was finished in a day and the true problem started after. A homeowner opens windows, dry-sweeps the floor, hits the ceiling with a pole sander, and now dust has moved through the house and settled into places that are hard to clean well. A project that could have stayed contained turns into a whole-house cleanup.
Treat dust like it already escaped. That mindset leads to better decisions.
Cleanup after popcorn removal should focus on containment and controlled removal:
- Isolate the room: Keep doors closed and limit foot traffic in and out.
- Pick up debris gently: Bag chunks and loose material without stirring it into the air.
- Use HEPA filtration: Fine ceiling dust passes right through ordinary vacuums.
- Clean from top to bottom: Dust lands on walls, trim, floors, and anything left in the room.
- Change or protect HVAC filters: Returns and supply movement can spread debris fast.
Practical rule: If your cleanup method creates a visible dust cloud, stop and change methods.
This is one of the biggest differences between a ceiling that is merely done and one that is done right. Done means the texture is off. Done right means the room is safe to work in, the debris is controlled, and the surface is clean enough that repair materials will bond properly and finish flat. Skip that part, and the final paint job often tells on you.
Do not rush into sanding. Sanding is for shaping repairs after the ceiling is clean and cleared for that kind of work. If there is still uncertainty about the original texture, sanding turns settled debris into airborne dust. Even in ceilings without asbestos concerns, premature sanding makes the room harder to clean and can drive fine particles into fresh compound later.
Use a simple order of operations:
- Confirm what material was removed
- Contain the space
- Remove loose debris carefully
- Clean all surfaces thoroughly
- Start repairs only after the room is under control
Homeowners usually want to get to the pretty part fast. I understand that. But smooth ceilings show every shortcut. A Level 5-style finish starts here, with a clean, stable surface and disciplined prep, not with a sander and a hope that primer will hide the rest.
Achieving a Flawless Surface Drywall Repair and Skim Coating
Scraped ceilings are damaged drywall. Treating them like finished drywall is where many jobs go sideways.

The work now is less about removal and more about correction. Every low spot, torn edge, ridge, and seam has to disappear into one continuous plane. That’s why many homeowners who search for what to do after popcorn ceiling removal eventually realize this is really a drywall finishing project.
If you’re dealing with torn paper, visible joints, water damage, or older repairs telegraphing through the ceiling, this is the stage where proper drywall repair matters most.
What scraping really leaves behind
The ceiling usually needs more than touch-up mud. Scraping often exposes fasteners, corner transitions, old patch lines, and paper fuzz that won’t paint cleanly.
The technique during removal also affects how much repair is needed. The key technical detail is keeping the scraper at a very low angle to limit gouging, and every repair cycle of compound, drying, and sanding can add 24+ hours to the timeline according to drywall preparation guidance for popcorn ceiling removal. That’s one reason a room that seemed like a weekend job can keep dragging on.
A ceiling at this stage usually needs:
- Spot filling where scrapers dug into the board
- Edge repair where face paper lifted
- Joint correction where seams show through
- Broad smoothing so isolated repairs don’t flash through paint
Why patching alone usually fails
Spot repairs sound efficient. In practice, patch-only work often leaves a ceiling that looks like a map of islands. Every repaired area has a different texture and porosity than the surrounding field.
That’s why skim coating is often the right move. Instead of chasing individual defects forever, you apply a broad, controlled layer of compound across the ceiling so the entire surface becomes more uniform. It’s the difference between filling potholes and repaving the road.
A good skim coat does three things:
- Unifies the surface
- Softens old seams and patches
- Creates a better base for primer and paint
If the ceiling still has scattered torn spots after scraping, broad skim work usually saves time compared with endless little repairs that never quite blend.
This is also where poor DIY work shows up fast. Heavy mud application leaves drag lines. Thin application misses low areas. Inconsistent sanding creates shiny ridges and dull valleys that paint will highlight.
For homeowners who want to see the process in action, this walkthrough gives a useful visual reference before you decide how far you want to take the finish yourself.
What a Level 5 finish actually means
A Level 5 finish is the smoothest drywall finish standard. On ceilings, it’s the one that gives you the best shot at that clean, flat, modern look people expect in remodeled homes in Portland, Lake Oswego, and Tigard.
Think of finish levels like sanding wood. A rough pass gets you closer. Fine finishing gets you to the result people notice. A Level 5 ceiling involves multiple coats of mud, detailed sanding, and careful inspection under light that reveals defects. It’s the standard that keeps surface variation from showing through after paint.
That matters because ceilings don’t hide much once texture is gone. Ceiling lights, windows, and side-angle light expose waviness fast. A ceiling can be technically repaired but still look amateur if the finish isn’t flat enough.
A few trade-offs are worth being honest about:
| Goal | What works | What usually doesn’t |
|---|---|---|
| Clean modern look | Broad skim coating and detailed sanding | Spot patching only |
| Minimal visible seams | Level 5 style finishing | Heavy texture rolled into repairs |
| Fast turnaround | Professional crew with process control | Repeating DIY repair cycles |
| Best paint appearance | Flat, uniform substrate | Painting over mixed porosity |
If the room is small and your expectations are modest, basic repair may be enough. If it’s a main living area, a resale project, or a room with strong natural light, the finish quality is what people remember.
Need a Perfect Finish Without the Mess
You scrape the popcorn, look up, and expect relief. Instead, the ceiling shows every patch, lap mark, and shallow dip the texture used to hide.
That is the point where "done" and "done right" split apart.
A ceiling can be fully stripped and still look rough after paint. I see that a lot in Portland homes, especially in living rooms, hallways, and bedrooms with strong window light. Homeowners put in real effort, then hit the stage where every pass of mud creates more sanding, more dust, and one more chance to leave a visible line in the finished surface.
Professional finishing matters because the last 10 percent is what everyone notices. Flat planes, consistent edges, clean containment, and a surface that is ready for primer are what turn a post-removal ceiling into a modern smooth finish instead of a patched-over project. Getting there takes process control, not just effort.
If you want to hand this part off before the house fills with fine drywall dust again, request a free estimate through this contact form. CS1 Real Interiors handles drywall finishing, painting, insulation, and interior upgrades for homeowners and property managers across the Portland metro area.
A good stopping point for DIY is before frustration starts showing up on the ceiling.
The Final Transformation Priming and Painting
A lot of ceilings get ruined at the last stage.
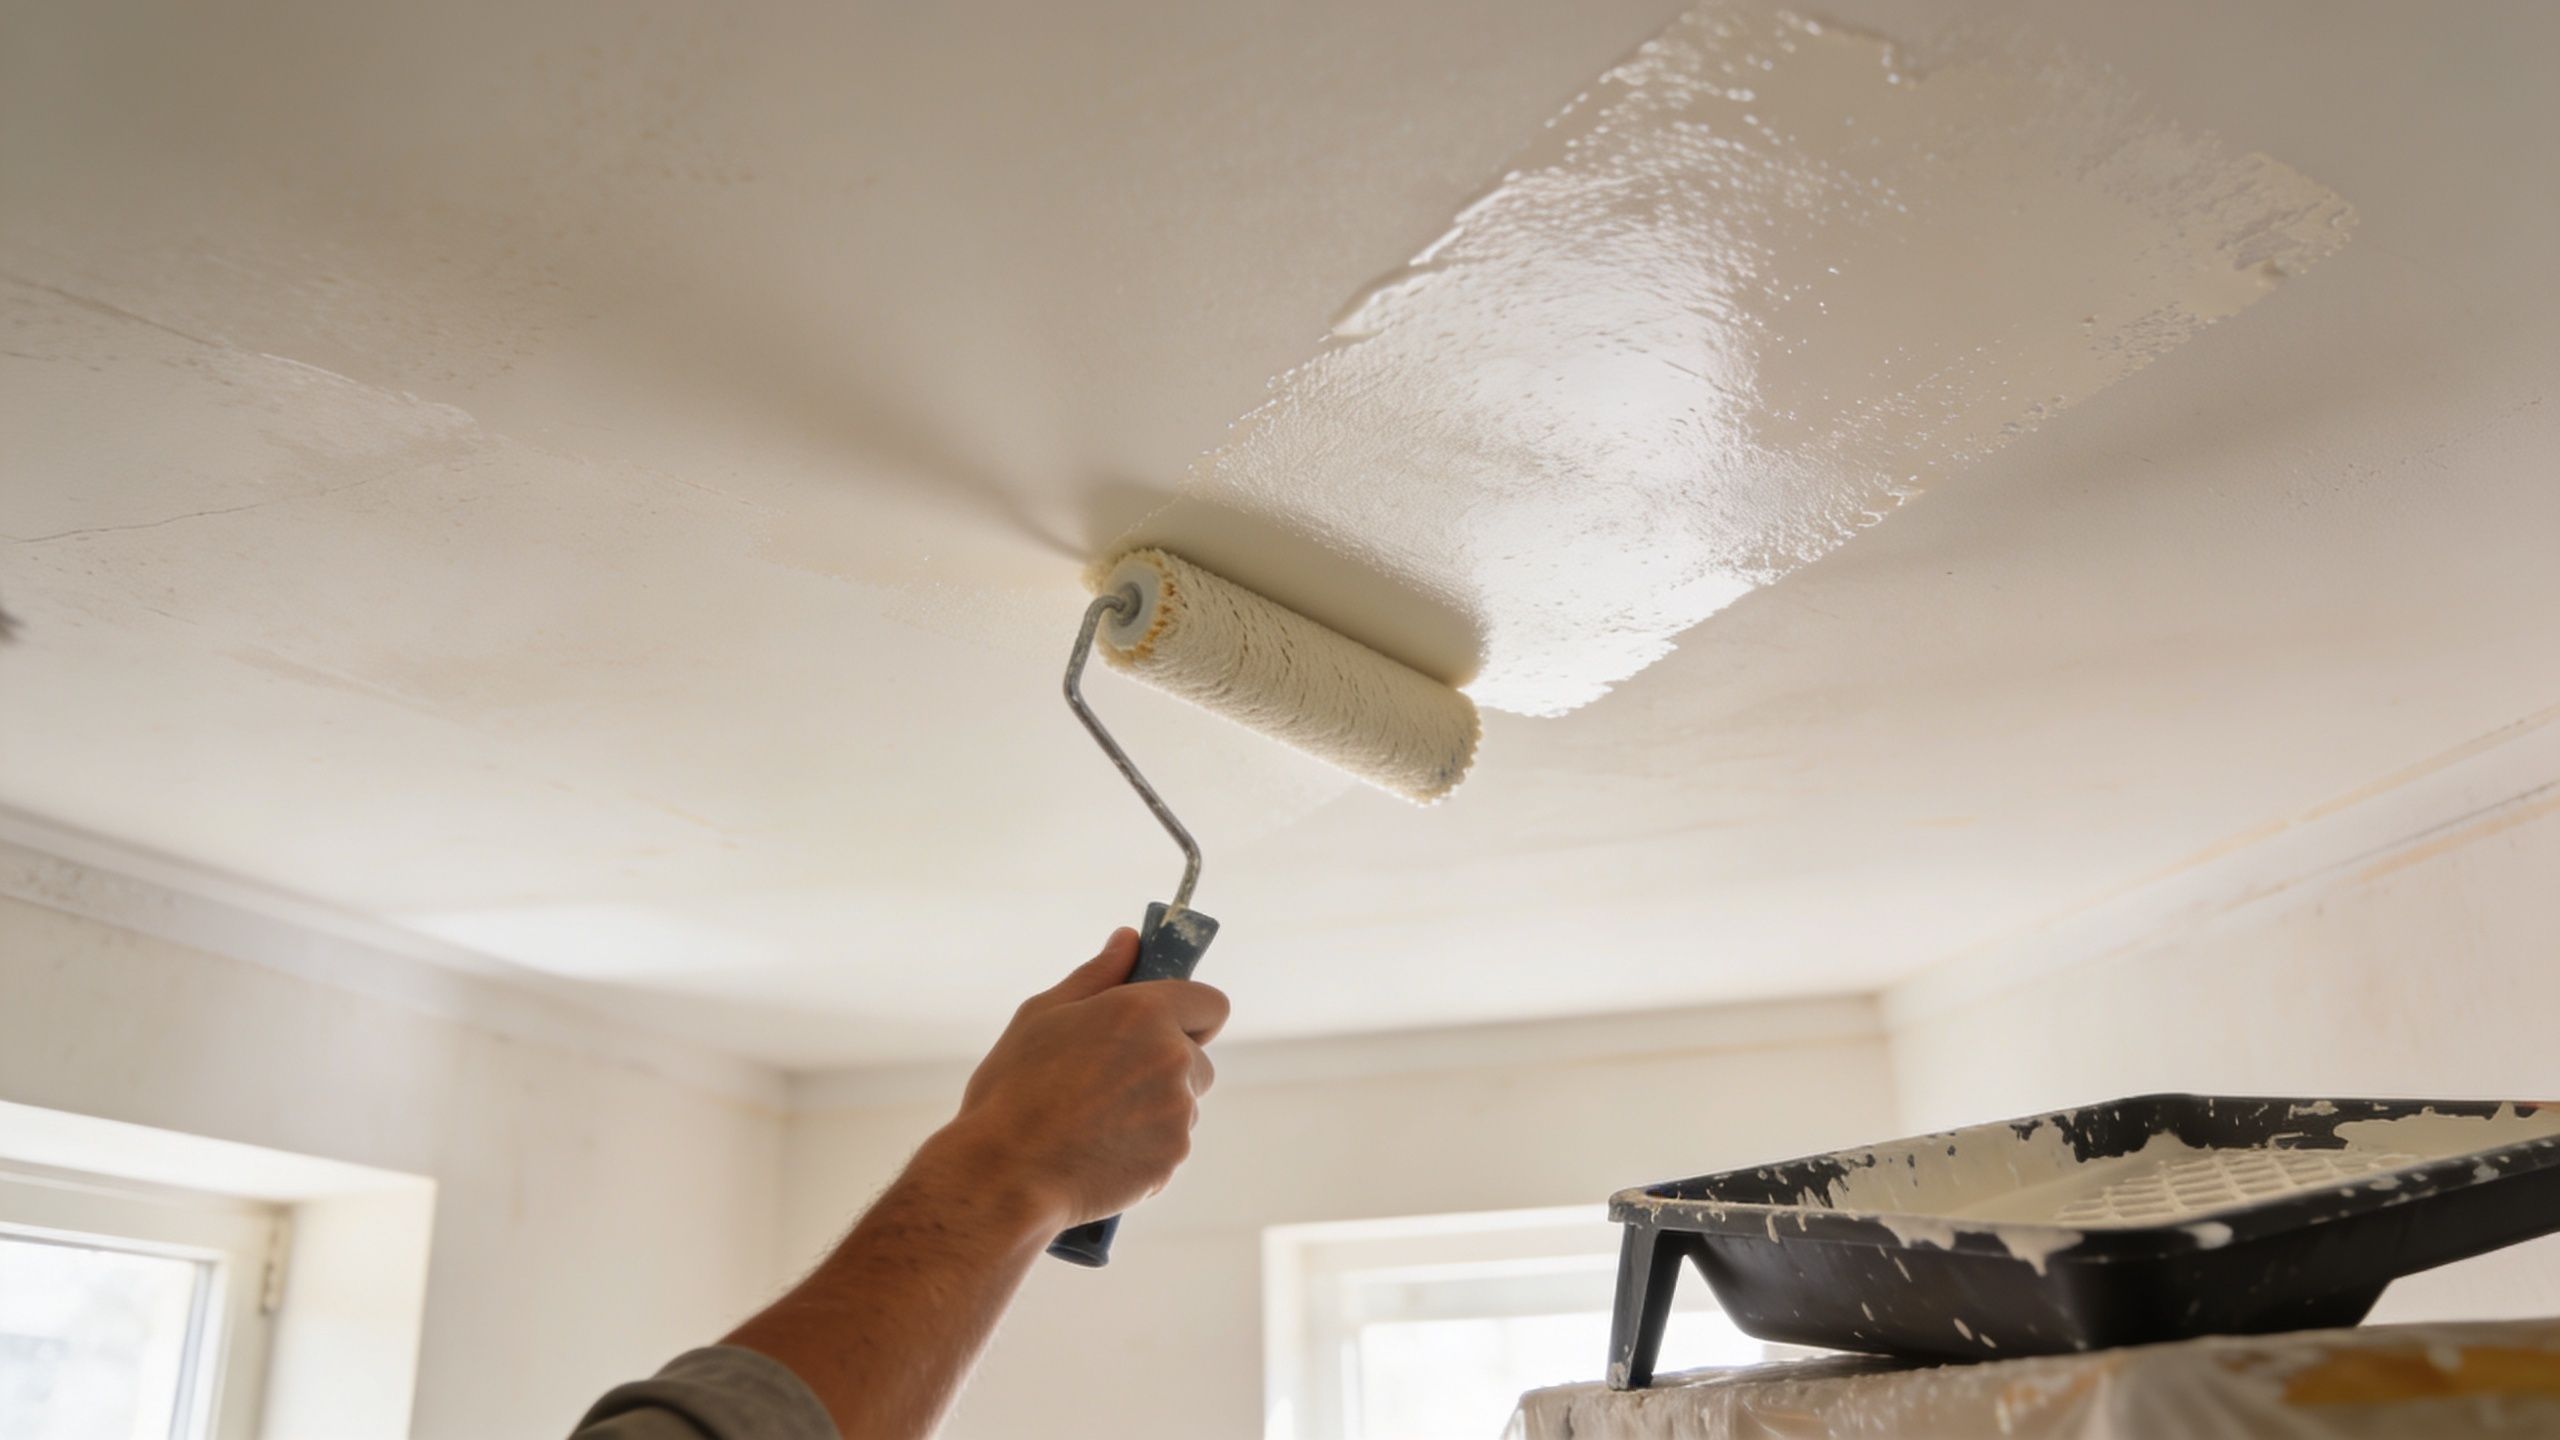
Once the surface is smooth and dust-free, primer comes first. Fresh joint compound, patched drywall, and original paper all absorb paint at different rates. If you skip primer, the ceiling can flash under light. One area looks dull, the next looks shiny, and every repair starts announcing itself.
Why primer is not optional
Primer seals the surface so the finish coat dries evenly. On post-removal ceilings, that matters more than homeowners expect. A smooth ceiling has nowhere to hide. The moment daylight hits it from the side, uneven porosity and missed sanding show up fast.
Use a primer made for new drywall or repaired surfaces. On problem ceilings, a high-build or stain-blocking primer can help level out minor differences and lock down patched areas. The right choice depends on what is overhead. Bare compound, exposed paper that was repaired, old water stains, or a mix of all three.
Primer also gives you a true inspection pass. I tell homeowners to look at the primed ceiling from every angle before any finish paint goes on. If you can see ridges, pockmarks, knife lines, or shallow low spots now, paint will not hide them later. Fix them at primer stage, then spot-prime again.
That is how you get closer to a Level 5 look instead of a ceiling that just reads as newly painted.
How to paint the ceiling without ruining the finish
Finish paint should confirm good prep, not try to make up for bad prep.
The best results come from controlled application:
- Maintain a wet edge: Letting one section dry too far ahead of the next can leave lap marks.
- Use even roller pressure: Heavy pressure leaves tracks and uneven film thickness.
- Work in consistent sections: Straight, repeatable passes produce a more uniform appearance than random rolling.
- Check the ceiling in real light: Stand at the window side of the room and look across the surface, especially in Portland homes with strong natural light for part of the day.
Flat ceiling paint is usually the safest choice for a modern smooth finish because it softens minor surface variation. Even then, product choice only gets you so far. If the drywall finish underneath is wavy, the paint will show it.
For homeowners preparing a larger interior refresh, it often makes sense to bundle ceiling work with interior painting services. That keeps the sequence tight and avoids handing a nearly finished ceiling from one crew to another with different standards.
A properly primed and painted ceiling is what makes the room feel finished. Clean lines. Even color. No flashing, no roller marks, no visible patch map overhead. That is the difference between a ceiling that looks done and one that looks done right.
DIY vs Hiring a Professional The Smart Decision
After popcorn comes down, a lot of homeowners hit the same moment. The ceiling is bare, the room is dusty, and what looked like a straightforward upgrade suddenly shows every patch, gouge, seam, and roller line overhead.

That is where the main decision starts. Not whether you can finish it. Whether you will be happy looking at that finish every day.
A homeowner fixing up a spare bedroom has a different standard than someone updating a main living area in Portland or getting a house ready to sell in Beaverton. Ceiling work is judged by light, sightlines, and how clean the final plane looks once paint is on. A ceiling can be technically finished and still look rough. I see that all the time after DIY jobs that were done with good effort but uneven skim work.
When DIY can make sense
DIY can be reasonable in the right room. Small spaces, low ceilings, and secondary areas give you more forgiveness. If the scraping went cleanly and the drywall underneath is still in decent shape, a patient homeowner can get an acceptable result.
DIY is usually the better fit when:
- The room is low stakes: Laundry rooms, utility spaces, and guest rooms do not get the same scrutiny as an entry or great room.
- You can tolerate some visible movement in the surface: Small waves, minor edge lines, or patch transitions often show up after paint.
- Your schedule has room for rework: Smooth ceiling finishing often takes more than one round of filling, sanding, touch-up, and repainting.
The trade-off is quality control. A ceiling is one of the hardest places in the house to make look flat because light rakes across it from windows, can lights, and fixtures. What feels smooth by hand can still look wavy from across the room.
When hiring a pro is the better call
Professional finishing is usually the smarter choice when the goal is a modern, clean ceiling that disappears instead of calling attention to itself. That matters most in open living areas, kitchens, hallways, and primary rooms where the ceiling ties the whole space together.
Hire a pro if any of these apply:
- You want a Level 5 style smooth finish: That level of work depends on consistent skim coating, tight repairs, proper sanding, and controlled priming.
- The room gets strong natural light: Portland homes with large windows expose every lap, ridge, and patch edge.
- The ceiling has existing problems: Water damage, loose tape, old patches, cracks, or sagging areas need repair before finish work starts.
- The room is occupied: Dust control, staging, and efficient sequencing matter a lot more when people are living in the home.
- The finish needs to help resale or turnover: Buyers and tenants notice overhead flaws fast, even if they cannot explain what looks off.
The main advantage is not just speed. It is consistency. A good drywall crew knows how to get the surface flat enough that primer and paint do their job instead of highlighting defects. That is the line between done and done right.
I tell homeowners this all the time. Removing the texture is only half the project. The finished look comes from the repair and skim work after removal, and that is the part that gets botched most often.
If your goal is to get rid of the popcorn, DIY may be enough. If your goal is a ceiling that looks like it was built smooth from the start, with no patch map, no flashing, and no visible waves under paint, professional finishing is usually the safer call.
Get Your Professional Ceiling Finish Today
A ceiling can look finished at a glance and still be wrong the moment daylight hits it. That is the part homeowners usually see after the crew is gone, the paint dries, and every patch edge, ripple, and sanding mark starts showing overhead.
If you are standing in that post-removal mess wondering whether to keep pushing through or hand it off, judge the ceiling by the finish you want, not by how much work you already put in. A true smooth ceiling has to read flat across the whole room, especially in Portland-area homes with big windows and shifting natural light. That takes more than getting the texture off. It takes careful repair, controlled skim work, proper priming, and paint applied over a surface that is ready for it.
That is where done and done right separate fast.
If the ceiling still needs repair, skim coating, priming, painting, or cleanup after a rough DIY attempt, bring in an experienced drywall contractor before you burn more weekends and materials chasing a finish that still looks patched. I have seen plenty of ceilings where the removal went fine, but the final result failed because the surface was never brought up to the standard the paint would expose. The goal is not just a ceiling that is passable from the doorway. The goal is a modern, paint-ready finish that looks smooth from every angle.
For homeowners in Hillsboro, Beaverton, Tigard, Lake Oswego, Gresham, Vancouver, and across the Portland area, the smartest next step is a quote with a real scope of work. That gives you a plan for the ceiling, any wall tie-ins, and the sequence needed to get the room back to clean and finished without more guesswork.
If you want a smooth, paint-ready ceiling without the dust, delays, and rework, contact CS1 Real Interiors. CS1 Real Interiors serves Portland and surrounding cities with professional drywall repair, drywall installation, interior painting, insulation, and metal stud framing for residential and small commercial projects.