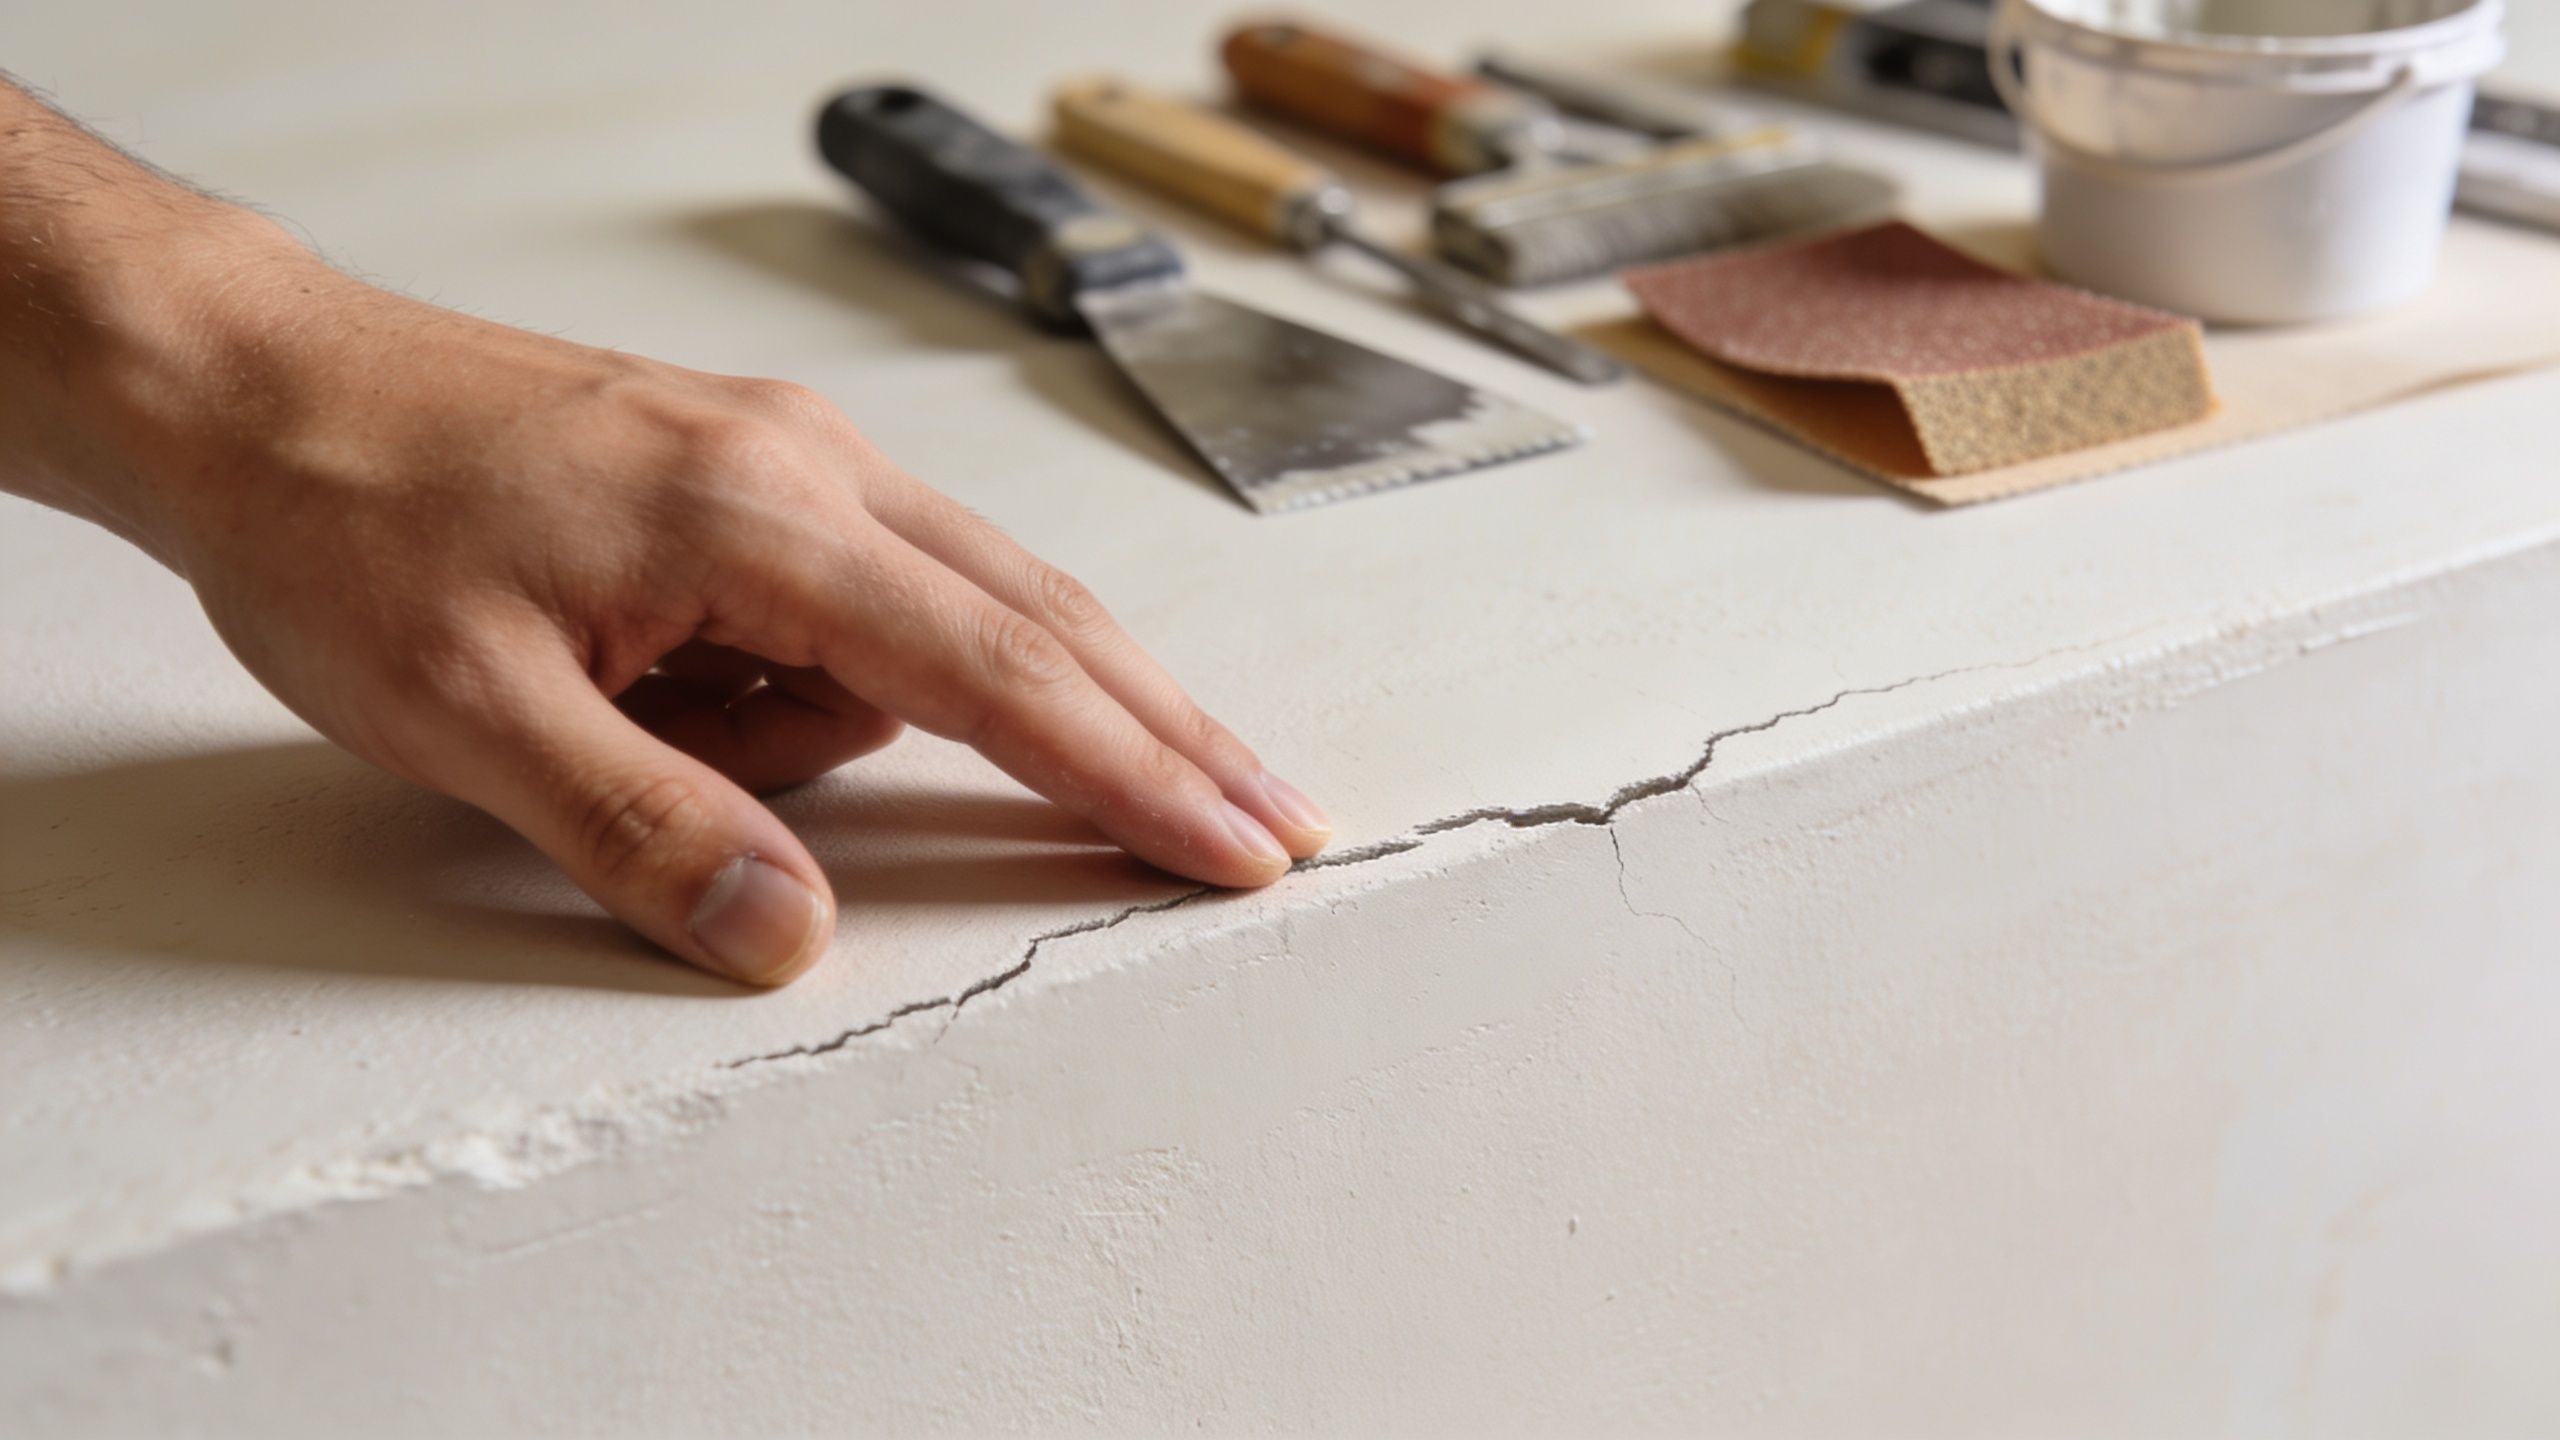
You noticed the crack weeks ago. Then the doorknob punched through the hallway wall, or a ceiling stain showed up after a long Portland rain, and now that “small problem” feels harder to ignore.
That’s how drywall repair usually starts. It rarely arrives as a planned project. It shows up as an annoyance, then turns into something you look at every day.
For homeowners in Portland, Beaverton, Hillsboro, Tigard, Lake Oswego, Gresham, and Vancouver, WA, drywall damage is common because homes age, remodels expose old work, and moisture finds weak spots. The drywall repair industry reflects that reality. The global drywall repair services market was valued at about $5.1 billion in 2023 and is projected to reach $10.22 billion by 2033, with part of that demand tied to older housing. The median age of owner-occupied homes in the U.S. reached 41 years in 2023 according to drywall repair market data from The Brainy Insights.
A lot of repairs are manageable if the damage is minor and dry. A lot are not. The trick is knowing the difference before you waste time, make more dust than progress, or cover up a leak that should’ve been opened and fixed properly.
Table of Contents
- That Hole in Your Wall Is Not Going to Fix Itself
- Assessing the Damage and Gathering Your Materials
- A Practical Guide to Fixing Small Holes and Cracks
- Handling Large Holes and Complex Structural Repairs
- The Professional Approach to Water Damage in the PNW
- Finishing Touches Your Guide to Texture Matching and Level 5 Finishes
That Hole in Your Wall Is Not Going to Fix Itself
Drywall damage usually falls into one of three buckets. Cosmetic wear, impact damage, or moisture-related failure. Each one needs a different response, and treating them the same is where people get in trouble.
A hairline crack above a doorway might be simple movement and normal settling. A soft, stained ceiling patch is a different conversation. A wall dent from furniture might take filler and sanding. A large hole near a switch box may need cutting, backing, taping, and a careful finish that won’t flash through paint.
Most drywall problems are ordinary, but they still need the right fix
Homeowners often assume drywall repair is either “super easy” or “major construction.” In reality, most jobs sit somewhere in the middle. The material is simple. The finish is not.
That’s especially true in older Portland-area homes. You might be patching over previous repairs, uneven framing, old texture, or walls that have seen years of seasonal movement.
A patch can be structurally sound and still look bad. That’s why so many repairs fail at the finishing stage.
There’s also the money side of the decision. Drywall repair cost ranges published by Mr. Handyman show average repairs ranging from $150 to $1,500, with small holes at $10 to $135, large holes at $60 to $225, cracks at $10 to $450, ceiling damage at $230 to $1,400, and water damage costing up to $1,550. That spread tells you something important. “Drywall repair” is not one job type.
A good repair solves more than the visible damage
A proper repair should do three things:
- Stabilize the area so the damage doesn’t reopen.
- Blend the surface so the patch doesn’t show after paint.
- Address the cause if the damage came from movement, moisture, or poor earlier work.
That last point matters most. If you skip it, you’re not repairing anything. You’re delaying the next repair.
If your wall or ceiling damage is tied to a remodel, rental turnover, interior repaint, or a larger room refresh, it often makes sense to handle the drywall and finish work together so everything is ready for primer and paint at the same time.
Assessing the Damage and Gathering Your Materials
Before you open a tub of compound, take five minutes and look closely at the damage. That’s time well spent.
Start with the cause, not the patch
A small repair is only small if the surrounding area is stable and dry. Check for these signs first:
- Clean, hard edges usually mean impact damage.
- Recurring cracks can point to framing movement, weak seams, or a previous bad patch.
- Brown stains, softness, or bubbling paint usually mean moisture.
- Damage near outlets or switches needs extra caution before cutting or probing.
In Portland and nearby cities, older houses bring another layer of caution. If the home has older paint layers or you’re sanding heavily during prep, be smart about dust control and containment. If you’re unsure what’s on the wall, don’t grind into it aggressively.
Practical rule: If drywall feels soft, smells musty, or stains keep coming back, don’t treat it like a cosmetic repair.
A quick homeowner check helps sort repairs into categories:
| Damage sign | Likely issue | DIY or pro |
|---|---|---|
| Tiny nail pop or pinhole | Cosmetic surface issue | Usually DIY |
| Short hairline crack with no movement | Minor seam or stress crack | Often DIY |
| Hole bigger than your hand | Impact damage needing support | Depends on skill |
| Ceiling sag, stain, or soft board | Water-related damage | Usually pro |
| Repeated crack in same location | Movement or weak backing | Better with pro diagnosis |
Basic materials that actually help
You don’t need a truck full of tools for minor drywall repair, but you do need the right ones.
A practical small-repair kit usually includes:
- Putty knives in more than one width so you can fill tight spots and feather wide.
- Joint compound or patching compound matched to the repair type.
- Drywall sanding sponge or fine sandpaper for controlled finish work.
- Utility knife for cleaning loose paper and trimming damaged edges.
- Dust mask and eye protection when sanding or cutting.
- Drop cloth and painter’s plastic to keep dust off floors and furniture.
For medium repairs, add a few more items:
- Drywall saw or oscillating cutter for clean openings.
- Tape measure and straightedge for square cuts.
- Mesh tape or paper tape depending on the repair.
- Screws and backing material when the patch needs support.
If the repair is part of a larger refresh, combining patch work with interior painting services usually gets a cleaner final result than touching up one small area in isolation. Drywall repairs often look “done” only after the wall is primed and painted across the full plane.
A Practical Guide to Fixing Small Holes and Cracks
Small drywall repair is where homeowners can save money and get decent results, as long as they stay within reason. A popped fastener, a minor dent, or a short crack can usually be fixed with patience more than strength.
The small repairs most homeowners can handle
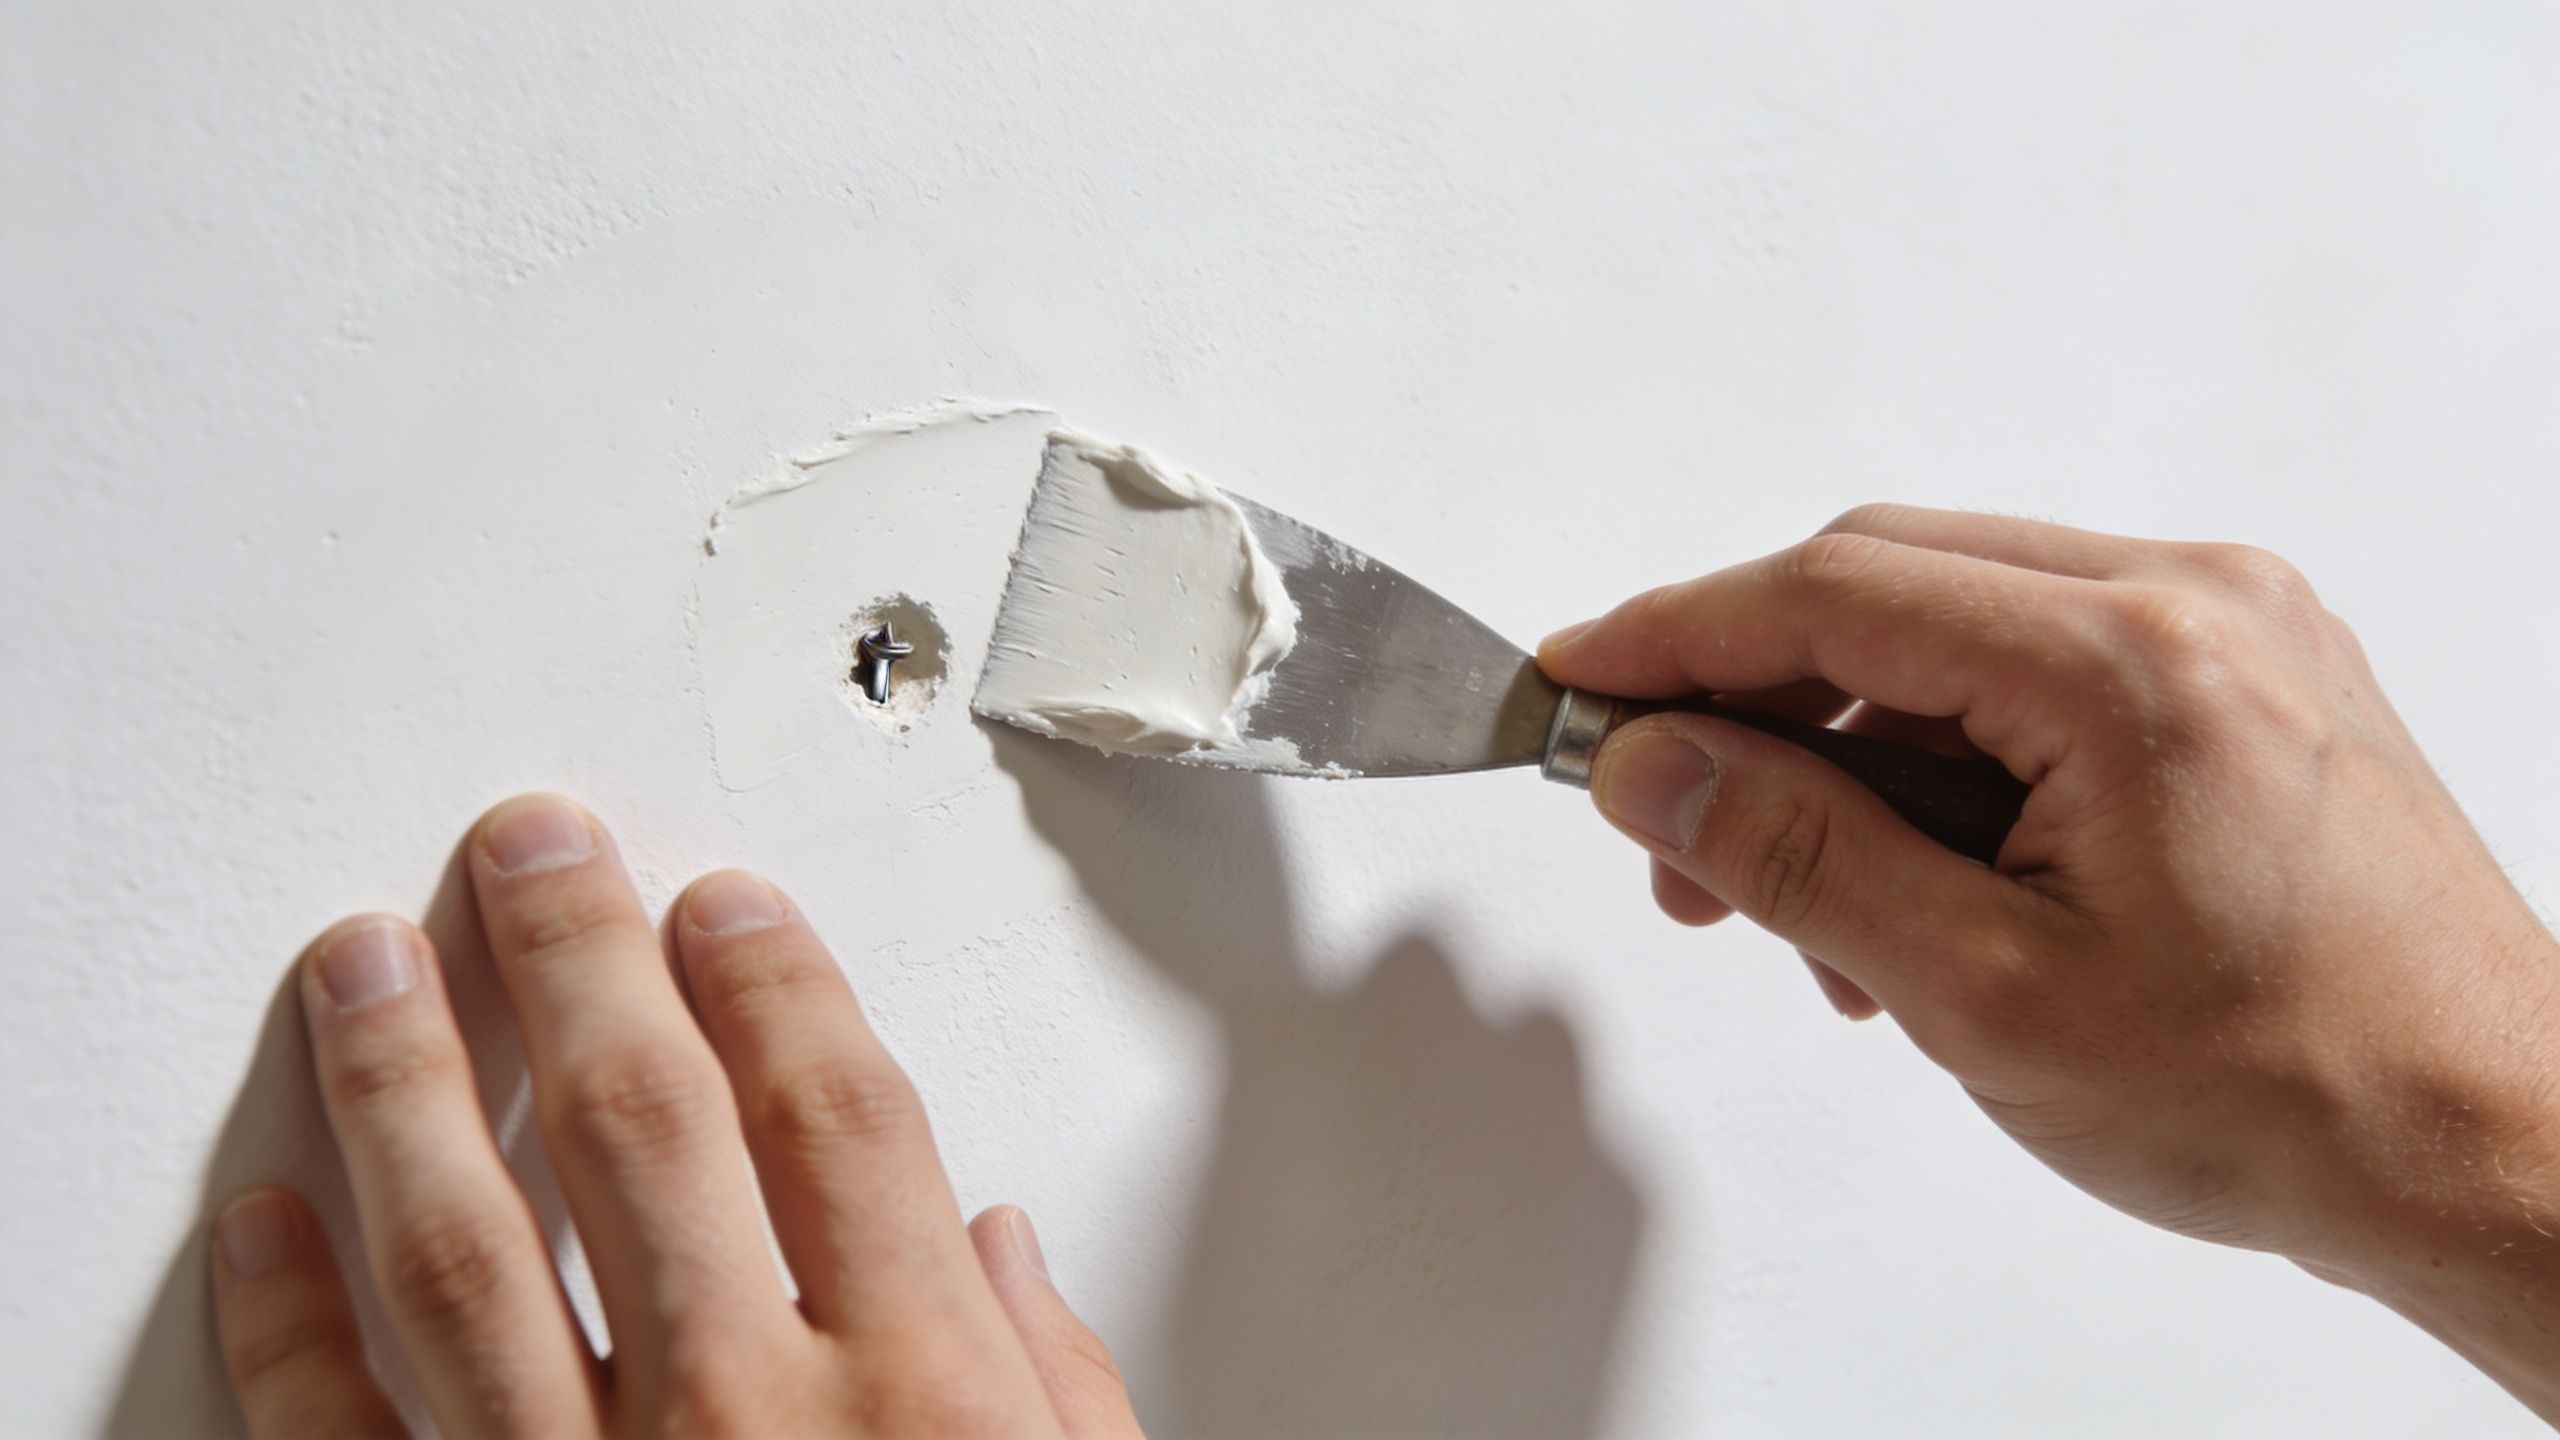
For nail pops, press lightly around the spot first. If the drywall surface is loose, remove any broken material, reset the area if needed, then apply compound in thin passes. Don’t leave a lump and expect sanding to solve it later.
For tiny holes, clean away loose paper first. Fill with a suitable patching material in thin layers, not one heavy blob. Thin coats dry more evenly and are easier to sand flat.
For minor cracks, widen the crack slightly only if loose material is present. That gives fresh compound a better bond. If the crack has movement behind it, simple filler alone may not hold.
A good sequence for small repairs looks like this:
- Clean the damage. Remove loose paper, crumbling compound, or raised edges.
- Apply a thin first coat. Push material firmly into the void.
- Let it dry fully. Rushing this step creates drag marks and shrinkage.
- Apply a wider second coat. Feather beyond the repair so the patch blends into the field of the wall.
- Sand lightly. You’re knocking down ridges, not reshaping the whole wall.
- Check under side light. Wall imperfections show up fast when light hits at an angle.
How to get a patch that disappears after paint
Most bad-looking repairs have one of two problems. The patch is too high, or the edges weren’t feathered far enough.
Use wider knife passes than you think you need. A repair the size of a coin may need a blended area much larger than the damage itself to disappear after paint.
The patch should get thinner as it moves outward. If you can feel a ridge with your fingertips, paint usually won’t hide it.
This is also where homeowners mix up spackle and joint compound. For a tiny fastener hole, light patching material can work fine. For a crack or a shallow wider repair, compound often gives a better blended finish because it feathers more smoothly.
Later in the process, this visual can help if you want to see the hand motion and pacing involved in a basic patch:
Common DIY mistakes on small repairs
- Over-sanding the wall face creates a dish around the patch.
- Applying thick coats leads to extra shrinkage and more sanding.
- Skipping primer before paint can leave a dull flashed spot.
- Touch-up painting only the patch often makes the repair more visible, not less.
If you’re repairing several small areas in one room, it’s often more efficient to patch everything first, sand once, prime repaired areas, and then paint the whole wall. That approach usually looks cleaner in bedrooms, hallways, stairwells, and living spaces.
Handling Large Holes and Complex Structural Repairs
A large hole is a different job. Once the damage gets beyond a small surface patch, the repair needs structure behind it. Otherwise the finish may crack, flex, or show a weak seam later.
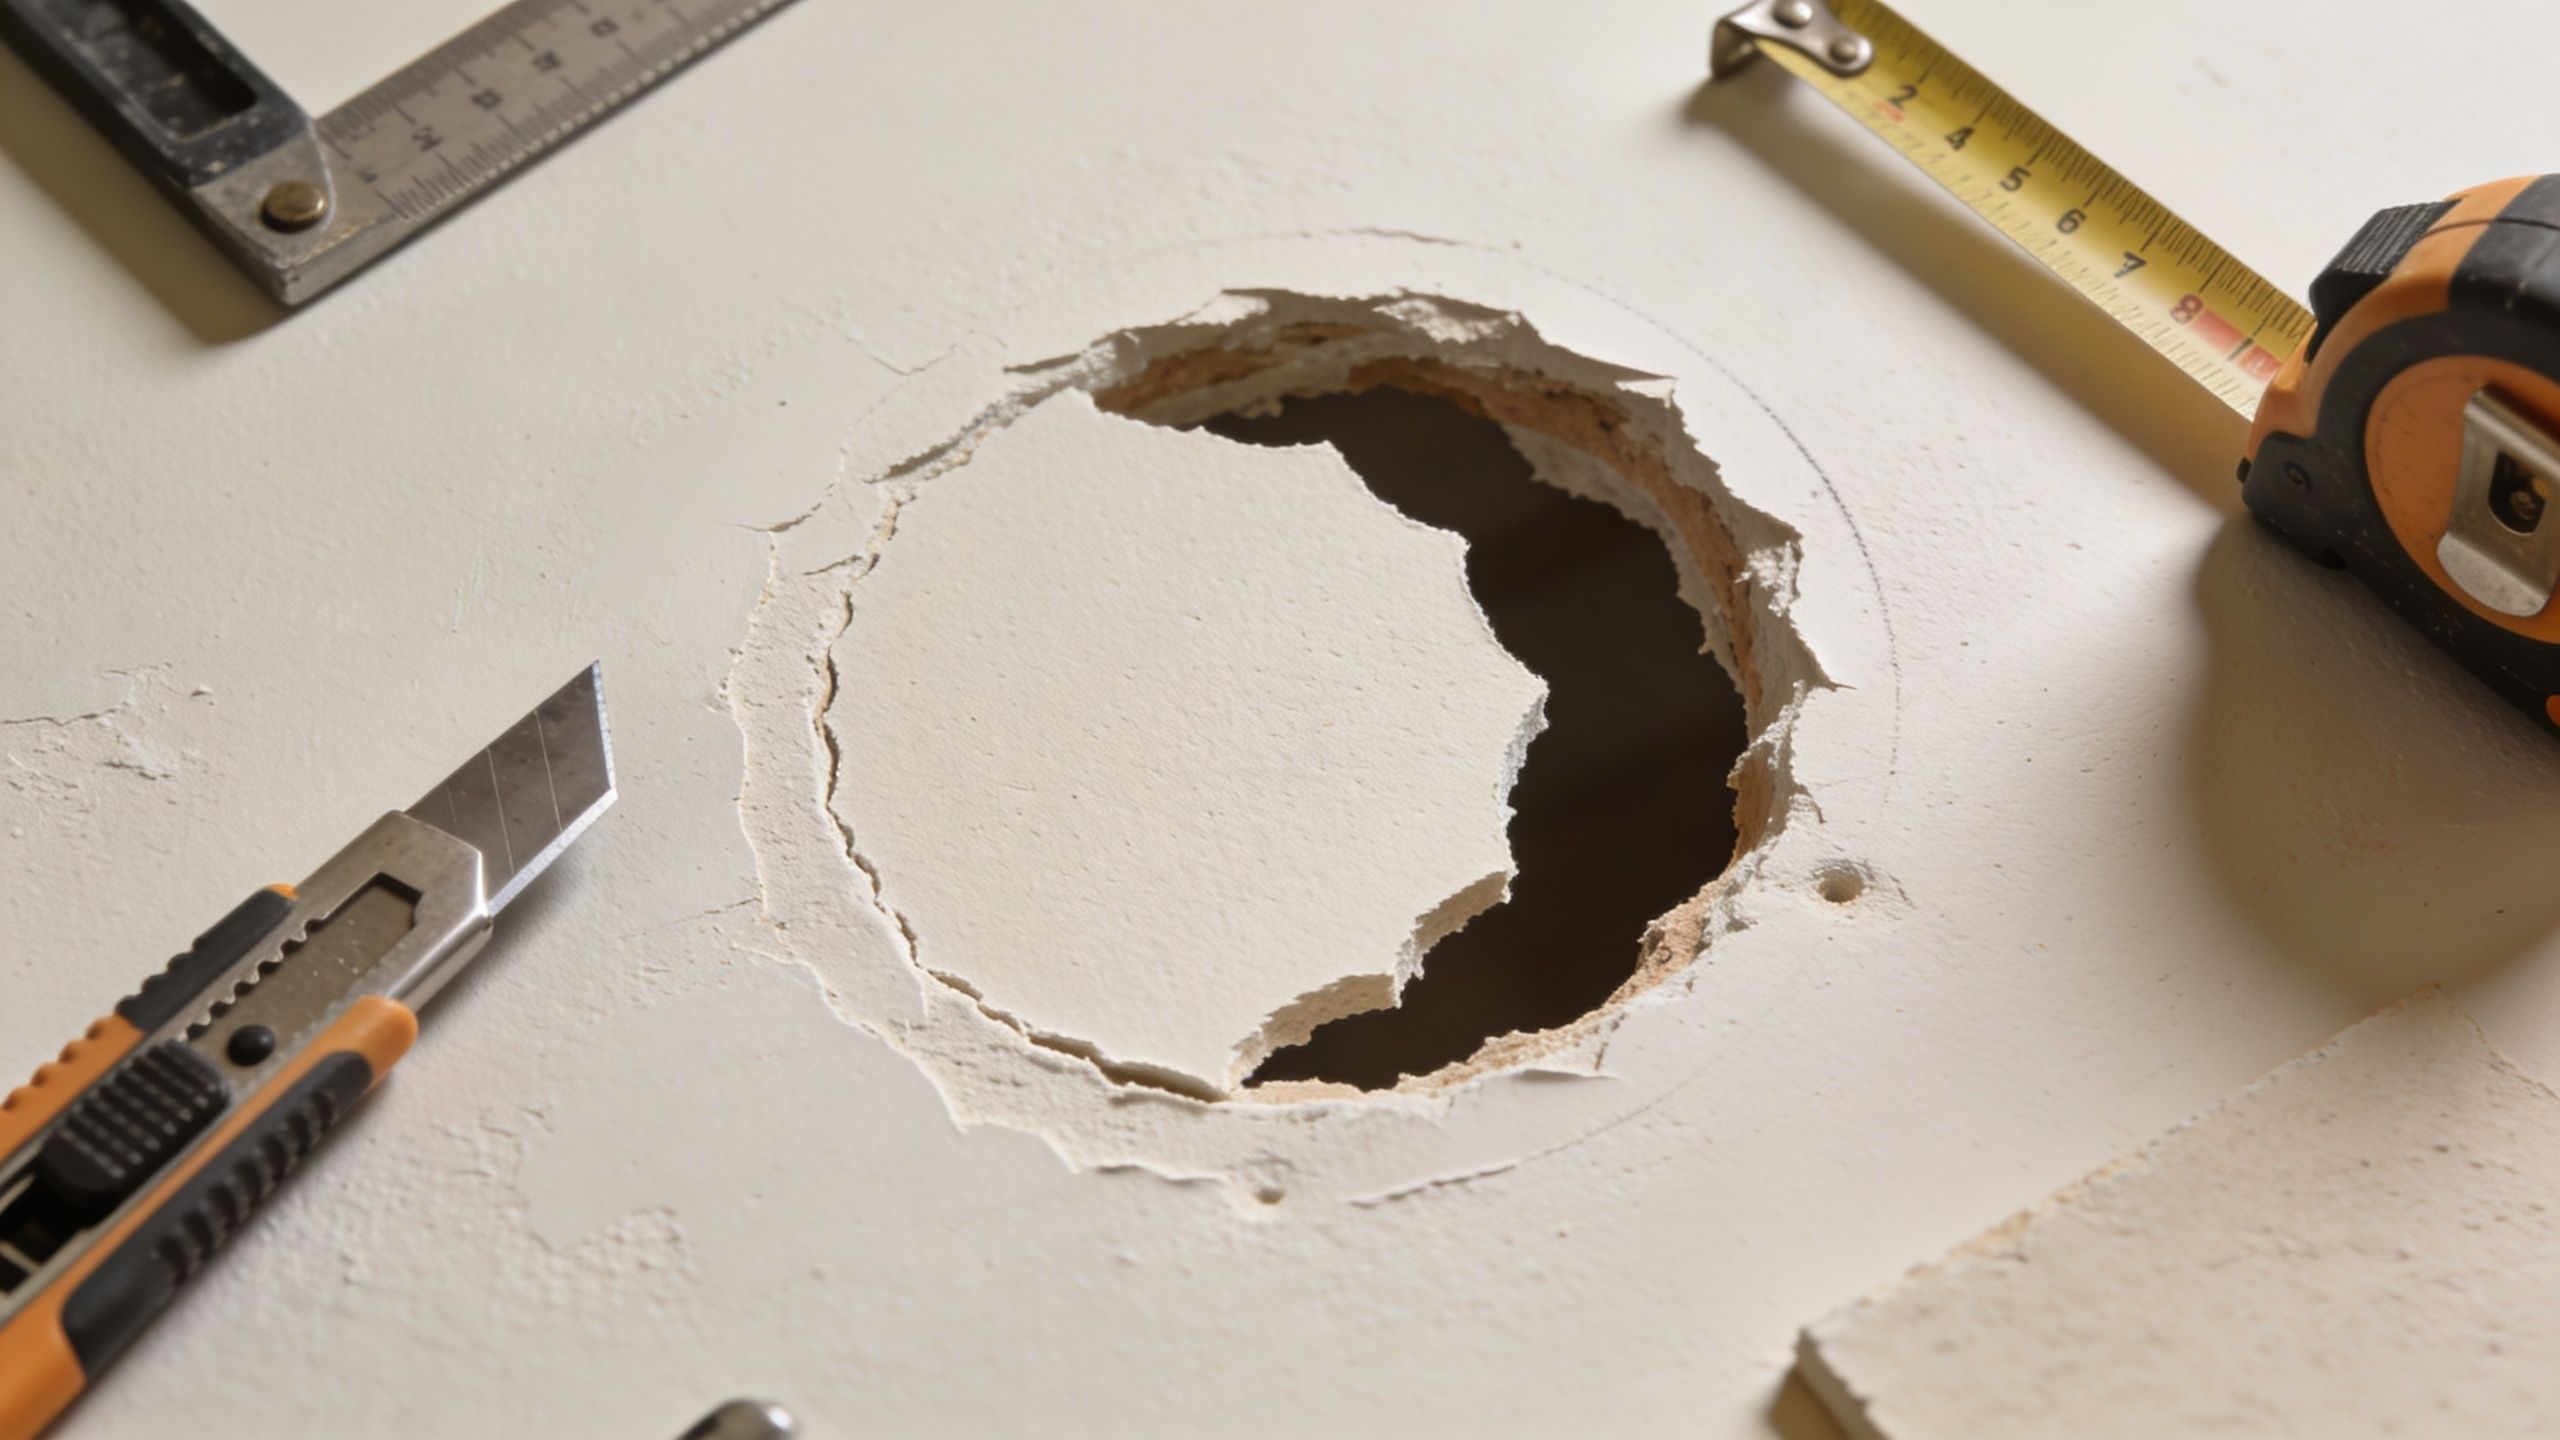
Why large holes need backing and support
For medium to large drywall holes, professionals commonly use a stud-anchored patch. The process involves cutting the damaged section to expose studs, securing a new drywall piece, taping the seams with self-adhesive fiberglass mesh, and applying multiple feathered coats of joint compound. Done properly, that method can achieve a success rate over 95% according to professional patching guidance from Home Depot.
That sounds straightforward, but the quality depends on execution. Clean cut lines matter. Patch thickness has to match the existing board. Screw placement matters. So does how far you feather the compound beyond the joint.
Here’s the trade-off in plain terms:
- Fast patch, minimal backing: quicker upfront, higher chance of cracking or visible edges.
- Proper cutout and anchored patch: more labor, better long-term stability.
- Ceiling repair with overhead finish work: harder to make invisible, especially under natural light.
A homeowner with patience can sometimes handle a large wall patch. Ceilings are much less forgiving. So are repairs near corners, cabinets, stairwells, and high-visibility entry areas.
When to stop and call for help
If you open the wall and find wiring, plumbing, damp insulation, or damaged framing, the repair just changed. The drywall is now the final step, not the first one.
This is also where it helps to work with a contractor who handles broader interior scope. Drywall repair services from CS1 Real Interiors cover patching, finishing, and integration with related interior work when a project is bigger than a single hole.
A large patch fails long before paint if the backing is weak or the opening wasn’t cut cleanly.
A few signs that the repair has moved out of DIY territory:
- The hole spans framing bays or lands near a stud edge
- The damage is overhead on a ceiling
- You need texture matching across a visible area
- There’s hidden water damage or prior patch material
- The wall finish needs to be paint-ready for a remodel or sale
Large drywall repair isn’t just about closing the opening. It’s about making the wall plane read as one surface again.
The Professional Approach to Water Damage in the PNW
You notice a brown ring on the ceiling after a week of Portland rain. The spot feels dry, so it is tempting to scrape, patch, and paint it that afternoon. That shortcut is why water-damage repairs fail so often.
In the Portland area, moisture hangs around longer than many homeowners expect. Older roofs, tired bath fans, crawlspace humidity, window leaks, and slow plumbing drips can keep a wall cavity damp well after the surface looks fine. By the time the stain shows, the drywall paper may already be weakened and the gypsum core may be soft.
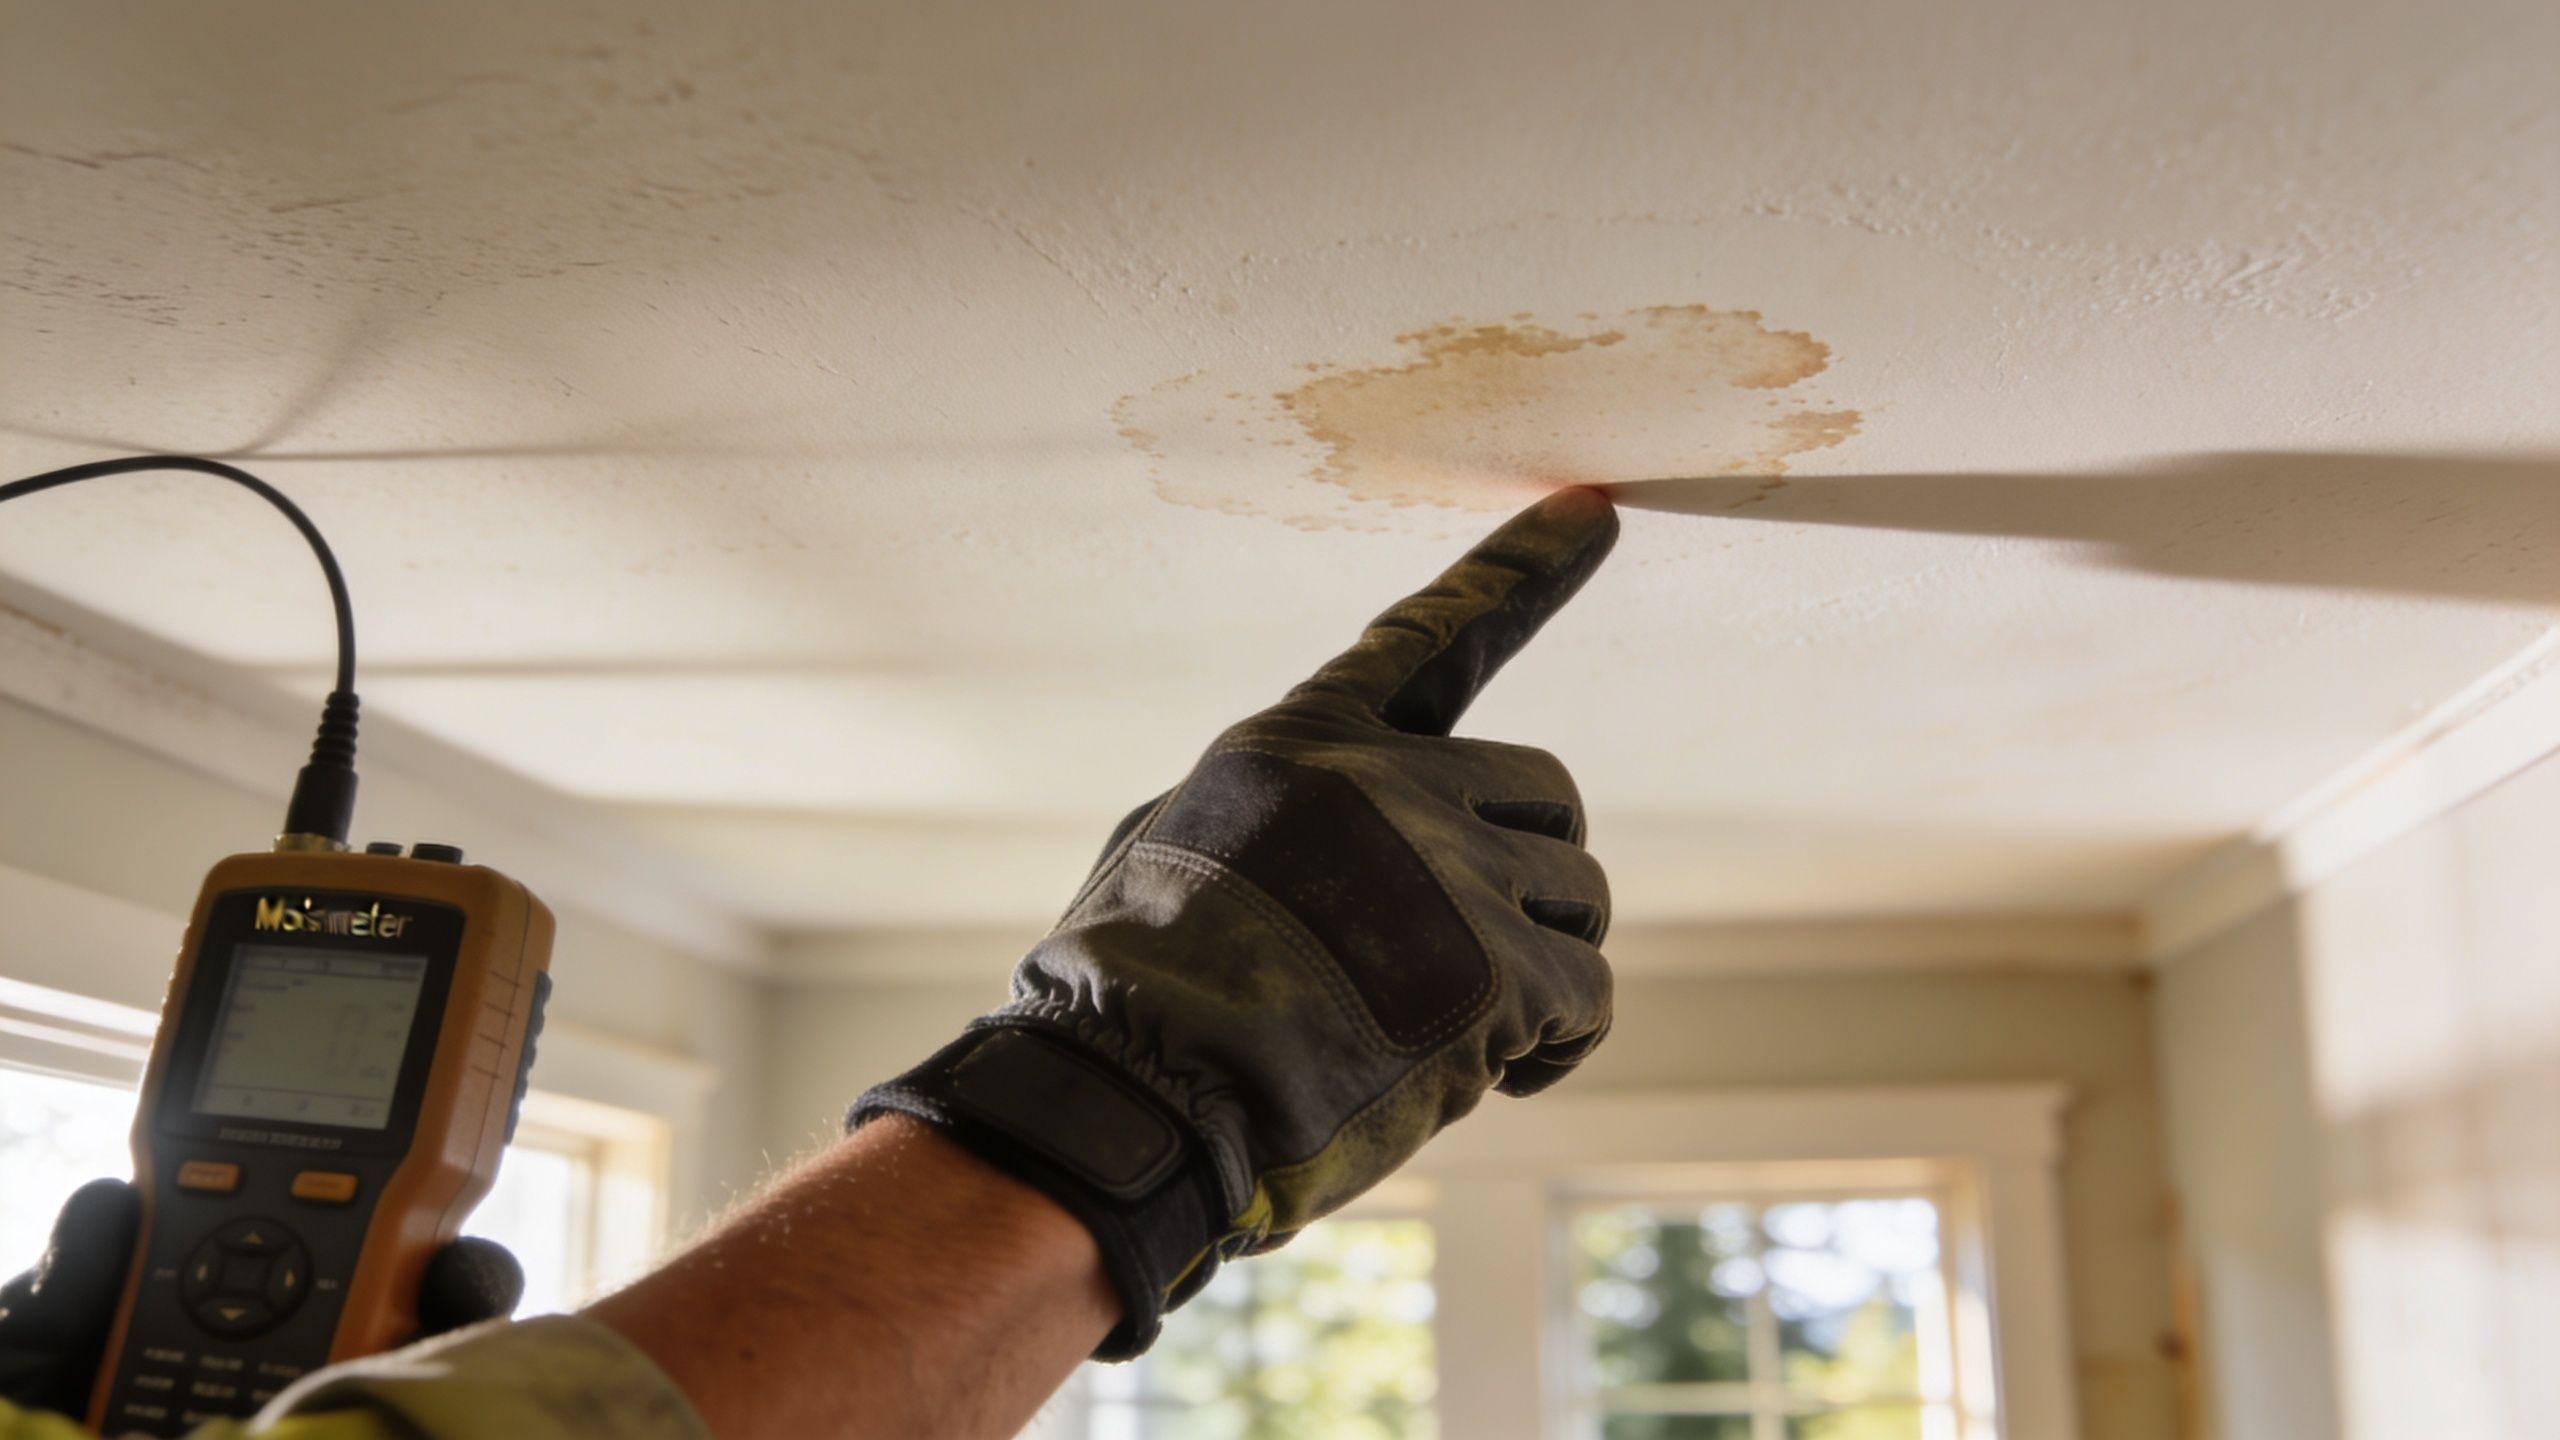
A stain is only a symptom
A painted-over stain can look better for a month and still hide an active problem. I see this a lot in bathrooms, top-floor ceilings, laundry rooms, and around older exterior windows. Surface repair alone does not solve trapped moisture, damp insulation, or staining that keeps bleeding through.
A sound repair starts behind the finish. The leak or moisture source has to be found first. Then the damaged drywall gets opened far enough to expose dry, solid material, the cavity gets dried, and only then does the patching begin.
That order matters in the PNW.
What a proper water-damage repair looks like
A professional repair usually follows this sequence:
- Identify the source of moisture. Roof leak, plumbing issue, failed caulk, poor venting, condensation, or exterior intrusion.
- Remove damaged drywall back to solid material. Stained paper, swollen edges, and soft board should not stay in place.
- Check the cavity. Insulation, framing, and nearby surfaces need to be dry before closing the wall or ceiling.
- Clean or treat exposed framing if needed. That step depends on what is found after opening the area.
- Install replacement board suited to the location. Bathrooms, laundry spaces, and other damp-prone areas may call for more moisture-resistant materials.
- Finish the patch fully. Tape, mud, sanding, stain-blocking primer, texture work, and paint all have to be done in the right order.
Homeowners often ask whether this is still a DIY job. Sometimes it is. If the leak is fixed, the drywall damage is limited, and the area is on a low-visibility wall, doing it yourself can save money. A small repair might cost less in materials than a service call, but it also costs time, cleanup, repeat trips for supplies, and the risk of sealing in moisture.
Ceilings shift that calculation fast. Overhead cutouts, hidden insulation, and stain bleed-through make them less forgiving. If the repair is above a finished room, near a bathroom fan, or below an active roof line, paying a local pro usually makes more sense than doing the patch twice.
If drywall got wet, the first question is why it got wet. Patching comes after that.
When the repair stops being simple
At that stage, homeowners often realize the job is larger than it looked from the floor.
Call for help if you find recurring staining, soft drywall, damp insulation, musty odor, sagging ceiling board, or damage that crosses a wide area. Those conditions point to a moisture problem first and a drywall problem second. In Portland homes, that is common after slow winter leaks or long-term bathroom humidity.
For homeowners in the city, the Portland service area page gives a clearer picture of where this kind of repair work commonly comes up.
Finishing Touches Your Guide to Texture Matching and Level 5 Finishes
A patch can be strong, flat, and still stand out from across the room. That usually comes down to finish quality.
Texture matching is where many repairs go from “good enough” to obvious. In Portland-area homes, you’ll see everything from smooth walls to orange peel, knockdown, hand-applied textures, and patched surfaces from older remodels. Matching the existing field takes pattern control, edge blending, and patience.
Texture matching is where many repairs fall apart
The challenge isn’t just applying texture. It’s applying the right amount, at the right spread, with a surrounding surface that was sanded and feathered correctly first.
Off-angle corners are another good example of why drywall finishing is a trade. A common but difficult challenge is repairing non-90-degree corners, especially in remodels. Pro forum discussion referenced in this source suggests 20% to 30% redo rates for these repairs in humid climates like Portland because of poor tape adhesion, and using flexible metal-reinforced beads can reduce callbacks by 40% according to the discussion summarized from this off-angle drywall repair source.
That lines up with what homeowners often experience. The corner may look fine at first, then a crack line appears after paint or seasonal humidity changes.
Smooth walls are unforgiving. The better the lighting, the better the finish work has to be.
When a Level 5 finish makes sense
A Level 5 finish is the highest drywall finish standard typically used for very smooth walls and ceilings. It makes the most sense in modern remodels, high-end rooms, and spaces with strong side lighting from large windows.
If you’re remodeling in Lake Oswego, updating a living room in Hillsboro, or preparing a home for sale in Beaverton, this matters because premium paint doesn’t hide poor prep. It often highlights it.
Here’s a practical way to think about cost and effort:
| Damage Type | Typical Cost Range | DIY Difficulty | Recommendation |
|---|---|---|---|
| Small holes | $10 to $135 | Low to moderate | DIY if the area is dry and isolated |
| Cracks | $10 to $450 | Moderate | DIY for minor stable cracks, hire help if recurring |
| Large holes | $60 to $225 | Moderate to high | Better for a pro if finish quality matters |
| Ceiling damage | $230 to $1,400 | High | Usually worth hiring out |
| Water damage | Up to $1,550 | High | Professional repair is the safer choice |
Those cost figures come from the earlier cited repair cost source. The recommendation is practical judgment based on repair complexity and finish risk.
If your project involves visible living areas, remodel prep, tenant improvements, or rooms that need smooth paint-ready walls, professional finishing usually pays off in appearance and time saved. That applies even more when the scope also includes interior painting, insulation, or framing changes in the same project.
If your walls or ceilings need more than a quick patch, CS1 Real Interiors can help with drywall repair, drywall installation, interior painting, insulation, and metal stud framing across Portland, Beaverton, Hillsboro, Tigard, Lake Oswego, Gresham, and Vancouver, WA. To get professional help and pricing for your project, request a free estimate through the CS1 contact form.