


You patch the hole, sand it smooth, and think you're almost done. Then the repair dries, you roll on paint, and the patch shows up anyway. The wall texture around it has a soft orange peel. Your patch is flat. Or your knockdown patch looks tighter than the rest of the room. On a ceiling, it's even worse because light catches every difference.
That's the point where a lot of Portland homeowners realize drywall repair isn't finished when the hole is closed. It's finished when the repair disappears. If you're trying to learn how to apply texture on drywall, that's the part that matters most. The actual spraying or hand texturing is only half the job. Matching what's already there is where DIY jobs usually go sideways, especially in older homes around Portland, Beaverton, Lake Oswego, and Vancouver where textures have aged, been repainted several times, or were applied by hand decades ago.
Table of Contents
- The Challenge of the Invisible Drywall Repair
- Prepping Your Walls for a Flawless Texture Finish
- Essential Tools and Materials for Drywall Texturing
- Applying Common Drywall Textures A Practical Guide
- Troubleshooting Common Drywall Texture Mistakes
- When to Call a Professional for Your Drywall Texture Project
The Challenge of the Invisible Drywall Repair
Most homeowners can get through a basic patch. Cut it clean. Screw in backing. Tape it. Mud it. Sand it. The repair feels solid, and from a few feet away it looks fine. Then you stand to the side, light hits the wall, and the patch reads like a square.
That's normal. Texture is what blends the repair into the surrounding surface.
The hard part is that texture matching is pattern-dependent. Small changes in hand pressure, spray distance, timing, or mud consistency can leave a repair visible after paint. That's the main problem homeowners run into, and it's why a small patch can turn into a larger cosmetic issue if the texture doesn't blend invisibly, as noted in this drywall texture matching guidance.
Why canned texture often disappoints
A lot of DIYers start with an aerosol texture can because it looks simple. Sometimes it works on a closet wall or a garage patch. In finished living areas, it often misses the mark. The spray pattern can be too fine, too heavy, or too uniform compared to the existing wall.
Older Portland homes add another wrinkle. Walls may have been repaired more than once. Paint builds up. Previous owners may have used different rollers, primers, or textures in different rooms. The result is a wall surface that isn't as predictable as a how-to video makes it seem.
Practical rule: New texture is easy. Matching old texture is the real trade skill.
What pros are actually solving
When a homeowner says, “I just need this patched,” what they usually mean is, “I need no one to notice where the damage was.” That's a different standard than getting mud on the wall.
A good texture repair has to do three things at once:
- Match the pattern: The new texture has to resemble the surrounding field, not just look acceptable on its own.
- Feather the transition: The eye catches edges first. If the repair stops abruptly, the patch shows.
- Hold up after paint: Some repairs look decent before primer and then flash or stand proud once painted.
That's why ceilings, large wall patches, and repairs in bright rooms are less forgiving. In many homes across Hillsboro and Tigard, the texture itself isn't complicated. The blend line is.
Prepping Your Walls for a Flawless Texture Finish
A repair can look fine right up until texture goes on. Then every ridge, dusty edge, and unsealed patch shows itself. Prep is where a lot of DIY texture jobs get lost, especially when the goal is to blend into an existing wall instead of putting fresh texture on new drywall.
Why prep decides the final look
Texture does not correct a bad patch. It highlights one.
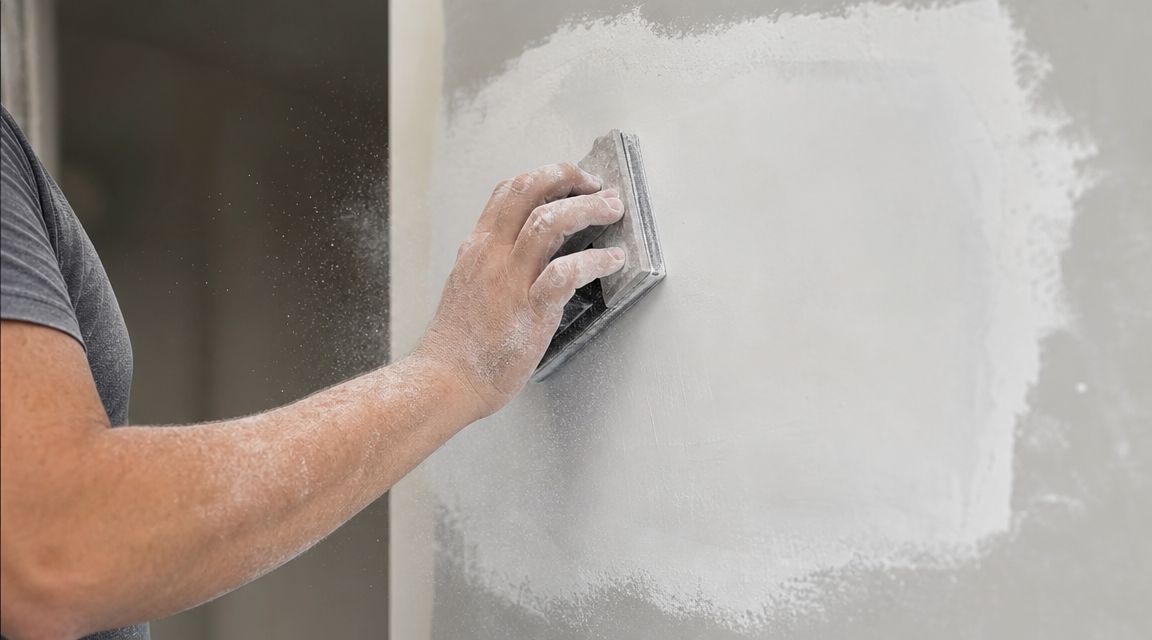
Repairs have mixed surfaces. You may have joint compound, exposed paper, old paint, and a little fuzzed drywall face all in the same spot. If those areas are not cleaned, dried, and primed, the texture material pulls in unevenly and the patch starts to stand out after paint.
That problem gets worse on walls you see in raking light. A hallway, stairwell, or living room wall near a window will show defects that looked minor during sanding. In Portland-area homes, moisture and temperature also slow things down more than DIYers expect. A patch that feels dry on top can still be soft underneath, and spraying or rolling texture over it usually creates extra sanding later.
The hard truth is simple. If you are trying to match an existing texture, prep is part of the match.
A prep sequence that gives you a fair shot
Use a consistent order and do not skip steps because the repair looks close enough.
Flatten the patch
Sand off lap marks, knife lines, and proud edges until the repair feels level by hand. Run your palm across the patch and the surrounding wall. If you can feel the transition now, you will probably see it after texture and paint.Clean off the dust
Vacuum or wipe the area so dry dust does not mix into the texture or weaken adhesion. If the surrounding painted wall needs cleaning before you start, this Neat Hive Cleaning residential wall guide covers safe wall-cleaning basics.Check for moisture
This matters after leaks, bathroom humidity, or recent patching. Texture over a damp repair often dries blotchy, softens the surface, or causes peeling paint later.Prime the repair and a little beyond it
Primer helps equalize how the surface absorbs moisture from the texture material. On repair work, that step often makes the difference between a patch that blends reasonably well and one that flashes through the final coat.
Where DIY prep usually goes sideways
Homeowners often over-sand the center and ignore the perimeter. The eye catches the edge of a repair first, so the feathered transition matters more than polishing the middle. Another common mistake is wiping too aggressively after sanding and raising the paper face, which creates a rough halo around the patch.
Keep the surface flat, clean, dry, and sealed. That is the target.
If the repair is large, on a ceiling, or in a room with strong natural light, be realistic before you start texturing. Those are the jobs where matching the surrounding texture gets hard fast, and a failed attempt usually means scraping it back, re-priming, and doing the whole area again.
Essential Tools and Materials for Drywall Texturing
A lot of DIY texture jobs fail before the mud ever hits the wall. The problem is usually setup. Homeowners buy a few tools, skip the test surface, and assume the pattern will somehow match what is already in the room. It rarely works that way.
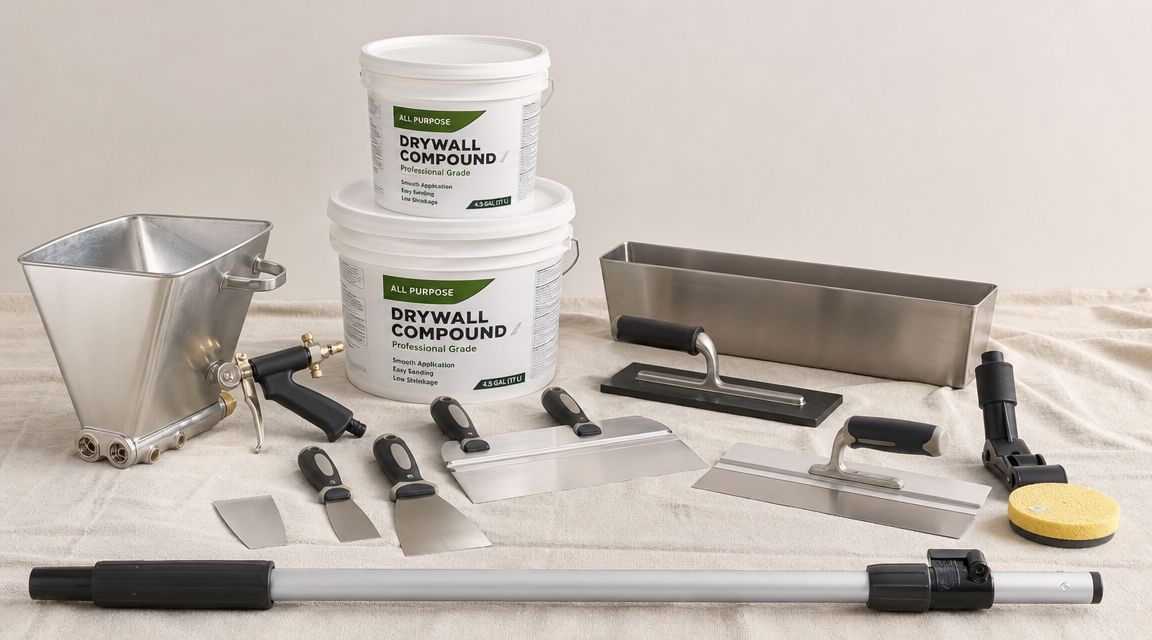
The right tool set depends on the texture you are trying to copy. On repair work, matching the existing pattern is harder than applying a fresh one on new drywall. That is why professionals spend so much time on sample boards, nozzle settings, mud thickness, and timing. If you cannot identify the existing texture with confidence, buying tools first can turn into wasted money fast.
What you need depends on the texture
For spray textures such as orange peel and knockdown, use a hopper gun, a steady air supply, clean buckets, a mixing paddle, and a large scrap surface for testing. A spray texture only looks consistent when the mud thickness, air flow, and hand speed stay consistent from start to finish. On bigger areas, mix enough material at once to avoid a pattern shift halfway across the wall.
For hand-applied textures, keep a different set of tools ready. Taping knives, a mud pan or hawk, finishing trowels, and texture brushes or sponges cover most patterns. Some textures depend more on hand motion than the tool itself. A slap brush, crows foot brush, or trowel can all leave very different marks depending on pressure, angle, and timing.
For small patch work, the support items matter as much as the application tools:
- Drop cloths and plastic protection: Overspray and splatter spread farther than homeowners expect, especially on ceilings and in rooms with hard flooring.
- Eye and dust protection: Dry sanding dust gets everywhere, and sprayed texture hangs in the air longer than people expect.
- A test board: Scrap drywall is better than cardboard if you are trying to match an existing wall texture, because it absorbs moisture more like the actual surface.
- A good work light: Side lighting exposes pattern differences that disappear under normal room light until the paint dries.
Materials that affect the final match
Joint compound is forgiving in some ways and unforgiving in others. You can use powdered or ready-mixed mud, but the mix has to suit the application method. Spray texture needs a mix that will atomize cleanly. Hand-applied texture needs a mix that holds shape without tearing or dragging.
A few material habits separate a decent result from a patch that keeps catching your eye:
- Use clean water and clean buckets: Dried chunks in the mix will clog spray equipment and leave bumps in hand-applied texture.
- Use fresh compound: Old mud gets lumpy, skins over faster, and makes the pattern less predictable.
- Keep the mix consistent for the whole repair: If you stop and remix by guesswork, the second batch often lands heavier or flatter than the first.
- Have primer ready for the repaired area: Texture dries differently over bare patching compound than it does over a sealed surface.
If the mix changes, the wall shows it.
That is the primary trade-off with DIY texturing. The tools are not always expensive, but getting a repair to disappear takes control over several small variables at once. On a closet wall, that is manageable. On a ceiling patch in a bright living room, one bad test pass can leave you scraping off wet mud and starting over.
A realistic call before you buy everything
If you are working on a visible patch, an older wall with a hard-to-read texture, or a ceiling that catches daylight, pause before buying a pile of tools you may use once. Those are the jobs where texture matching usually beats DIY confidence.
CS1 Real Interiors is one local option for homeowners in the Portland metro who want the texture matched by a contractor who also handles painting, insulation, and framing work.
Applying Common Drywall Textures A Practical Guide
Most drywall texture falls into a few repeatable families. Spray texture for orange peel. Spray then flatten for knockdown. Hand-applied movement for skip trowel and related finishes. The technique changes, but the same rule applies every time. Test first, then commit.
Orange peel
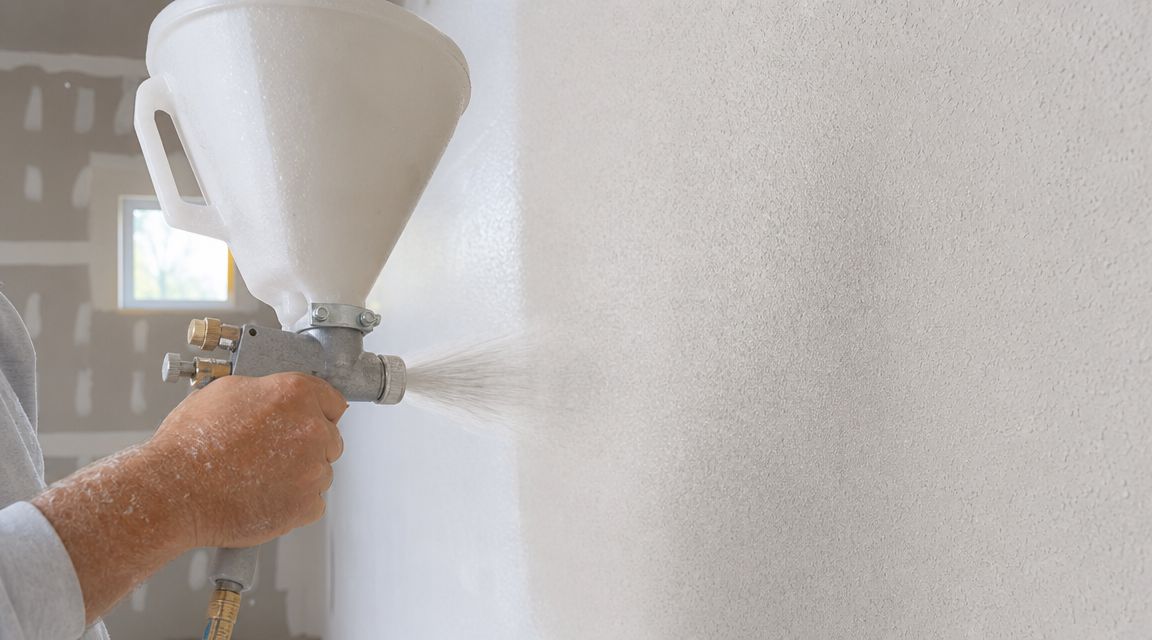
Orange peel is one of the most common textures because it's fast to apply and forgiving compared to a smooth wall. It's a sprayed finish, and the final look depends on mud consistency, air delivery, and how far you hold the nozzle from the surface.
A workable approach is to mix the compound until it sprays cleanly and forms a fine, even pattern. Instructional material often describes general texture mud as similar to thick pancake batter, and orange peel walkthroughs also recommend testing the pattern before touching the wall so you can dial in spray distance and atomization using a hopper gun and compressor.
A few technique points matter:
- Keep your distance consistent: One instructional reference notes orange peel can be sprayed from about half a meter away or more, which shows how much the final pattern depends on spacing.
- Move your hand evenly: Hesitating in one spot creates heavier blobs.
- Overlap lightly: Heavy passes stack texture too fast and create obvious patches.
Orange peel is often the safest DIY texture because you aren't trying to flatten it afterward. Still, matching an existing wall is harder than creating a fresh uniform finish on new drywall.
Knockdown
Knockdown starts with a sprayed or applied mud pattern, then you flatten the peaks after partial drying. A lot of repairs go wrong at this point because timing matters more than people expect.
For spray application, a practical field benchmark is to keep the nozzle roughly 12 to 18 inches from the wall and test the pattern before spraying the actual surface. For the knockdown step, the texture should be flattened when it has hazed over but hasn't fully hardened, typically 10 to 15 minutes after spraying depending on temperature, humidity, and coat thickness, according to this knockdown timing guide.
If you knock it down too early, the texture smears. If you wait too long, the knife tears the surface instead of flattening it.
Field note: Knockdown is less about force than timing. Light, even pressure works better than pressing hard.
Use a broad knife or knockdown blade and keep it clean. Wipe the edge often so dried buildup doesn't leave drag marks or ridges.
Here's a helpful visual if you want to see spray texture application in action before trying it on your own wall:
Skip trowel and hand-applied texture
Skip trowel gives you a more hand-crafted look. It's common in some remodels, and it can work well when a room already has that style. It's not my first recommendation for a beginner trying to patch a small area because the pattern depends heavily on hand rhythm.
The basic method is to load a trowel lightly and skip it across the wall so the mud catches in broken areas instead of covering the surface fully. The wrist motion matters. Too flat and you smear the mud. Too steep and you leave hard edges.
This type of texture works best when:
- The room already has hand variation: A perfect machine-like patch usually looks wrong beside it.
- You can practice first: Hand texture improves after a few test passes.
- You're willing to sand and redo small sections: That's part of the process.
Practice before the real wall
If you're learning how to apply texture on drywall, don't make the finish wall your first attempt. Use a scrap piece of drywall, an offcut, or even a protected test area in a garage.
Watch for these things on your sample:
| Check | What you're looking for |
|---|---|
| Pattern size | Does it resemble the surrounding wall, or is it too tight or too heavy? |
| Edge blend | Can you feather it out, or does the patch stop abruptly? |
| Drying behavior | Does the mud hold shape, or does it sag and flatten? |
| Paint response | After primer, does the texture still look believable? |
In remodel work around Portland and Beaverton, testing saves more time than it costs. Texture isn't just about making a wall rougher. It's about making the repair disappear.
Troubleshooting Common Drywall Texture Mistakes
Most texture failures come from a short list of causes. Bad prep. Inconsistent mix. Wrong timing. Too much confidence after one decent-looking test patch. The fix depends on knowing which one you're dealing with.
When the pattern looks wrong
If the texture is too fine, the mud is often too thin, the spray pattern is too tight, or you're too far from the wall for the look you're trying to match. If it's too heavy, you may be dwelling too long in one area or using a mix that's too thick for the setup.
The first question to ask is simple. Does the texture look wrong everywhere, or only in the repair? If it's only the repair, your issue is usually matching. If it's across the entire area, your setup is off.
Try this sequence:
- Stop and let it dry fully: Wet texture is hard to judge accurately.
- Sand down the high offenders: Don't attack the whole wall if only a few spots are bad.
- Adjust one variable at a time: Change mix, distance, or pressure. Don't change everything at once.
When the texture won't behave
Sometimes the mud starts drying too fast. That's common in warm rooms, on thirsty surfaces, or when the patch wasn't primed evenly. You'll see dragging, poor atomization, or a skin forming before you can shape the pattern.
Other times knockdown smears instead of flattening. That usually means you started too early, pressed too hard, or let wet material build up on the knife.
If the knife leaves broad smears, stop. Clean the blade, wait a little longer, and test again in a less visible area.
Peeling or flaking texture points back to the wall surface more than the tool. If the base was dusty, glossy, damp, or unprimed, the texture may not bond uniformly. That's why surface prep causes so many failures. By the time the finish lets go, the actual mistake happened earlier.
When the repair still shows after paint
This is the most frustrating one because the job looked acceptable before paint. Then the sheen changes, side lighting hits the wall, and the patch pops out.
At that point, one of three things is usually happening:
- The texture pattern is different
- The patch is slightly proud or shallow
- The repaired area absorbed paint differently than the field
Small mismatches can sometimes be improved by sanding the transition, spot-priming, and retexturing a broader area so the blend isn't concentrated in one obvious square. Large mismatches often need to be widened, skimmed, or fully redone.
That's also why a “small repair” can turn into a larger wall section. The goal isn't saving the original patch at all costs. The goal is getting the wall to read as one surface again.
When to Call a Professional for Your Drywall Texture Project
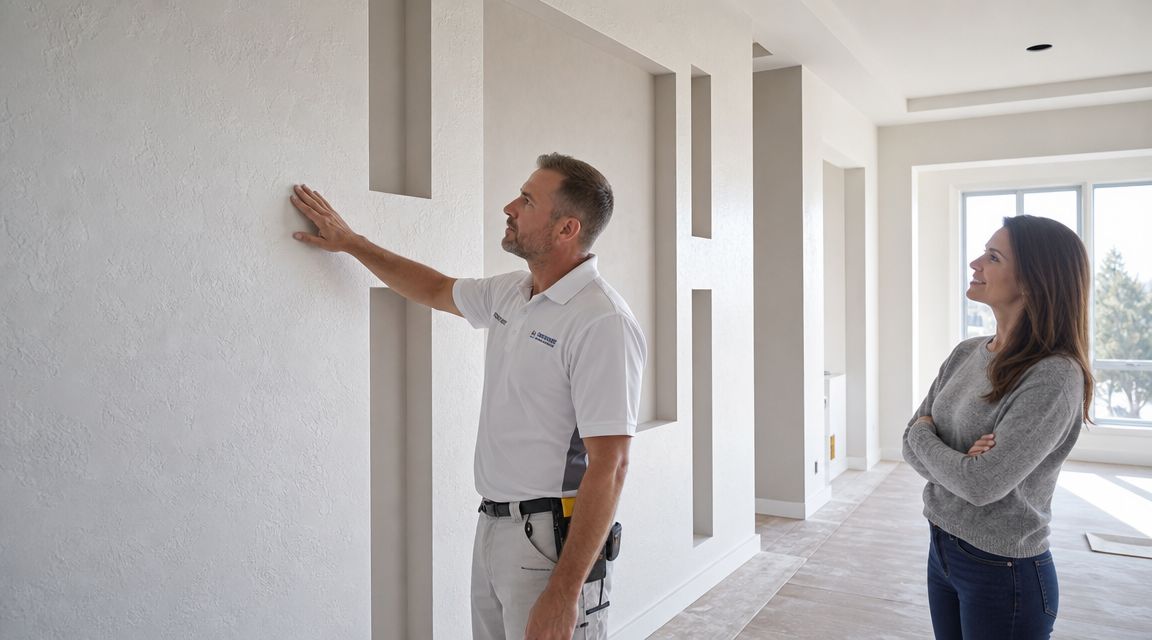
There's nothing wrong with doing your own texture work when the stakes are low. A laundry room, garage wall, or hidden patch is a reasonable place to learn. A bright entry wall, a ceiling repair, or a visible water-damage patch in a main living area is different.
Jobs that usually stop being good DIY projects
Some texture situations are less forgiving.
- Ceiling repairs: Gravity works against you, overspray spreads everywhere, and light from windows makes flaws obvious.
- Water-damaged areas: The texture issue is only part of the job. The substrate, staining, and repainting often need attention too.
- Older texture matching: Homes in Portland, Beaverton, and Lake Oswego often have aged finishes that don't respond like fresh drywall.
- Large open walls: Pattern drift becomes visible across broad surfaces.
- High-end smooth or near-smooth finishes: If the room really needs a refined finish, a patch texture approach may be the wrong strategy entirely.
Homeowners also underestimate how often one repair leads to adjacent work. A patch might need corner touch-up, repainting of the full wall, or skim work beyond the original damage. That's especially common before listing a home or finishing a remodel.
If you're comparing contractor options in the area, these Growth 4 Trades' local builder insights can help you think through what to look for in a local construction partner.
What professional help changes
A pro doesn't just bring tools. A pro shortens the trial-and-error cycle.
That matters when you need:
- A true blend instead of a close-enough patch
- A repaired wall that's ready for paint
- A crew that can handle drywall, painting, insulation, or framing in one project
- A cleaner process for occupied homes or active commercial spaces
For homeowners in Portland and nearby cities, it also helps to work with a contractor who regularly handles the kinds of issues that trigger texture work in the first place. Leak repairs. Remodel openings. Settlement cracks. Rental turnovers. Builder punch work. If your project is in the metro area, it's worth reviewing the local service area for drywall contractor work in Portland before you decide whether to patch one room or address a bigger finish problem properly.
If you already know the repair needs to disappear, not just get covered, that's usually your answer. The more visible the location, the less forgiving DIY texture becomes.
If your wall or ceiling repair needs to blend cleanly, request a free estimate from CS1 Real Interiors through the contact form. We help homeowners, property managers, and small commercial clients across Portland, Beaverton, Hillsboro, Tigard, Lake Oswego, Gresham, and Vancouver WA with drywall repair, drywall installation, texture matching, interior painting, insulation, and metal stud framing. Contact CS1 Real Interiors to get professional help before a small texture problem turns into a bigger finish issue.


