You fix a hole, sand it smooth, spray some texture, paint it, and then the patch still flashes at you every time light hits the wall. That's the part most homeowners in Portland, Beaverton, and Gresham run into with knockdown. The repair itself may be solid. The texture match is what gives it away.
Knockdown became common because it's easier to visually blend than a perfectly smooth wall, but that same irregular look is what makes it difficult to copy cleanly. The finish changes based on timing, pressure, and tool angle, which is why texture matching frustrates so many capable DIYers (Texture Master on matching knockdown texture). If you're trying to learn how to match knockdown texture, you're really learning a mix of craft, patience, and restraint.
Around the Portland metro, a lot of texture repairs start with something else. A plumbing leak. A moved outlet. A patched ceiling after electrical work. If the damage came from moisture, it's worth reviewing how to spot hidden water damage before you worry about the finish. Texture should always be the last part of the repair, not the first thing you chase.
Table of Contents
- The Challenge of the Invisible Drywall Repair
- Flawless Preparation for a Smooth Texture Match
- Choosing Your Tools and Mixing the Compound
- Mastering the Apply and Knockdown Technique
- Pro Tips for a Truly Invisible Finish
- Troubleshooting and When to Call a Professional
The Challenge of the Invisible Drywall Repair
A knockdown patch usually looks fine when it's wet. Problems show up after it dries, after primer, or worse, after final paint. Then you notice the patch is too flat, too sharp, too dense, or sitting in a hard-edged square that your eye catches from across the room.
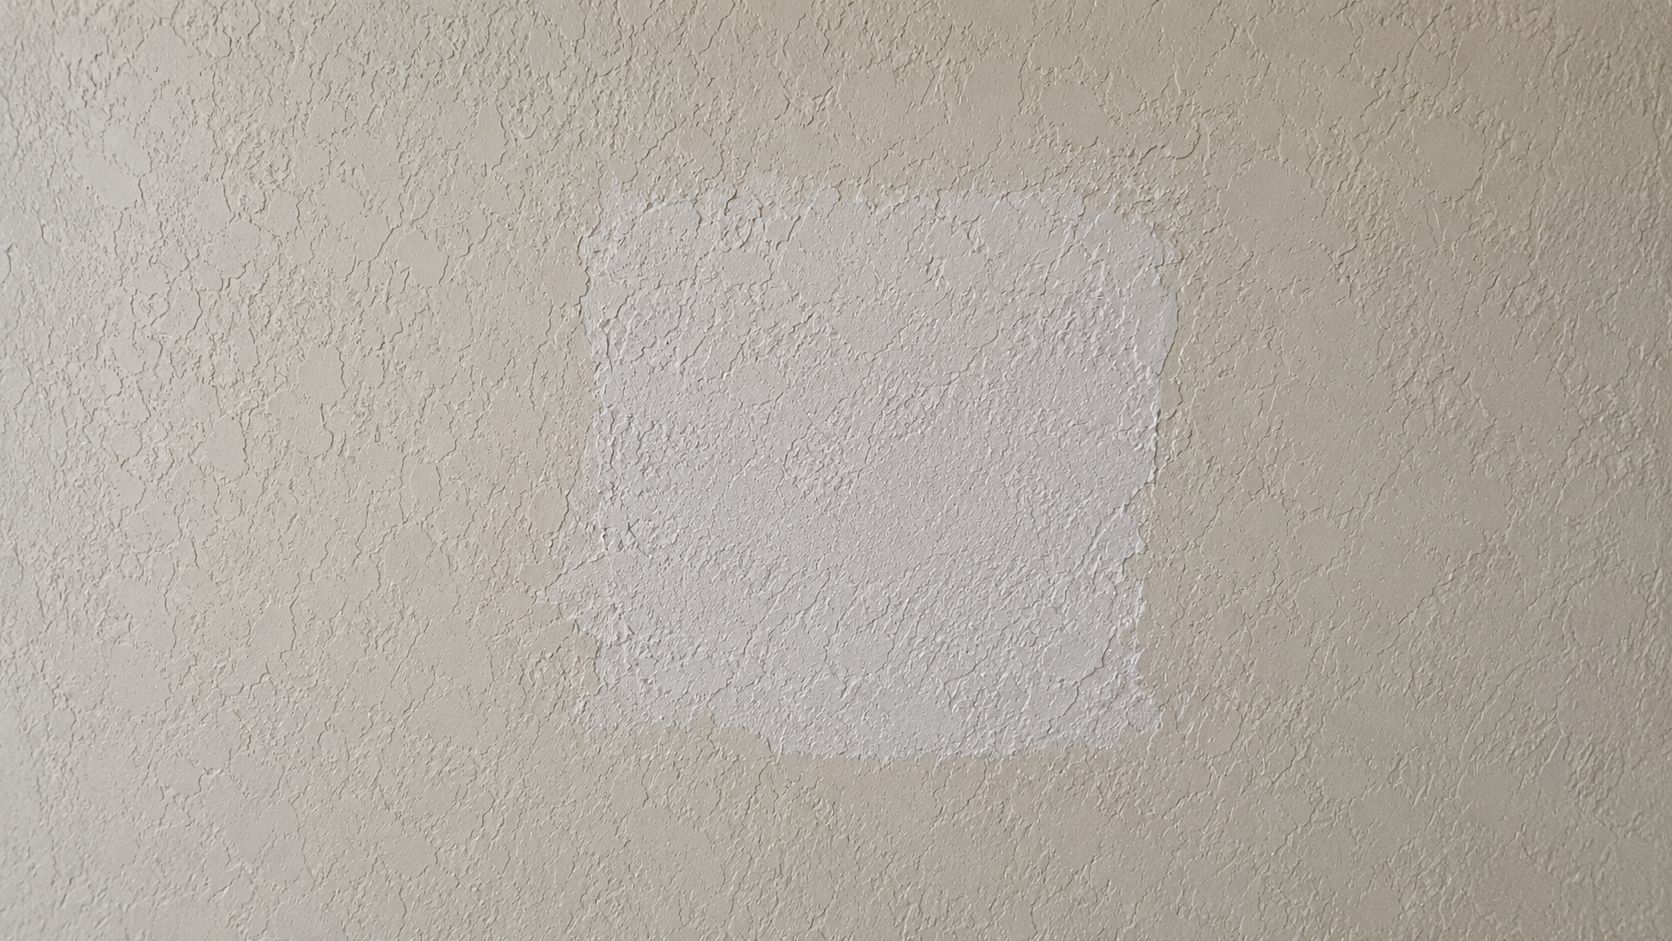
That's why I tell homeowners to stop thinking of knockdown as “random.” It isn't random once it's on the wall. Existing texture has a pattern, a height, a spread, and a rhythm. Even older tract homes in Hillsboro or unit turns in Tigard often have a consistent look room to room. If your patch doesn't follow that look, it won't disappear.
Why knockdown helps and hurts
Knockdown is popular because it hides minor repair history better than a smooth wall. Small imperfections don't stand out the same way they do on a flat finish. That makes it practical for remodels, patch work, and turnovers where a clean blend matters.
Practical rule: Knockdown forgives small surface flaws, but it does not forgive bad technique.
The hard part is that a good match depends on tiny decisions. How wet the mud is. How high the splatter stands. How long you wait. How hard you drag the knife. Those aren't details you can brute-force after the fact.
Why capable DIYers still struggle
Most failed repairs don't fail because the homeowner didn't care. They fail because texture matching is a judgment skill. You're trying to replicate something that was originally applied under different conditions, with a different hand, and then painted over for years.
A small patch on a bedroom wall is one thing. A ceiling repair in Lake Oswego with side light from big windows is another. Ceilings are less forgiving because shadows reveal every ridge and flat spot.
If the damage is just a small puncture or doorknob hit, a basic patching guide like DIY drywall hole repair can help with the repair side. But once the wall has knockdown, the patch itself is only half the job. The finish has to disappear too.
Flawless Preparation for a Smooth Texture Match
A patch can look dead flat under work lights and still show up the minute texture and paint hit it. That usually comes back to prep. Knockdown does not cover a bad base. It follows every hump, soft spot, dust line, and hard edge underneath.
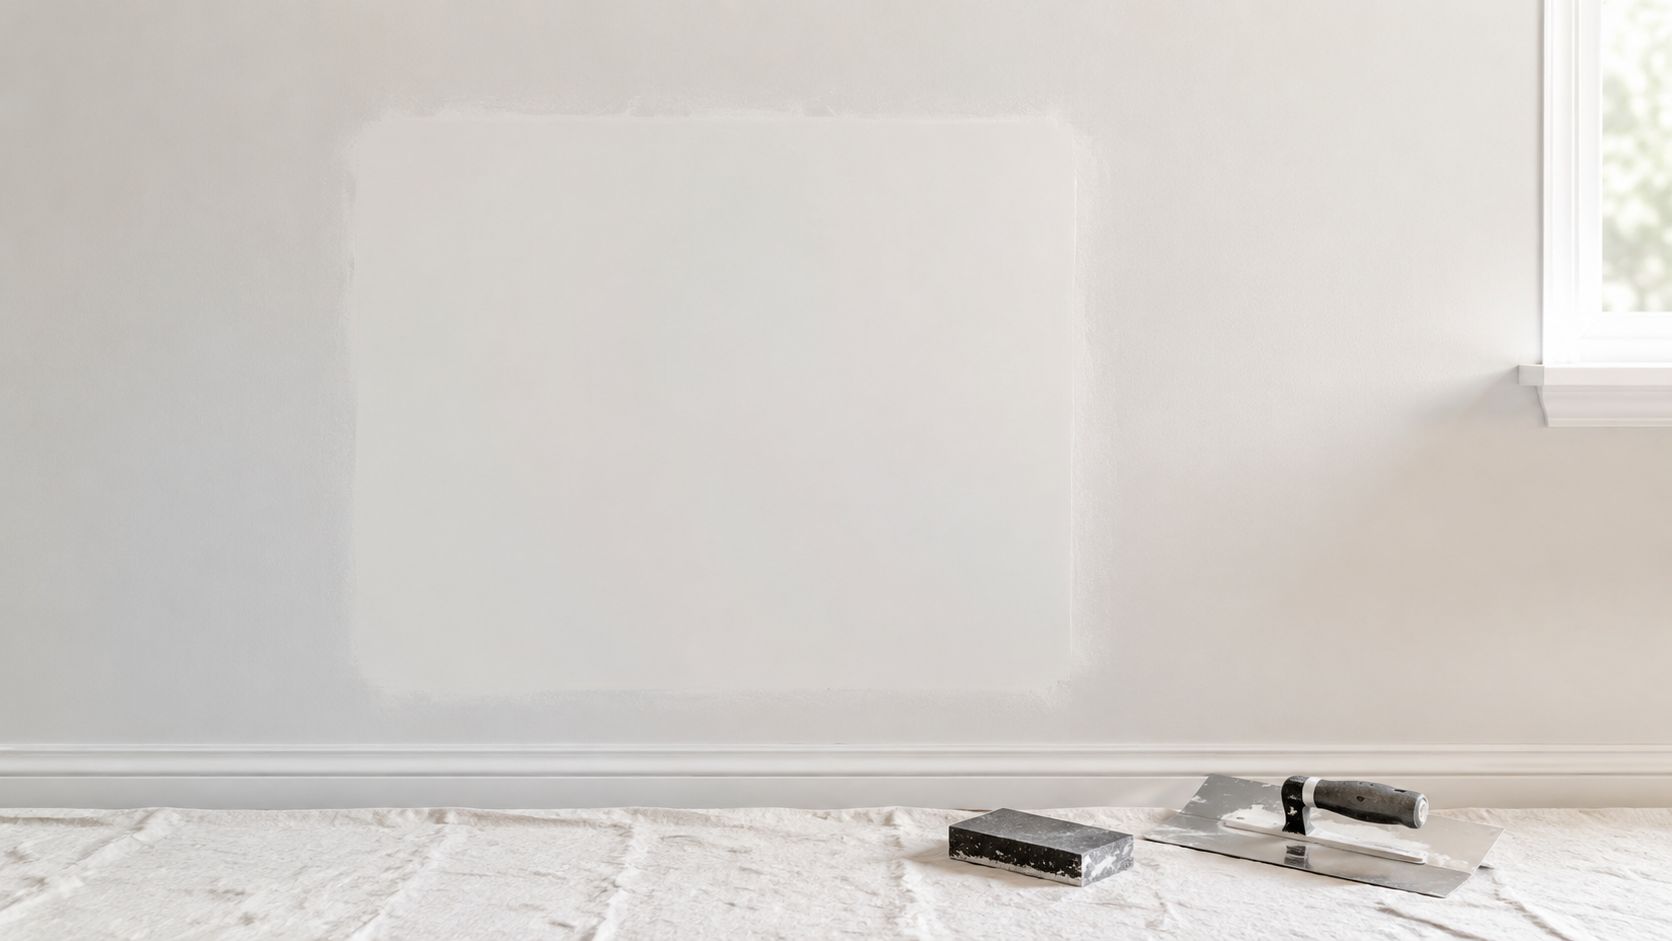
Get the base flat before you think about texture
The repair needs to sit flush with the surrounding wall or ceiling. Even a slight crown changes how the knockdown catches side light. A shallow dip causes the splatter to collect and flatten differently, which is why a patch can look fine wet and wrong after it dries.
Build the area with thin coats and feather wider than the patch itself. That wider transition matters more than many DIYers expect, especially on ceilings and long walls where light rakes across the surface. Sand off ridges and lap marks, but do not chase perfection so aggressively that you fuzz the paper or dish out the patch.
For holes larger than a simple ding, the repair has to be structurally sound before texture work starts. A basic guide like DIY drywall hole repair covers the patching side, but texture matching starts after that point, not before.
A prep sequence that works looks like this:
- Cut back weak material so you are not texturing over torn paper, crushed gypsum, or loose edges.
- Tape and fill correctly anywhere the repair crosses a joint or patched opening.
- Use multiple light coats to control shrinkage and keep the surface flat.
- Feather past the repair area so the eye does not catch a hard border under paint.
- Vacuum or wipe off dust before primer and texture mud go on.
Texture failures often start with a base that was close, but not flat enough.
Prime the patch so the texture dries at the right speed
Timing starts before you ever spray or hand-apply texture. Fresh compound, old paint, and patched paper all absorb moisture differently. If one part of the area drinks water faster than the rest, your splatter starts setting unevenly, and the knockdown knife hits some spots too soon and others too late.
That matters even more on older painted walls. In Portland houses, I see repairs where the original texture has been painted several times, softened by rollers, and filled in around the edges. New mud over that surface does not behave like new mud over fresh drywall. Primer helps even out suction so your dry time is more predictable, which gives you a better shot at matching the existing pattern.
A few prep mistakes cause repeat problems:
- Bare compound under texture: The patch dries faster than the surrounding field and changes the final pattern.
- Square repair edges: The outline stays visible even if the texture itself is close.
- Dust left on the wall: Mud bonds inconsistently and can shear or flake when you knock it down.
- Soft filler underneath: Knife pressure drags and smears the texture instead of flattening it cleanly.
Paint history matters too. Older knockdown often has rounded tops from years of repainting, while fresh texture has sharper relief. Matching that aged look sometimes means toning down the new texture on purpose. If the wall has multiple old repairs, recurring cracks, or a large ceiling patch where light will expose every difference, a dedicated drywall repair service can save a lot of rework.
Choosing Your Tools and Mixing the Compound
A lot of bad knockdown repairs start before the mud ever hits the wall. The wrong sprayer, the wrong knife, or a sloppy mix will give you a pattern you can't really save with technique later.
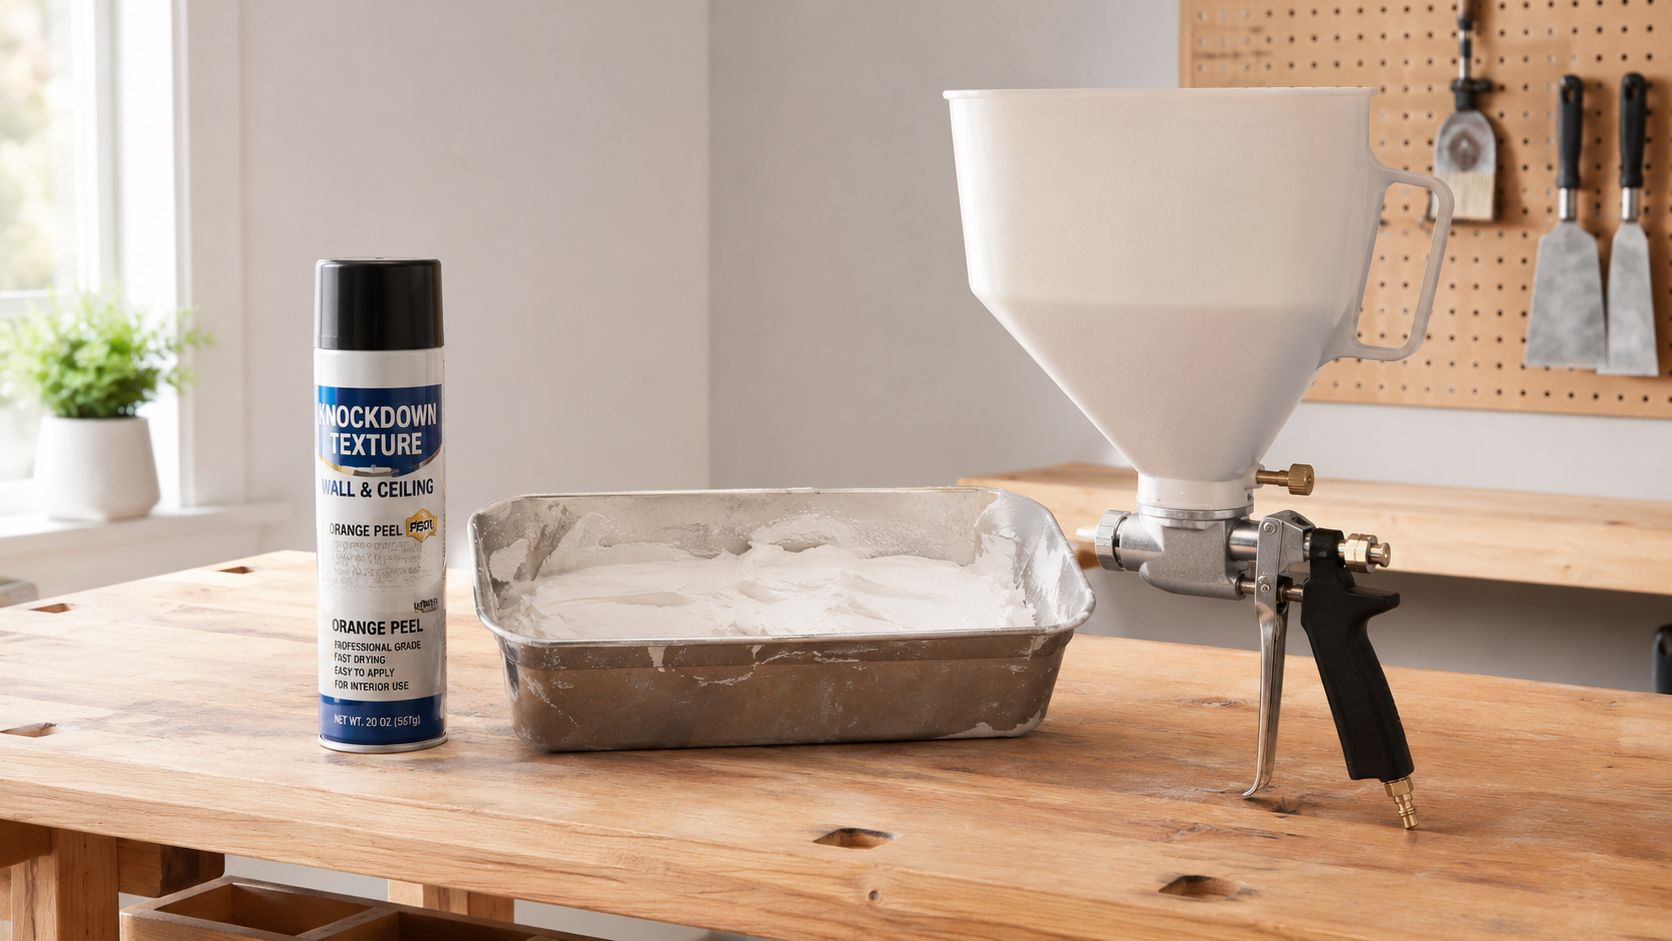
Match the tool to the patch size
Patch size should drive the method. For a small wall ding or a cut-out around an electrical repair, hand application usually gives better control. You can place the mud where you need it, vary the buildup at the edges, and avoid overspray on the surrounding painted surface. On a larger ceiling patch, especially one seen in side light, a spray setup often produces a field that looks less forced.
Tool pressure matters as much as tool choice. A stiff, clean wide knife gives you a flatter, more even knockdown. A dirty blade leaves tracks. A blade with too much flex chatters across the tops and creates little ripples that do not show up until paint goes on.
Keep the setup simple:
- Mud pan and mixing knife: For adjusting the mix in small increments as conditions change.
- Margin trowel or small applicator: Good for tight patches and for hand-placing texture where spray would be too coarse.
- Wide knockdown knife: Wide enough to ride over the high spots without digging into every low spot.
- Scrap drywall or cardboard: For test passes before you touch the repair.
Aerosol texture has its place. It is fine for tiny repairs in low-visibility areas. It is a weak choice for a broad patch where you need control over droplet size, spread, and buildup. That is the trade-off.
The mix controls the pattern
Most DIY texture mismatches come back to consistency. Mud that looks close in the pan can behave completely differently on the wall.
One repair demonstration notes that setting-type compound is often mixed a little creamier for flicking and shaping, which is a useful reminder that texture mud needs to move without turning soupy (repair demonstration on mixing and shaping mud).
For knockdown, aim for a mix that will break cleanly off the tool or sprayer, hold small peaks for a short window, and then relax just enough for the knife to flatten the tops. That window is the art part. Fresh, unpainted drywall gives you a wider margin. Older painted walls usually do not. On walls that have been rolled a few times, the existing texture is often softer and rounder, so the new mud may need to be mixed and applied a little lighter than you expect.
Watch the material, not the clock.
| What you see | What it usually means |
|---|---|
| Mud clumps, tears, or spits unevenly | Too thick |
| Texture spreads out and loses definition fast | Too thin |
| Peaks hold, then relax slightly before knockdown | Close to right |
| Knife drags, smears, or pulls patches loose | Mix, suction, or timing is off |
If you are trying to match an older painted texture, make a few test samples and let them dry. Fresh mud almost always looks sharper than the surrounding field. After primer and paint, it will soften some, but not always enough. Sometimes the better match comes from backing off the height, thinning the pattern slightly, or using less pressure during application so the finished texture does not look too crisp and new.
That is the part many guides skip. Matching knockdown is not just about making splatter. It is about controlling mud consistency, droplet shape, and how much pressure the tools put into the surface at each step. On a small patch, that is manageable. On a large repair, it can turn into a lot of trial and error fast.
Mastering the Apply and Knockdown Technique
Most homeowners searching for how to match knockdown texture are really trying to answer one question. When do I flatten it? That's the right question, because this finish is won or lost between application and knockdown.
Apply the texture with control
Start by blending the repair area into the surrounding wall or ceiling. Then apply the texture while the mud is fresh. Demonstrations of practical repair workflows emphasize that the wide knife or knockdown tool should only flatten the peaks, not wipe out the whole field (expert demo of the practical workflow).
Practice on scrap first. That's not beginner advice. It's standard sense. You need to see how your mud is behaving before you commit to the finished surface.
For small patches, hand application often gives you more control over spacing and buildup. For larger areas, spraying may produce a more natural spread. In both cases, avoid loading the center of the patch too heavily. You want the perimeter to break up and blend, not stop in a hard circle.
A better approach is to think in zones:
- Center of patch: Closest match to the existing texture height.
- Outer edge: Slightly lighter application so it feathers into the old surface.
- Beyond the patch line: Little to no buildup, just enough to prevent a visible transition.
Wait for the right moment
Many repairs falter at this stage. Expert demonstrations commonly recommend waiting about 10 to 15 minutes before knockdown so the mud sets slightly but stays workable (timing and pressure guidance for knockdown).
That time isn't a hard rule for every room. In Portland and Vancouver, WA, indoor humidity can change how fast the mud firms up. A cool room, a damp ceiling, or a heavier application can slow things down. A warm, dry room can speed everything up.
If you knock it down too early, the knife smears wet mud. If you wait too long, the blade scrapes and tears instead of flattening.
You're looking for a surface that has lost the wet shine and has enough body to hold shape. The peaks should still yield under the knife, but they shouldn't flow.
This video gives a useful visual for the motion and feel:
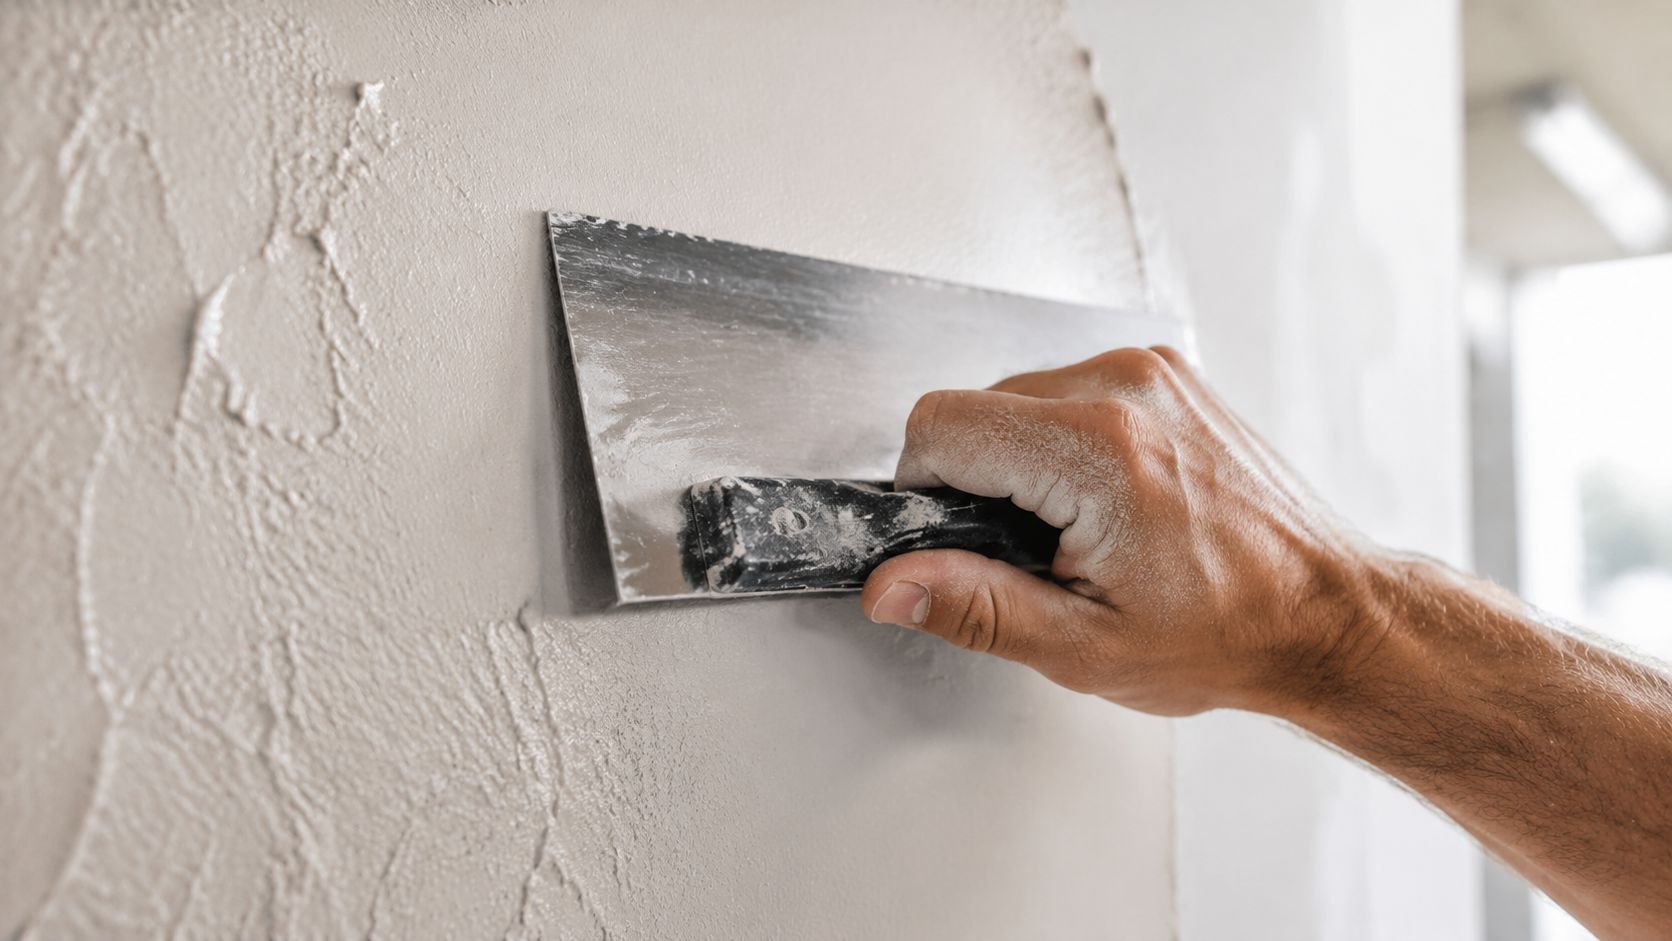
Knock down only the peaks
The blade should ride lightly over the texture. That's the whole move. You're shaving the tops, not pressing the patch flat. The same expert guidance that recommends the wait window also warns that too much pressure flattens the entire texture field and ruins the match.
Keep these corrections in mind while you work:
- Texture looks mashed flat: You pressed too hard, or the mud was still too wet.
- Sharp ridges remain after knockdown: You probably waited too long, or your blade angle was too aggressive.
- Patch looks denser than the wall: Application was too heavy in one area.
- Knife leaves drag marks: Clean the blade and ease up on pressure.
Some surfaces benefit from a second light pass after a short additional set if minor ridges remain, but that only works when the field still has enough moisture to respond cleanly. Once the mud starts resisting the knife, stop. Going back again usually makes the repair more obvious, not less.
Pro Tips for a Truly Invisible Finish
Getting close on the pattern is one thing. Making the repair disappear after primer and paint is another. That's where most basic guides stop too early.
Blend the perimeter first
The eye rarely catches the center of a good patch first. It catches the edge. If the texture ends abruptly, or if the outer band is flatter than the surrounding wall, the repair reads like a stamped shape.
Feathering the edge of the texture takes restraint. Don't build a full pattern right to the patch line. Let the texture thin out as it reaches the existing field so the old and new surfaces overlap visually.
Field note: The best texture match can still fail if the edge of the patch announces itself.
On bigger walls, step back often. What looks right from two feet away may be too heavy from across the room. Side light from a window can change your read completely.
Older surfaces need a different mindset
Aged texture is a different problem than fresh texture. Older ceilings and walls can still reveal a repair through differences in porosity and sheen, even when the texture shape is close. Guidance focused on repair matching points out that success depends on testing first and paying attention to how the existing surface has aged (DAP guidance on matching wall and ceiling textures).
That matters a lot in older Portland homes and in ceilings that have been repainted several times. Paint builds film thickness. Cooking residue, sunlight, moisture shifts, and previous patching all change how the surface takes primer and finish paint.
A few adjustments help:
- Test the full system: Don't judge the repair before primer and paint.
- Watch sheen, not just color: A close color match with the wrong sheen still flashes.
- Use light coats where needed: Heavy texture or heavy paint can make the patch stand proud.
- Respect the age of the ceiling: Older surfaces may absorb and reflect differently than the repair.
If the drywall work is done well but the finish still doesn't disappear, the final paint system is often the missing piece. That's why pairing texture repair with professional interior painting services can make the result look consistent wall to wall instead of patched and touched up.
Troubleshooting and When to Call a Professional
Some repairs can be saved. Some should be scraped while they're still workable and redone. The trick is knowing which situation you're in.
If the texture is too flat, the usual cause is early knockdown or too much pressure. If it's too pointy, the mud likely set too long before you hit it with the knife. If the patch edge shows, the texture may be acceptable but the prep or feathering wasn't. And if the whole area still flashes after paint, you're often dealing with surface age, absorbency, or sheen mismatch rather than pattern alone.
A short decision list helps:
- Redo it yourself when the patch is small, easy to reach, and in low-stakes lighting.
- Stop and reassess when you're on a ceiling, dealing with old water damage, or trying to blend into a large visible field.
- Call a pro when the repair sits in a main room, a vaulted ceiling, or a home you're preparing to sell.
That last one matters. In places like Lake Oswego and West Portland, buyers notice finish quality fast. A patch that looks “fine” to the person who repaired it can still read as deferred maintenance to someone walking the home for the first time.
There's also the cleanup factor. Drywall dust, overspray, and paint prep can spread farther than anticipated. If you want a sense of what thorough cleanup should include after interior work, this overview of a post-construction cleaning service gives a useful checklist mindset.
For larger repairs, recurring cracks, patchy ceilings, or anything that has to look right the first time, it usually makes more sense to bring in a contractor who does this regularly across the Portland metro area.
If you want a clean, paint-ready repair without guessing at timing, pressure, or sheen, contact CS1 Real Interiors. We handle drywall repair, texture matching, interior painting, insulation, and metal stud framing for homeowners and small commercial clients across Portland, Beaverton, Hillsboro, Tigard, Lake Oswego, Gresham, and Vancouver, WA. For a guaranteed perfect match and a stress-free experience, request your free estimate today and get professional help for your drywall or interior project.