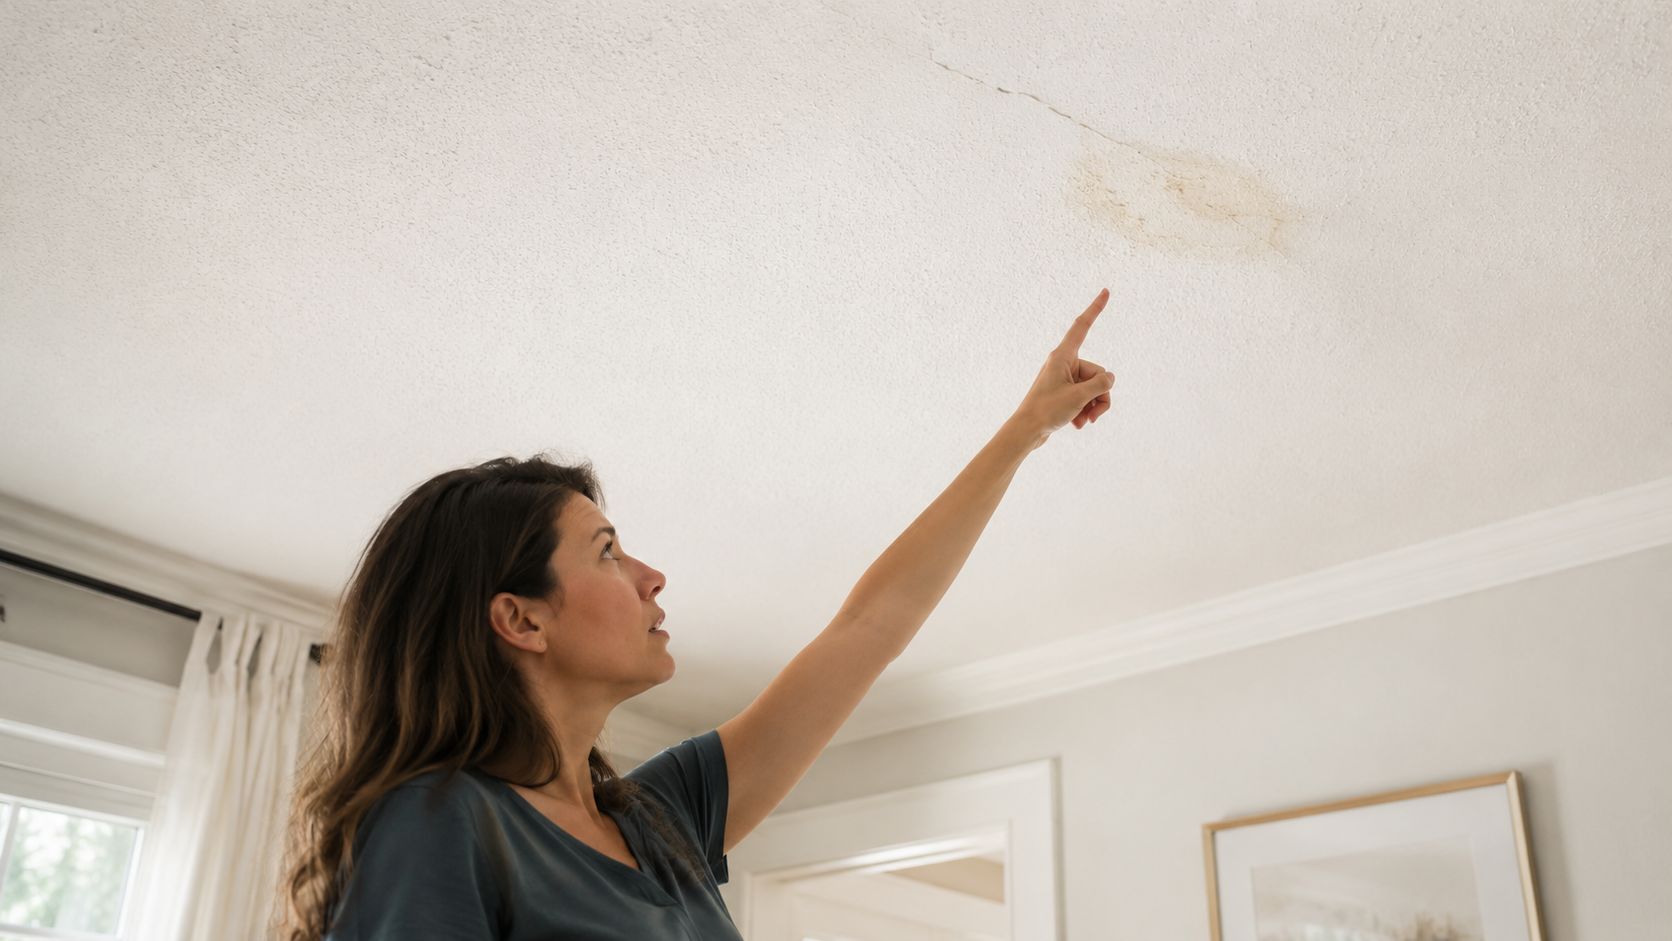
You look up, notice a stain spreading around a ceiling crack, and your first thought is usually the same. Can I just paint over it and move on? In Portland, Beaverton, Hillsboro, Tigard, Lake Oswego, Gresham, and Vancouver WA, that shortcut rarely holds up for long.
Textured ceiling repair is one of those jobs that seems simple until the patch dries and stands out from every angle. The hard part usually isn't getting mud onto the ceiling. It's figuring out whether the drywall underneath is still sound after water damage, and then matching an older texture so the repair doesn't look new against an aged ceiling. That's where most DIY repairs go sideways.
If you want to learn how to fix textured ceiling damage the right way, start with diagnosis, prep, and texture matching. Those steps matter more than speed.
Table of Contents
- That Ugly Spot on the Ceiling What It Is and What to Do
- Diagnose the Damage and Identify Your Texture
- Essential Prep Work for a Clean and Safe Repair
- Is DIY Ceiling Repair Worth the Headache
- The Art of the Patch and Matching Texture
- Finishing Touches for an Invisible Repair
- Get a Flawless Finish with CS1 Real Interiors
That Ugly Spot on the Ceiling What It Is and What to Do
A ceiling problem usually starts small. A faint yellow ring. A hairline crack over a hallway. A rough patch where texture has started to peel. Then you notice it every time you walk into the room.
In older Portland-area homes, ceiling damage often falls into a few familiar categories. Some cracks come from normal settling. Some patches fail because a previous repair was sanded too flat. A lot of the urgent repairs around this region start with moisture, especially after roof issues, plumbing leaks, or bathroom exhaust problems that let humidity build up over time.
What homeowners usually see first
The finish failing is often what's noticed first, not the root problem.
- Stains and discoloration often point to an active or past leak.
- Peeling or soft texture can mean the paper face of the drywall got wet.
- Straight cracks along seams may signal tape failure.
- Random hairline cracks are often less serious, but they still need a close look before patching.
- Sagging areas need immediate attention because the drywall itself may be compromised.
Why paint alone doesn't solve it
Painting over a stain or rough patch usually buys a little time and creates more work later. If the source is still active, the damage comes back. If the texture underneath is loose, new paint can highlight the patch instead of hiding it.
A good ceiling repair starts below the texture line. If the drywall paper, tape, or framing conditions are wrong, the finish won't last.
Most textured ceilings fall into a few broad patterns. Popcorn has a heavy acoustic look. Knockdown starts as a splatter and gets flattened. Orange peel has a finer sprayed texture. Some older homes in Forest Grove, Cornelius, and Tualatin also have hand-applied patterns that don't match anything sold in a basic patch kit.
That's where practical judgment matters. Small repairs can be manageable. Large stains, repeated cracking, or anything involving soft drywall usually deserves a more careful process, especially if you're trying to protect resale value or prep for interior painting.
Diagnose the Damage and Identify Your Texture
Start with the ceiling itself, not the patch kit. A textured ceiling can fail because of movement, age, poor original taping, or moisture, and the repair only holds if you identify which one you are dealing with.
Around Portland, moisture is a common complicating factor. Roof leaks, plumbing drips from upstairs baths, and slow humidity damage in older homes can all soften drywall long before the stain looks serious. That is the part many DIY articles skip. If the board underneath has lost its strength, matching the texture is secondary until the substrate is sound.
Read the signs before you cut or scrape
The pattern of the damage usually gives you the first clue.
- Brown or yellow staining points to past or current water intrusion.
- A raised or widened seam often means the tape has let go.
- A soft, fuzzy, or blistered surface usually means the drywall paper got wet and started to fail.
- A round patch under a bathroom, laundry area, or kitchen often traces back to plumbing.
- Damage near an exterior wall, chimney, or ceiling penetration can come from roof or flashing problems.
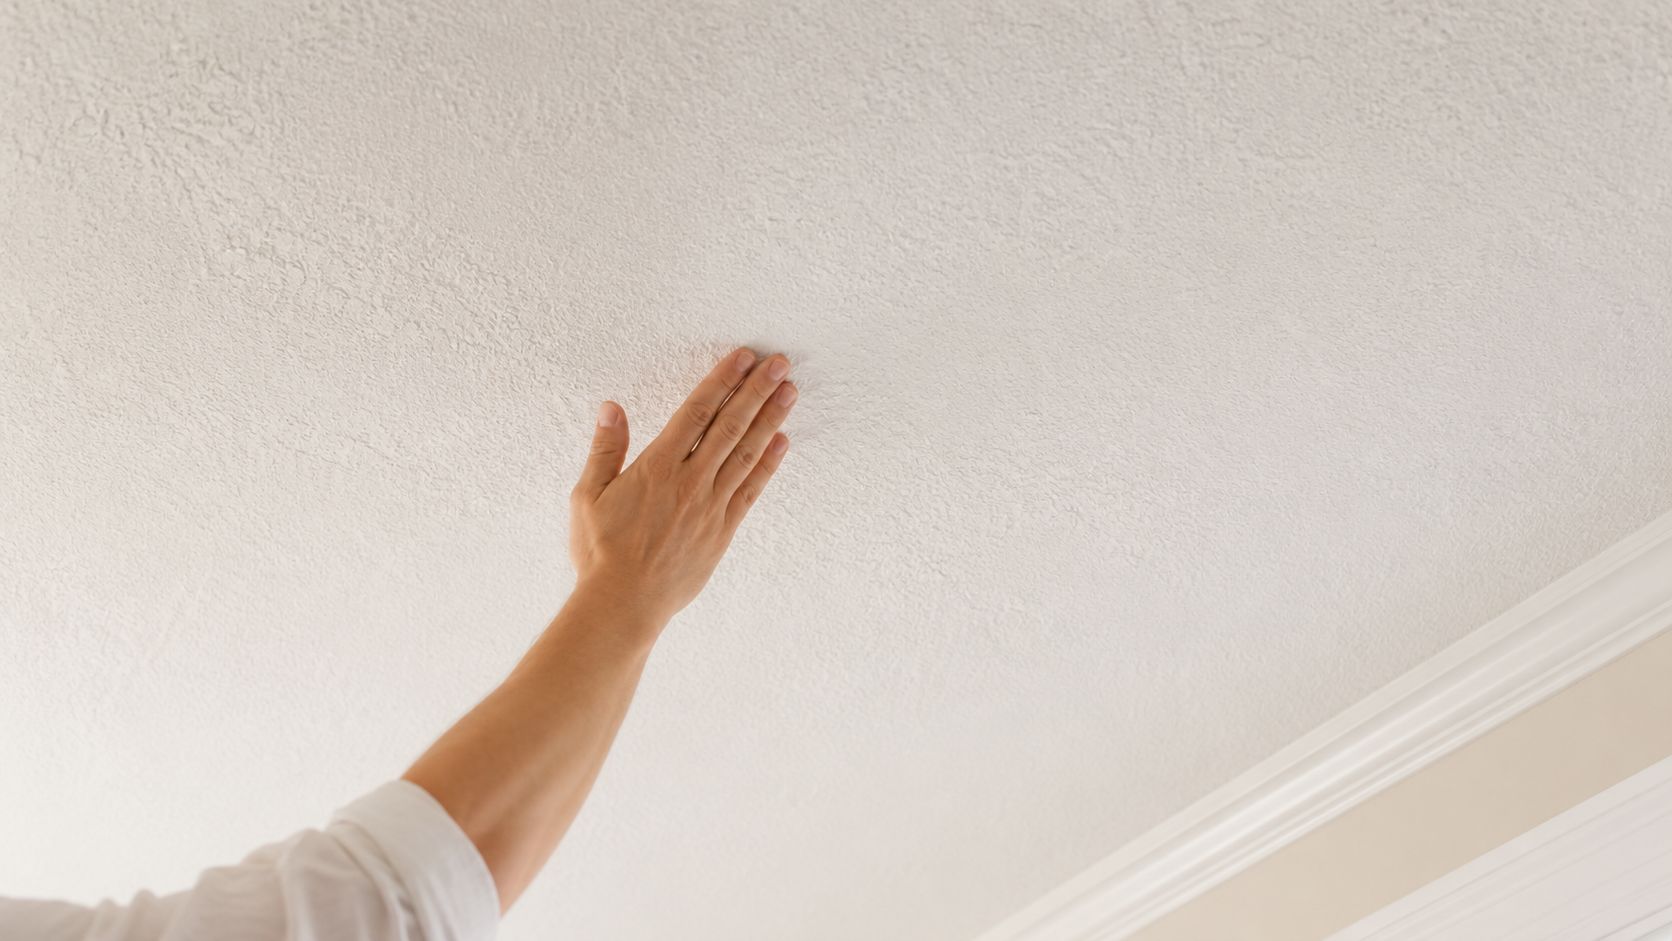
Press lightly with your fingertips or the back of a putty knife. Sound drywall feels firm. Damaged drywall feels soft, crumbly, or slightly spongy. If the area bows down, keeps reopening after paint, or extends farther than the visible stain, plan on more than a cosmetic repair.
That call matters.
A small texture blemish can be patched. Wet drywall paper, sagging board, or repeated cracking usually means part of the ceiling needs to be cut out, retaped, and rebuilt before any finish work starts. In older Portland homes, I also watch for multiple old repairs stacked on top of each other. Those patches can look stable until you start scraping and find loose layers underneath.
Common ceiling textures and repair overview
| Texture Type | Appearance | DIY Difficulty | Primary Tools |
|---|---|---|---|
| Popcorn | Heavy, bumpy acoustic finish | High | Putty knife, patch material, hopper or matching texture tool |
| Knockdown | Splattered texture flattened at the top | Medium to high | Joint compound, texture applicator, knockdown blade |
| Orange peel | Fine to medium sprayed dimples | Medium | Thinned compound or texture spray, knife for patch edges |
| Skip trowel or hand texture | Broad, irregular hand-applied pattern | High | Trowel, brush, matching compound consistency |
| Crows foot or slap brush | Repeated stamped brush pattern | High | Matching brush, thin compound, careful blending |
Texture ID is harder than it looks because age changes the surface. Paint buildup softens sharp edges. Sunlight and old smoke staining can yellow one section of the ceiling more than another. Repairs that were done ten or twenty years ago may have introduced a second pattern that does not quite match the original.
That is why older ceilings in Portland, Beaverton, and Hillsboro can be frustrating for homeowners trying to blend one patch. The texture may be knockdown in one room, but the finish has been repainted enough times that a fresh spray lands too crisp and obvious. Hand-applied textures are even trickier. They often reflect the installer's habits more than any standard pattern name.
The goal is to match the ceiling you have now, not the texture it had the day the house was built.
Check the texture from more than one angle before choosing a repair method. Side lighting from a window will show ridges and flat spots that disappear under overhead lights. That helps you decide whether the patch needs sprayed texture, hand work with a brush or trowel, or a flatter finish to blend with years of repainting.
If you're not sure whether the drywall is still sound or the texture is too aged to match cleanly, drywall repair services from CS1 Real Interiors are one route to address both the damaged area and the finish match instead of just covering the spot.
Essential Prep Work for a Clean and Safe Repair
A lot of homeowners hit the same point. The stain is ugly, the leak seems to be fixed, and it is tempting to grab a scraper and start patching. That is usually where a simple repair turns into a bigger one.
On Portland-area ceilings, prep work does two jobs. It keeps dust and debris under control, and it tells you whether the drywall is still solid enough to repair. That second part gets missed all the time after roof leaks, plumbing overflows, or bathroom moisture problems. If the paper face is soft or the tape has let go, texture and paint will only hide the problem for a short time.
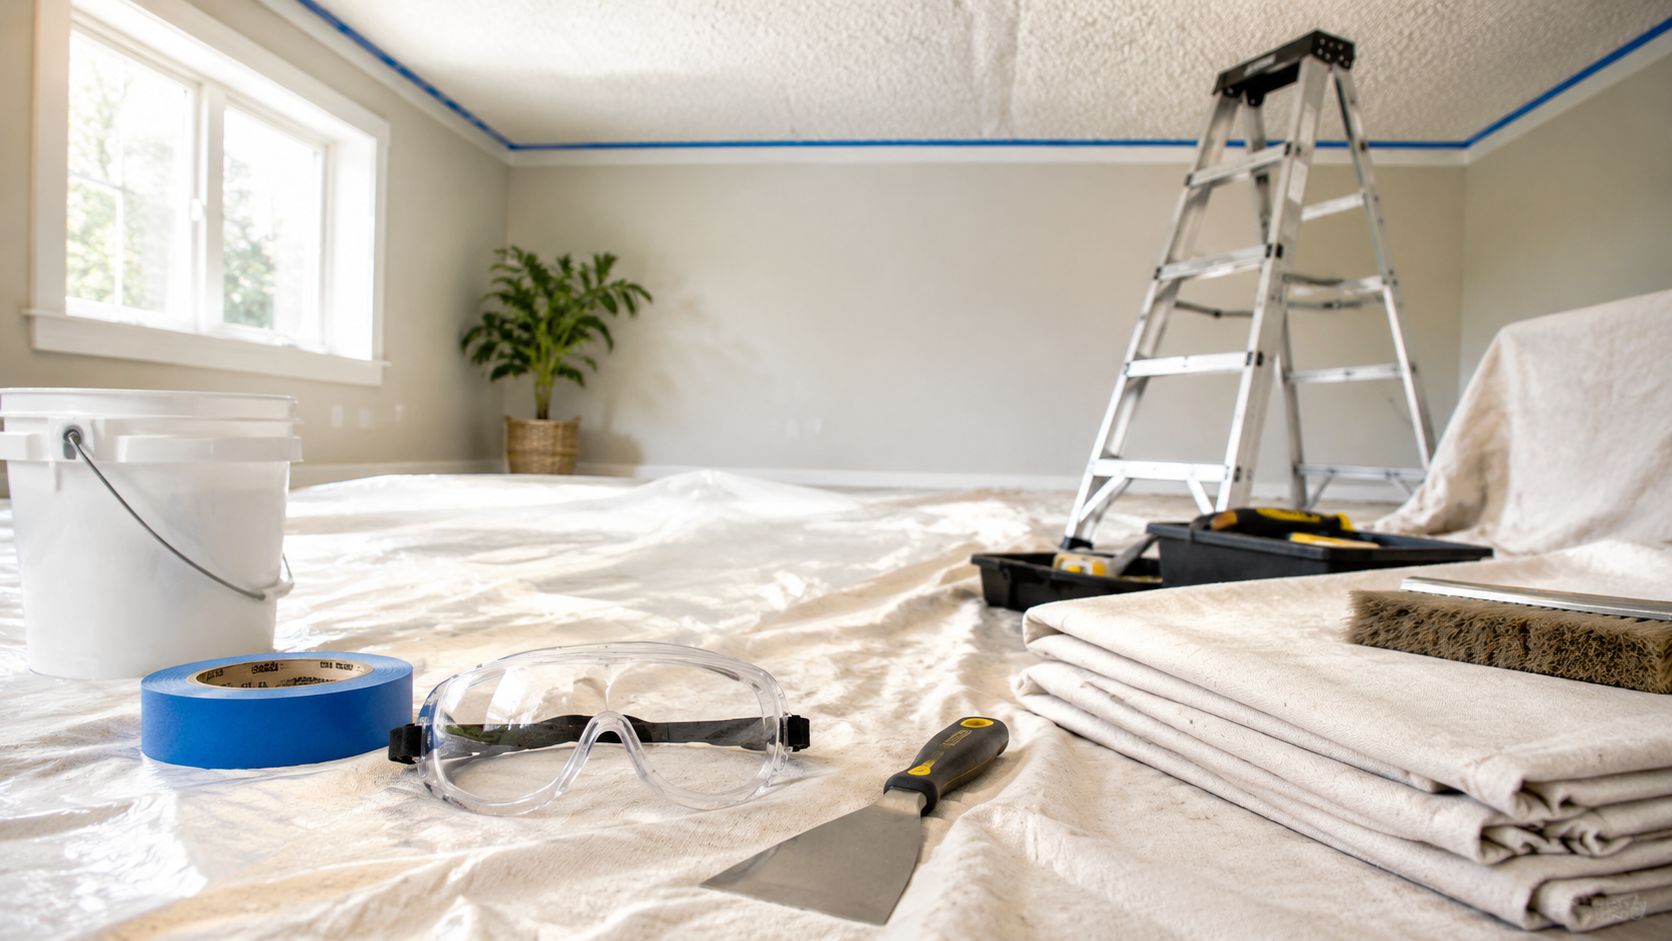
Contain the room before you touch the ceiling
Ceiling work is messy even on a small patch. Wet mud drops. Dry texture falls. Fine dust gets into supply vents and lands on furniture across the room.
Cover the floor wall to wall if you can. If furniture has to stay, wrap it fully instead of draping one loose sheet over the top. Tape plastic over vents, protect light fixtures, and set your ladder where you can work straight overhead without reaching off to the side. Overreaching is how ceilings get gouged and shoulders get hurt.
A basic setup should include:
- Floor protection with drop cloths and taped seams
- Plastic on furniture and wall tops where dust likes to settle
- Covered vents and fixtures to keep debris from spreading
- A stable ladder position that lets you stay close to the repair
Check what is loose and what is still sound
Before any patch goes in, find the edge between failed material and solid material. Scrape off texture that has already broken bond. Cut away bubbled drywall paper. Remove loose tape instead of trying to bury it under compound.
Then press around the stained or damaged area with light hand pressure or a plastic knife. If the surface feels soft, flexes, or sounds hollow, stop and widen your inspection. In older Portland homes, a small brown spot can sit under a much larger area of moisture-weakened drywall. I see this often below old bathroom floors and around slow roof leaks that homeowners thought had dried out months ago.
Jobsite rule: Do not load damaged drywall with compound until you know it can still hold the repair.
If the gypsum core has turned chalky, the paper face is delaminating, or fasteners have rusted and released, the right fix is partial replacement, not patching over the top.
Older popcorn ceilings need a safety check first
If the popcorn ceiling was installed before the mid-1980s, test for asbestos before you scrape, sand, or cut into it. Disturbing acoustic texture without checking first is a real risk, especially in older homes around Portland and Vancouver where these ceilings were common.
If testing shows the material is clear to disturb, build repairs with thin coats and the right knife or trowel for the patch size. Thin applications are easier to control overhead, dry more evenly, and reduce the hump that gives away a repair later.
Prep choices affect how flat the repair looks
Clean edges matter. So does restraint.
Keep cut lines neat and only open the area as far as the damage requires. Seal torn drywall paper when needed so it does not bubble under compound. Let each coat dry before adding the next one. Rushing this part is one of the main reasons a patch flashes through paint or shows a raised ring under side light.
A good prep sequence is simple:
- Fix the cause of the damage before cosmetic repair
- Protect the room because ceiling debris travels farther than people expect
- Remove only failed material and keep the surrounding texture intact
- Confirm the drywall is sound after any water damage
- Test older popcorn texture before disturbing it
- Build the patch in thin layers so the ceiling stays flat
If the area is large, the ceiling sits over stairs, or moisture damage has softened the board, a DIY repair can get risky fast. At that point, safety and substrate condition matter more than patching technique.
Is DIY Ceiling Repair Worth the Headache
Saturday morning, you cut out a stained spot over the dining room table and expect a quick patch. By Sunday afternoon, the repair is flat enough, but the texture still looks newer, tighter, and brighter than the rest of the ceiling. That is the part many homeowners underestimate.
Ceiling repair is often less about filling a hole and more about judging two things correctly. First, is the drywall still sound after the leak or moisture event? Second, can you match a texture that has aged for years in a Portland home through repainting, humidity swings, and normal settling? If either answer is no, the job gets expensive in time, materials, or both.
DIY usually makes sense in a narrow set of cases
A homeowner can usually handle the repair if the area is quite small, the board is dry and firm, and the texture is simple enough to practice and repeat. A closet ceiling, utility room, or small bedroom gives you more room for minor imperfections. Low visibility changes the risk.
DIY is also more realistic if you have the patience to do sample textures first, let coats dry fully, and repaint more ceiling area than you planned. Spot-painting a textured ceiling rarely disappears cleanly, especially on older paint.
Hire help when the repair involves judgment, not just labor
Professional help usually makes more sense in these situations:
- The stain came from a roof leak, plumbing leak, or long-term moisture
- The drywall feels soft, swollen, or crumbly
- The paper face is torn and keeps bubbling
- The ceiling is high, vaulted, or sits over stairs
- The existing texture is old, layered, or visibly hand-applied
- The patch is in a main living area where side light will expose flaws
Water damage is the big one around Portland. I have seen plenty of ceilings that looked patchable from the floor, then opened up to reveal softened gypsum, loose fasteners, or a wider moisture path than the stain suggested. At that point, the job is no longer a simple texture repair. It becomes a substrate repair, and that distinction matters.
There is also a real cost trade-off. A DIY patch can save money if it works the first time. If you end up patching twice, repainting the whole ceiling, or cutting back out a failed repair, the savings disappear fast.
If you already know uneven texture or visible flashing will bother you every time you walk into the room, that is useful information. For homeowners in Tigard, Lake Oswego, and nearby Portland-area neighborhoods, getting a repair priced before opening the ceiling can be the calmer option.
The Art of the Patch and Matching Texture
A ceiling repair usually succeeds or fails here. The drywall may be solid and the patch may be flat, but if the texture is off, the repair still reads from across the room.
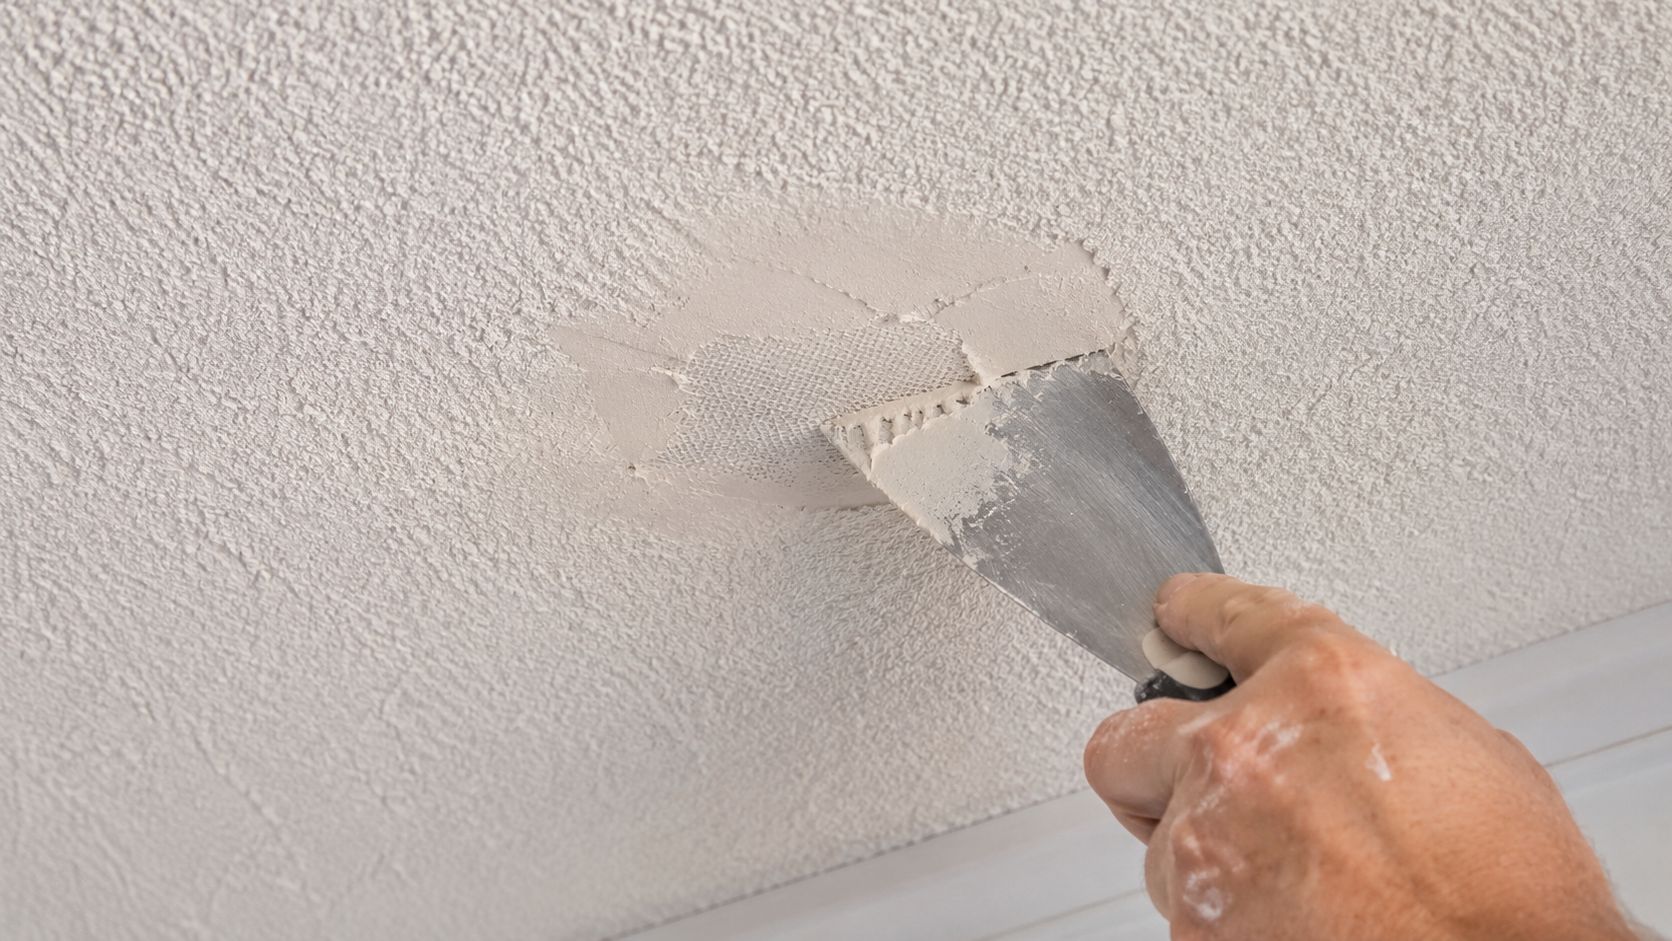
Build a flat patch before you worry about texture
Start by getting the repair plane right. Tape cracks, patch openings properly, and build the area with light coats instead of one heavy pass. Heavy compound shrinks, dries unevenly, and leaves a proud spot that shows up the moment side light hits it.
Each coat should have a clear purpose. One bonds. One fills. One feathers the patch into the surrounding ceiling. On older Portland ceilings, especially ones that have seen moisture over the years, that feathering matters as much as the patch itself because aged paint and old texture rarely hide abrupt transitions.
Sand enough to remove ridges, then stop. Over-sanding creates a shallow dish or a slick flat spot, and both can make the new texture sit differently than the original field.
Mix the mud so it behaves like the original texture
Texture matching is not just about pattern. It is also about how the mud breaks, droops, and sets on the ceiling.
Thin the compound gradually until it sprays, rolls, stipples, or pulls the way you need it to. If it is too thick, you get sharp peaks and clumps. If it is too wet, the splatter falls flat and the patch looks washed out once it dries. Professional finishers usually test a small amount on scrap first because bucket consistency changes fast with added water, room temperature, and even the age of the compound.
Matching texture starts with material control, not just hand motion.
Match the application method to the original finish
The best repair uses the same type of tool and the same style of application that created the original ceiling. If the surrounding texture was built in layers over time, copying a fresh, perfect pattern can make the patch stand out more, not less.
Orange peel
Orange peel takes restraint. Keep the application light, then extend it past the patched area so the eye does not catch a hard perimeter. A test board helps because a fine orange peel and a heavy one are only a small adjustment apart, but they look very different once painted.
Knockdown
Knockdown is a splatter texture first and a flattening pass second. Apply the droplets, let them firm up until they lose their wet shine and hold their shape, then drag a broad knife lightly across the tops to knock them down. If you flatten too soon, the mud smears. If you wait too long, the peaks tear instead of laying over cleanly.
This is one of the more common misses on DIY jobs. The timing changes with temperature, humidity, and how wet the mix is, so there is no single clock setting that works every time.
Popcorn
Popcorn is tough to patch cleanly because the existing ceiling usually has paint buildup, dust, and age-related color shift. Focus on matching the density and size of the aggregate as closely as you can. If the house is old enough that asbestos is a possibility, stop and have that answered before scraping, cutting, or disturbing the texture.
Hand-applied legacy textures
Older Portland homes often have textures that were done by hand, touched up more than once, or softened by years of repainting. Skip-trowel, brush textures, and irregular stomp patterns rarely repeat in a neat grid. They need judgment more than speed.
In those cases, I aim to match the character of the ceiling, not create a textbook sample. Slight irregularity is often the right call. A patch that looks a little imperfect up close can disappear better from normal viewing distance because it fits the age of the room.
What works and what usually fails
A few habits consistently improve the result:
- Thin, controlled coats that keep the patch flat
- Wide feathering so the repair dies out gradually
- Test samples on scrap before touching the ceiling
- Using the same tool type that made the original texture
- Checking the surrounding drywall again if the area was ever wet
The failures are predictable too:
- Trying to hide a soft or damaged substrate with fresh mud
- Building texture over a hump or dish
- Spraying or stippling only inside the patch boundary
- Over-sanding until the repaired area gets too smooth
- Making the new texture cleaner and sharper than the aged ceiling around it
That last point gets overlooked in older homes. Many ceilings in Portland, Lake Oswego, and nearby neighborhoods have mellowed with repainting, minor settling, and past repairs. A good match often comes from copying that softened, slightly uneven look.
For broader repair needs tied to remodel prep or repainting in the city, Portland drywall and interior service coverage is useful if you need local help with walls, ceilings, or full interior finishing.
Finishing Touches for an Invisible Repair
A ceiling patch often looks fine until the primer and paint go on. Then problems show up. Stain bleed, flashing, and a patch that reads smoother or brighter than the rest of the ceiling.
In Portland-area homes, this final stage matters even more after a roof leak, bathroom fan failure, or attic moisture issue. If the drywall took on water, the goal is not just covering the repair. The finish has to hide the patch and keep old discoloration from coming back through.
Prime the patch with stain blocking in mind
If the repair involved past water damage, use a stain-blocking primer on the patched area before paint. I usually reach for a shellac-based or other high-blocking primer when the ceiling has brown rings, yellowing, or signs that moisture sat there for a while. Standard ceiling paint does a poor job of hiding those stains long term.
Drywall paper and joint compound can absorb finish paint differently, too. Primer evens that out so the patch does not flash under window light or recessed cans.
White paint covers color. It does not reliably lock down a water stain.
If the patched area still feels soft, fuzzy, or swollen after drying, stop there and reassess. That usually means the underlying drywall is not sound enough for finish work yet, which is one of the main reasons textured ceiling repairs fail in older homes.
Prime and paint beyond the patch
Spot-priming only the repair can leave a visible picture frame around it, especially on ceilings that have been repainted over the years. Priming the whole ceiling, or at minimum painting corner to corner on that ceiling plane, gives the finish a more uniform look and helps the repaired area blend into the aged texture around it.
That matters in older Portland homes where ceilings rarely have a fresh, consistent surface. Smoke residue, past touch-ups, sunlight, and humidity can all shift the way white paint reads from one side of the room to the other.
A few finishing habits help here:
- Use flat ceiling paint unless the existing ceiling has a different sheen
- Cut and roll the entire ceiling plane for a consistent color and reflection
- Keep a wet edge so lap marks do not highlight the repair
- Check the ceiling at night with lights on and again in daylight before calling it done
Sand less than you think
Late sanding causes a lot of avoidable trouble. Knock down obvious nibs or ridges, then leave the texture profile alone. If you sand aggressively after you finally got the patch to match, the repair starts looking too flat and too new compared with the surrounding ceiling.
That is also the point where homeowners often realize the repair is part of a bigger cleanup and turnover project. After ceiling work, some people also coordinate painting, final dust removal, and presentation work such as Clean Space SA property cleaning before photos, showings, or move-in.
Get a Flawless Finish with CS1 Real Interiors
Textured ceiling repair looks manageable on paper. In real houses, it gets complicated fast. Moisture damage can leave the drywall weaker than it looks. A small patch can stand out because the surrounding texture aged differently. High ceilings, stairwells, and visible living spaces raise the stakes even more.
That's why many homeowners, landlords, and small commercial clients decide not to turn this into a trial-and-error weekend. Clean results usually come from good diagnosis, disciplined prep, and texture matching that respects the age of the home. That same practical thinking matters when a property is being prepped for sale or turnover. Alongside interior repairs, some owners also coordinate final presentation work such as Clean Space SA property cleaning so the entire space shows well once repairs are done.
CS1 Real Interiors handles drywall repair, drywall installation, drywall finishing, interior painting, insulation, and metal stud framing across the Portland metro area, including Hillsboro, Beaverton, Tigard, Lake Oswego, Forest Grove, Cornelius, Tualatin, Gresham, and Vancouver WA. The company works with homeowners, builders, property managers, restaurants, clinics, and retail spaces that need dependable interior work and paint-ready finishes.
If your ceiling has water damage, recurring cracks, visible tape lines, or a texture that won't blend, professional repair is often the cleaner and less expensive outcome than redoing a failed patch later.
If you want help from CS1 Real Interiors, request a free estimate through the contact form. It's the easiest way to contact CS1 Real Interiors and get professional help for your drywall repair, textured ceiling repair, interior painting, insulation, or metal stud framing project in Portland, Beaverton, Hillsboro, Tigard, Lake Oswego, Gresham, Vancouver WA, and nearby cities.