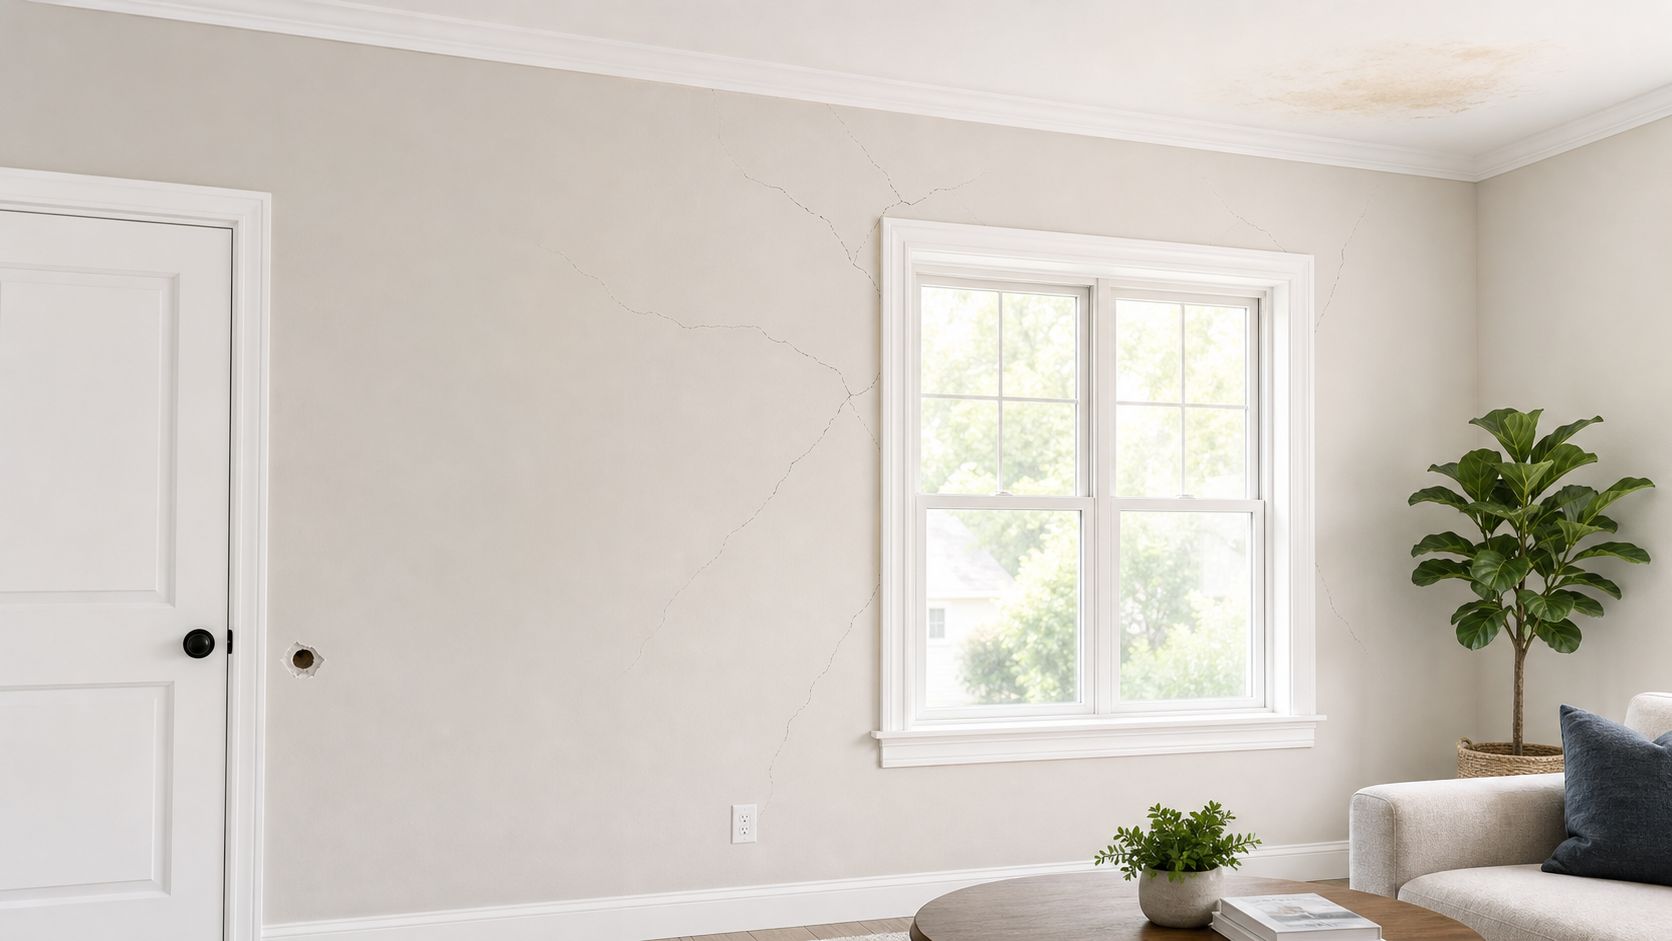
A wall crack that seemed small last month now catches your eye every time you walk by. A doorknob punched a hole near the hallway. A ceiling stain showed up after a roof or plumbing issue, and now you're wondering whether this is a simple patch or the start of a bigger problem.
That's where most Tigard homeowners get stuck. The surface damage is obvious, but the key question is what caused it and whether a repair will be durable. Good drywall work isn't just about filling a hole. It's about diagnosing movement, moisture, failed seams, bad prior repairs, and finish conditions so the wall looks right and stays right.
Table of Contents
- Your Guide to Professional Drywall Repair in Tigard
- Identifying Common Drywall Problems We Fix
- The CS1 Drywall Repair Process Step by Step
- Achieving a Perfect Finish with Texture Matching and Level 5 Walls
- Handling Water Damage Repairs and Insurance Claims
- Why Homeowners in Tigard Trust CS1 Real Interiors
- Frequently Asked Questions About Drywall Repair
Your Guide to Professional Drywall Repair in Tigard
Drywall problems are common because drywall is in almost every home. According to industry data on drywall use in U.S. homes, drywall is utilized in approximately 96% of homes across the United States. In Tigard, Portland, Beaverton, and the rest of the metro area, that means cracked walls, damaged corners, ceiling stains, and patch failures show up in every kind of house, from older neighborhoods to newer builds.
Most homeowners don't call for drywall repair because they enjoy home maintenance. They call because the damage keeps drawing attention, paint starts looking uneven, or they're worried that a stain or crack points to something behind the wall. That stress is real. If the damage is in a living room, kitchen, stairwell, or primary bedroom, it can make the whole space feel unfinished.
Practical rule: A drywall repair should answer two questions. What caused the damage, and what method will keep it from coming back?
That's the standard to use when hiring for Drywall Repair Tigard. A fast cosmetic patch can be fine for a tiny dent. It's the wrong approach for recurring cracks, moisture damage, sagging ceilings, seam issues, or repairs in walls that need a clean paint-ready finish.
The right repair also needs to fit the room and the goal. A rental turnover needs durable, clean work. A remodel needs flat walls and consistent corners. A home getting ready for sale often needs repair plus paint touch-up so the fix disappears. In many cases, drywall work overlaps with other interior needs like insulation replacement, repainting, or framing adjustments.
Identifying Common Drywall Problems We Fix
Some drywall damage is straightforward. Some of it is a clue. The important part is knowing the difference before anyone starts mudding over the surface.
What cracks usually mean
Hairline cracking at a tape joint often points to seam movement, poor tape bonding, or a previous repair that was never reinforced properly. A straight crack that follows a joint usually gets treated differently than a jagged crack that runs off pattern through a wall or ceiling plane.
Here's how those often break down:
- Seam cracks: Usually show up in straight lines and often mean the joint failed.
- Corner cracks: Often happen where walls and ceilings meet, especially with seasonal movement.
- Recurring cracks: Usually signal that patching the surface alone won't solve it.
- Stress cracks around doors or windows: These can point to framing movement or settlement patterns.
A good repair starts by deciding whether the joint needs to be reopened and rebuilt, not just skimmed.
When holes and dents are more than cosmetic
Impact holes are common in hallways, garages, kids' rooms, stair landings, and busy living areas. Small punctures are usually localized. Larger openings need backing, secure fastening, proper fill sequence, and enough feathering so the patch doesn't flash under paint.
Nail pops and screw pops also deserve attention. One isolated pop can be minor. Several in one area can suggest movement in the framing, poor fastening, or a seasonal cycle that keeps stressing the board.
If a wall has been patched more than once in the same spot, the problem often isn't the mud. It's the substrate, the fastening, or the movement behind it.
Water stains, soft spots, and sagging areas
Water damage is where homeowners in Tigard need the most caution. A stain on the ceiling doesn't automatically mean the drywall is the main problem. It may be the symptom of a roof leak, plumbing issue, condensation problem, or an ongoing moisture source inside the wall cavity.
Local service pages often talk about fixing stains and soft drywall, but the bigger issue is deciding whether the area can be repaired at the surface or should be opened for further investigation. That gap is exactly what causes repeat problems. As noted in guidance on Tigard drywall damage and hidden moisture issues, drywall damage can be tied to hidden leaks, insulation issues, and conditions that change the scope of repair.
Watch for these warning signs:
- Soft drywall: Pressing on the area leaves give or crumbling.
- Recurring discoloration: The stain comes back after painting.
- Musty smell: Moisture may still be present in the cavity.
- Bubbling tape or peeling texture: The board face may be compromised.
- Sagging ceiling lines: The affected section may need replacement, not patching.
The CS1 Drywall Repair Process Step by Step
A drywall repair goes more smoothly when the process is clear from the start. If you have a stain spreading across a ceiling, a crack that keeps coming back, or a patch that still shows through paint, the first question is not how fast it can be covered. The first question is what caused it, and whether that cause is still active.
Inspection comes first
At CS1, we start by looking past the surface. We check the shape of the damage, the firmness of the surrounding drywall, and the pattern around seams, fasteners, corners, or ceiling lines. We also ask what changed before the damage showed up. A plumbing overflow, roof issue, door slamming, framing movement, or a long-term humidity problem all point to different repair plans.
That inspection matters because the right fix depends on the cause. A hairline seam crack may only need reinforcement and refinish work. A soft ceiling spot under a past leak may need a cut-out, cavity check, and board replacement because the paper face or gypsum core can no longer hold a lasting finish.
The estimate should reflect that logic. Homeowners in Tigard deserve to see whether the work includes removal of failed material, substrate correction, patching, corner bead repair, texture blending, sanding, primer, and paint-ready preparation. Clear scope prevents surprises.
Before any cutting or sanding begins, the work area gets protected. Floors, nearby furniture, and finished surfaces need dust control and clean masking, especially in occupied homes.
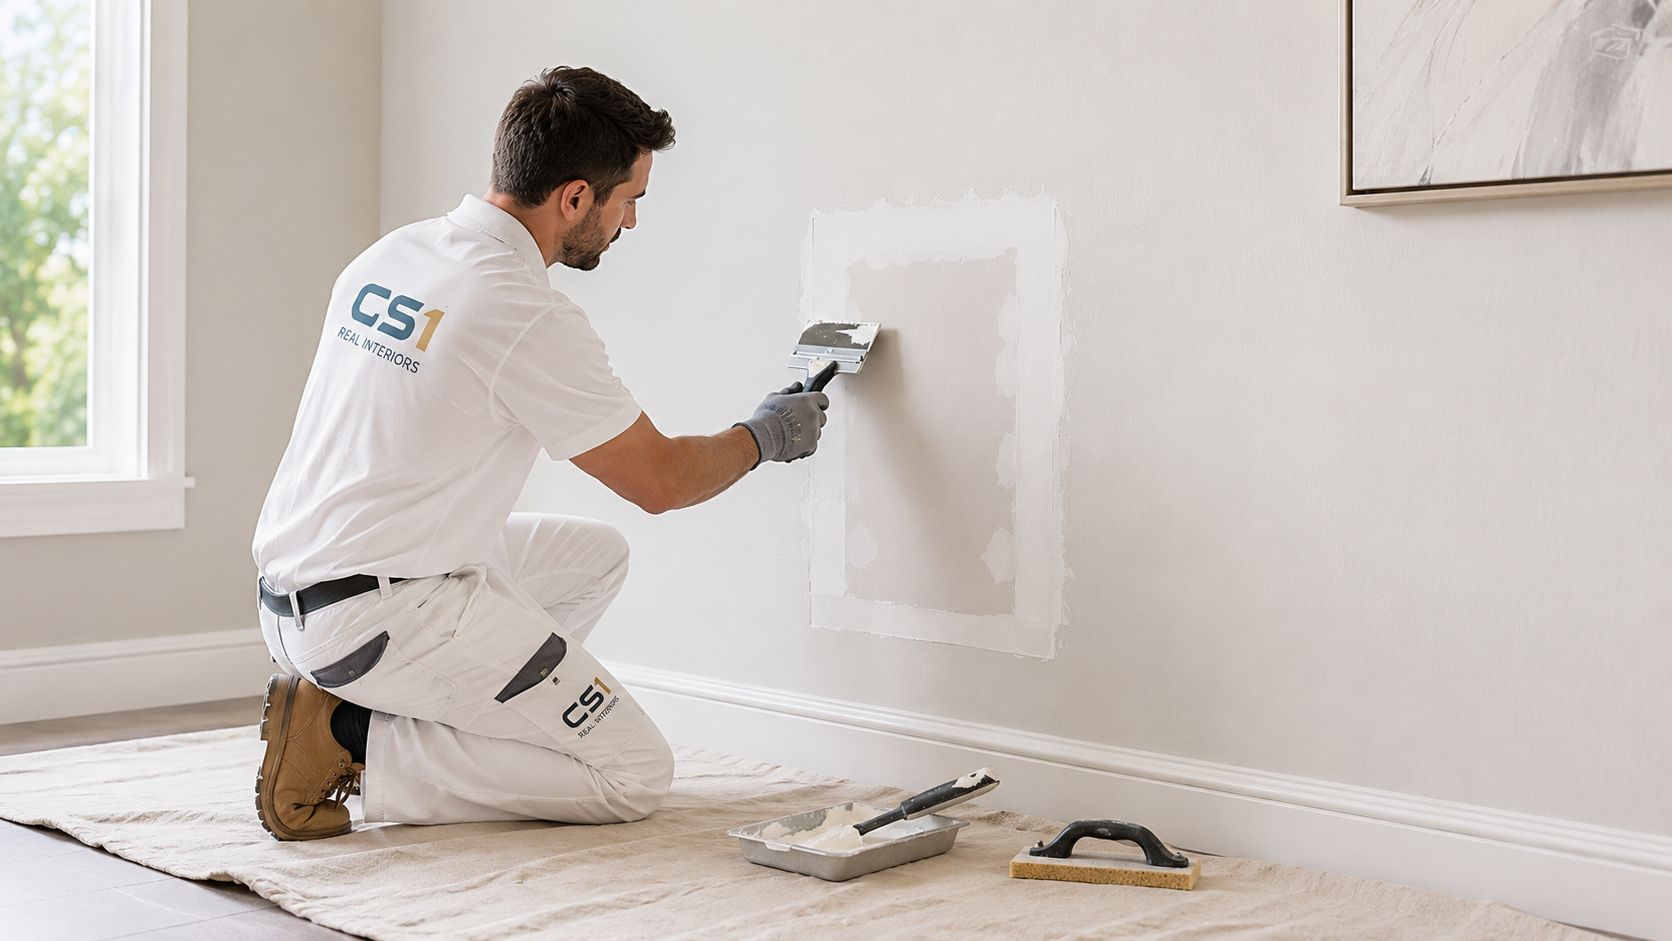
How the repair is built
Once the damaged section has been assessed, we repair from the structure outward. That means we do not leave loose edges, weak backing, or damp material in place and hope compound hides it.
A typical repair sequence includes:
- Opening the damaged area to sound material so the patch is tied to drywall that will hold.
- Checking backing, framing, and fastening if cracks, movement, or sagging suggest poor support.
- Replacing compromised drywall with a properly fitted patch that sits flush.
- Securing seams with the right tape and compound sequence based on the repair size and location.
- Applying multiple coats with proper drying time so the patch stays flat and resists flashing.
- Sanding and feathering the repair wide enough to blend with the surrounding field.
- Preparing for texture or smooth-wall finishing so the surface is ready for primer and paint.
Small decisions make a big difference here. A patch that is too small can leave weak perimeter edges. A patch that is too large creates more finishing area than the wall needed. If movement caused the crack, the repair has to address that condition or the line often returns in the same place.
For homeowners who need a repair contractor, drywall repair services in Portland and nearby cities are one option when the work involves cracks, holes, ceilings, texture matching, or repaint-ready finishing.
A short visual can help if you want to see the basics of patching and finishing in action:
A good repair should solve the reason the wall failed, leave the surface stable, and disappear after paint. If the underlying issue is ignored, the patch may look fine for a few months and then telegraph, crack, or stain through again.
A repair should disappear when the paint is on. If you can still spot the patch from across the room, the wall needed a better diagnosis, a better finish process, or both.
Achieving a Perfect Finish with Texture Matching and Level 5 Walls
Most drywall repairs don't fail at the patch. They fail at the finish. The board is solid, but the texture is off, the edge telegraphs, or the repair flashes when afternoon light hits the wall.

Texture matching is where many repairs fail
In Tigard homes, common wall and ceiling finishes include smooth walls, light orange peel, heavier orange peel, and knockdown. Matching those textures takes restraint as much as technique. Too much material, the repair stands proud. Too little, the patch area goes flat and catches light differently than the surrounding field.
A clean match depends on several things:
- Patch size: Larger patches need wider blending.
- Existing texture style: Fine orange peel behaves differently than hand-applied knockdown.
- Paint sheen: Higher sheen makes imperfections easier to see.
- Lighting direction: Side lighting reveals surface changes fast.
This matters most in entry walls, great rooms, stairwells, and long hallway runs where your eye tracks the surface.
When a Level 5 finish makes sense
For smooth-wall interiors, remodels, and spaces with strong natural light, a Level 5 finish can be the right move. According to Trim-Tex guidance on drywall finish levels, Level 5 finishing adds a full skim coat over the entire gypsum board surface on top of Level 4 work to minimize joint telegraphing and surface texture variation under critical lighting.
That extra skim coat isn't about making the wall fancy. It's about making the surface more uniform so seams, fasteners, and patched areas don't show through after paint. In practical terms, this is often the difference between a wall that looks acceptable at night and one that still looks clean in daylight.
If the goal is “good enough,” a basic finish may be fine in a closet, utility room, or low-visibility area. If the goal is a flawlessly blended result in a remodeled living space, kitchen, office, or primary suite, finish level becomes part of the repair plan, not an afterthought.
Handling Water Damage Repairs and Insurance Claims
Water-damaged drywall creates more stress than ordinary wall damage because the visible problem may be only part of the story. The stain, bubbling paint, or soft ceiling area is what you see. The underlying issue may be active moisture, wet insulation, hidden mold conditions, or a plumbing problem that hasn't been corrected yet.
Stop the source before repairing the wall
If the leak is active, call the right trade first. That may be a plumber, roofer, or another specialist depending on where the water came from. Drywall should not be closed back up until the source has been addressed and the affected area is dry enough for repair.
A practical sequence looks like this:
- Find the source: Don't patch before the leak path is known.
- Document the damage: Take photos before demolition or removal.
- Open what needs inspection: Soft or stained sections may need to come out.
- Check the cavity: Wet insulation or visible contamination changes the scope.
- Repair and refinish after conditions are stable: This is what prevents repeat staining and failed patches.
For insurance-related projects, organized documentation helps. Clear photos, dates, visible room conditions, and a written scope of what drywall and finish work is needed can make the process easier for a homeowner to manage.
Repairs in rentals, multifamily, and commercial spaces
Some water-damaged walls are also part of a rated assembly. That matters in apartments, mixed-use buildings, offices, restaurants, and tenant improvements. In those cases, the repair can't focus only on the visible finish.
According to National Gypsum guidance for fire-rated wall repairs, certain repair configurations use Type S screws at 8 inches on center, and multi-layer patch joints should be staggered by at least 12 inches to help preserve the tested assembly. If a rated wall is patched incorrectly, the surface may look fine while the wall no longer performs as intended.
That's one reason these repairs need careful scope review in small commercial and multifamily settings across Tigard, Portland, and nearby cities.
Why Homeowners in Tigard Trust CS1 Real Interiors
People usually want the same things from a contractor. Show up when promised. Protect the home. Communicate clearly. Finish the repair without turning the house into a dusty mess.
What people actually want from a contractor
The work itself matters, but the experience matters too. Homeowners in Tigard drywall contractor service area and across Portland often need more than a patch. They may need interior painting, insulation replacement after a leak, or metal stud framing as part of a remodel or small commercial update.
That's where CS1 Real Interiors fits. The company provides drywall repair, drywall installation, interior painting, insulation, and metal stud framing for residential and small commercial interiors in the Portland metro. For a homeowner, that can simplify a job that would otherwise require coordinating several trades.
Clean containment, realistic scheduling, and clear scope notes matter almost as much as the repair itself in an occupied home.
If you're dealing with a water-loss situation and trying to understand claim steps more broadly, this outside resource on help with NC storm water damage claims can be a useful general reference for the paperwork and coverage side of the conversation.
Frequently Asked Questions About Drywall Repair
A lot of drywall questions come up after the same frustrating moment. You notice a stain spreading, a crack reopening, or a patch that still shows through paint, and now you need to know whether this is a quick repair or a sign of a bigger problem.
Common questions from homeowners
How long does a typical drywall repair take?
It depends on what caused the damage, not just how big the hole looks. A simple wall ding can be repaired quickly, but a ceiling stain, recurring crack, or soft drywall from a leak usually adds demolition, drying time, extra coats, texture work, and sometimes primer and paint. If the root cause has not been corrected, patching too soon usually leads to another call for the same area.
What does drywall repair usually cost?
Cost depends on access, repair size, finish level, texture matching, and whether damaged drywall needs to be cut out and replaced. Water damage, ceiling work, and repairs in visible lighting conditions often take more labor because the finish has to hold up under close inspection. If you want a broad pricing reference, Domicile Construction's drywall cost guide gives a helpful overview. For a specific home in Tigard, the only reliable price comes from seeing the damage in person and figuring out what caused it.
Can I patch a small hole myself?
Sometimes, yes. Nail holes and minor dings are reasonable DIY repairs if you prep well, use the right filler, sand carefully, prime, and match the paint. The trouble starts when the repair is larger than it looks, the wall has texture, or the surface damage is hiding movement or moisture.
Here is a practical rule of thumb:
| Damage Type | Recommended Action |
|---|---|
| Tiny nail holes or minor dings | DIY can work with careful prep |
| Medium wall holes | Hire a pro if you want the patch to disappear |
| Ceiling cracks or stains | Hire a pro, especially if moisture may be involved |
| Recurring cracks | Hire a pro and find the source of movement before patching |
| Water-damaged drywall | Hire a pro after the leak or moisture source is fixed |
| Textured wall or ceiling repairs | Hire a pro for blend-in work and finish consistency |
A failed patch usually costs more the second time.
If you need CS1 Real Interiors for drywall repair, texture matching, painting, insulation, or interior framing in Tigard or the Portland metro, request a free estimate through the contact form. Clear diagnosis, clean work, and a repair plan that addresses the cause of the damage can save a lot of time and frustration.