You usually notice wall finishing at the worst possible moment. The new lights go in, afternoon sun hits the wall, and every seam, patch, and wave suddenly shows up. Or you're getting a house ready to sell in Portland, Beaverton, or Lake Oswego and realizing the paint isn't the main problem. The surface under the paint is.
That's where interior wall finishing comes in. It's the work that turns installed drywall into a surface that looks clean, straight, and ready for paint or texture. Done well, it disappears. Done poorly, you'll see it every day.
For most homeowners, this part of the project feels harder to judge than flooring, cabinets, or trim. You can see a cracked wall or a rough patch, but it's not always obvious what level of finish you need, what kind of texture makes sense, or when a “simple repair” is likely to keep coming back. In Portland-area homes, that matters a lot. Older houses move. Remodels expose uneven framing. Moisture events leave behind more than stains. Good finish work has to account for all of that.
Table of Contents
- The Unseen Detail That Defines Your Home
- The Six Levels of Drywall Finishing Explained
- From Textured to Smooth Common Wall Finishes
- Planning Your Project Let Us Handle the Details
- Choosing the Right Finish for Your Portland Home
- Troubleshooting and When to Call a Pro
The Unseen Detail That Defines Your Home
A lot of homeowners think of walls as background until they start a remodel. Then the walls start deciding how finished the whole room feels. New cabinets can look expensive, but if the drywall around them has ridges, cracked corners, or a bad patch, the room still looks incomplete.
That's why interior wall finishing matters so much. It's the stage where joints are taped, fasteners are covered, corners are built cleanly, surfaces are corrected, and the wall is prepared for its final appearance. It sounds technical, but the result is simple. The room either looks sharp and intentional, or it doesn't.
Drywall now dominates interior wall finishing in the United States, with over 90% market share for interior finish materials, driven by speed of installation, cost-effectiveness, and the ability to achieve Level 5 smooth standards, according to BuildingGreen's review of interior finish systems. For homeowners, that means most wall-finish decisions come down to how drywall is taped, coated, sanded, and textured, not whether drywall itself belongs in the house.
What homeowners usually want
The initial conversation often doesn't involve requests for 'Level 4'. Instead, the priority is outcomes:
- Walls that look smooth in natural light
- Repairs that don't flash through paint
- Corners that stay crisp
- A finish that fits the budget
- Less mess and less disruption
Those are fair concerns. Dust gets everywhere if the job isn't contained well. Cheap patching often looks fine until primer goes on. And a low-cost finish can become expensive if it has to be redone before painting or sale.
Good wall finishing doesn't call attention to itself. It lets everything else in the room look better.
There's also a local reality. Portland homes range from older bungalows with movement and layered repairs to newer builds with big windows that expose every surface defect. The right finish in one home can be the wrong choice in another.
For homeowners who are also comparing contractors, this guide on strategies for contractors to get found can help you think about what transparent, locally focused service should look like before you hire anyone.
The Six Levels of Drywall Finishing Explained
Think of drywall finish levels like image resolution. At the low end, you're looking at a rough preview. At the high end, you see a clean, refined surface where flaws are much harder to spot. The wall didn't just get “more mud.” It got more preparation, more control, and tighter tolerances.
Why levels matter to homeowners
The level affects three things more than anything else:
| Finish concern | Lower levels | Higher levels |
|---|---|---|
| Appearance | Good enough for concealed or utility areas | Better for visible living spaces and critical lighting |
| Labor | Less time and fewer finishing steps | More coats, more sanding, more detail work |
| Paint result | Surface defects show more easily | Paint lays down more evenly on a flatter surface |
If you've ever wondered why two drywall bids look far apart, finish level is often part of the answer. So is the amount of correction required before finishing starts.
For contractors building estimates, clean takeoffs matter. Homeowners won't use estimating software themselves, but seeing how detailed professional takeoffs are can explain why serious bids are more than a guess. This overview of Exayard drywall estimating software is a useful example of the kind of planning that goes into drywall scope and finish work.
A practical look at Levels 0 through 5
Level 0
No taping, no compound, no finish. Drywall may be hung, or material may be placed for future work. Homeowners rarely see this stage unless a remodel is midstream.
Level 1
Tape is embedded in joint compound, but the finish is very rough. Tool marks and excess compound are acceptable. This is usually for concealed spaces such as service areas above ceilings or inside non-finished utility zones.
Level 2
Joints and fasteners receive additional compound, but the surface still isn't intended as a final decorative wall. A garage, warehouse-type area, or substrate under tile may fit here depending on the build.
Level 3
A more developed finish, often suitable where a heavier texture will be applied. If a homeowner wants texture that helps hide minor irregularities, this level may support that plan well. It is not the choice for walls that need to look smooth under paint.
Level 4
This is the common standard for many painted interior walls. Joints, fasteners, and accessories receive a more complete finish, and the surface is prepared for flat paints and many typical residential spaces. For a lot of remodels in Hillsboro or Tigard, Level 4 is the practical middle ground.
Level 5
The highest drywall finish level. This includes the Level 4 process plus a skim coat or equivalent surface treatment over the wall. It's used where smooth paint-ready walls matter, especially with stronger light, darker paints, or modern interiors where texture would feel out of place.
Practical rule: The smoother you want the final look, the less forgiving the wall becomes. Every framing issue, seam, patch, and corner has to be handled better upstream.
That idea shows up in related plaster standards too. AWCI notes that high-quality systems under ASTM C842 use basecoat plaster for the first two coats before the finish coat, and that layered build-up matters for crack resistance and flatness, as explained in AWCI's interior finishing guidance. Different materials, same lesson. Skipping build-up usually shows later.
From Textured to Smooth Common Wall Finishes
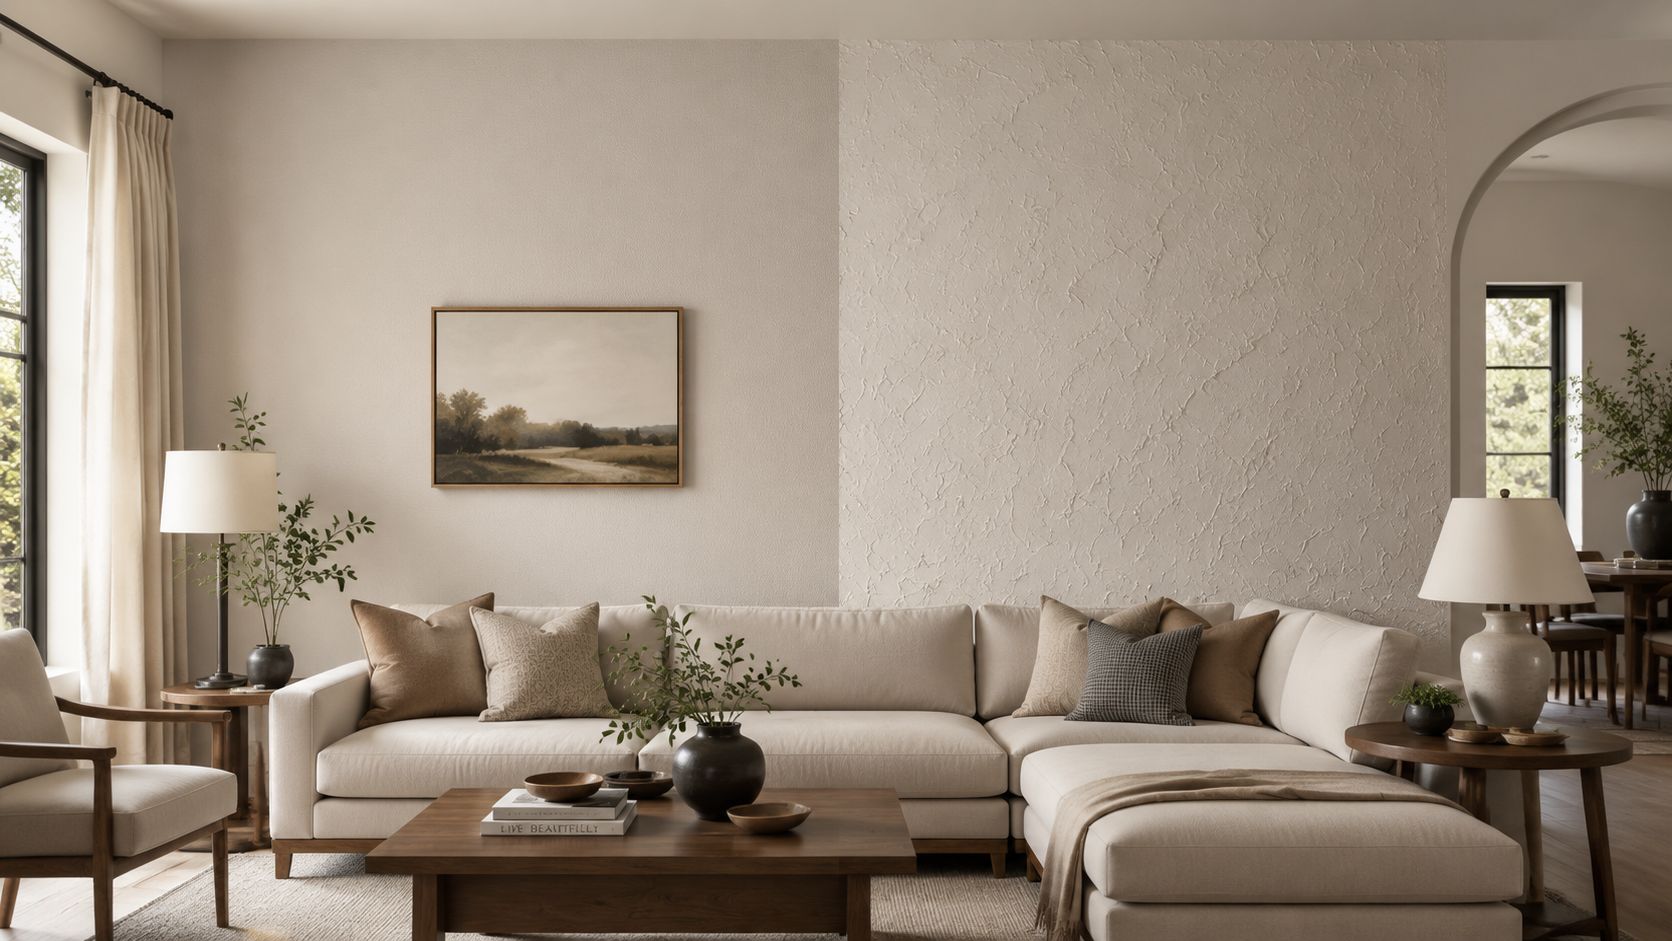
Once the drywall is properly finished, the next question is what the wall should look like. This decision often leaves homeowners stuck. They know they don't want ugly seams, but they may not know whether texture will help or hurt the room.
Texture and smooth finish both have a place. The right choice depends on lighting, style, existing surfaces, and how much forgiveness the room needs.
What texture does well
Common textures such as orange peel and knockdown are popular for a reason. They break up light, soften minor imperfections, and can blend well with existing finished areas in many homes. In practical terms, texture often makes more sense when you're tying into older work or trying to match the rest of the house.
Texture can be a smart choice in:
- Rental properties: Easier to blend repairs over time
- Busy family homes: Small dents and minor wear don't stand out as much
- Patch-heavy remodels: Texture can help visually unify old and new surfaces
- Ceilings: Especially where smooth ceilings would reveal every irregularity
That doesn't mean all texture is equal. Heavy, inconsistent spray texture can look dated or sloppy if it's not intentional. Matching an existing texture is also harder than many DIY videos make it look.
When smooth walls are worth it
A Level 5 smooth finish gives a cleaner, more modern look. It also asks more from the installer and the room itself. If the lighting is strong or rakes across the wall, smooth work needs to be flatter and more consistent. Dark paint and satin or semi-gloss finishes make that even more demanding.
Smooth walls usually make sense in spaces like these:
- High-end kitchen and living remodels
- Modern additions
- Primary suites
- Offices and commercial interiors where a clean look matters
- Homes being prepared for sale where first impressions count
Here's a quick visual reference for how finishing choices affect the look of a room:
Corners and transitions that need more care
Most homeowners focus on flat wall areas, but corners are where a lot of finish jobs succeed or fail. Standard 90-degree corners are straightforward when framing is decent. Angled ceilings, pitched walls, and architectural features are different.
Many guides ignore off-angle inside corners, but modern homes often include them. For those conditions, specialized solutions are recommended over standard paper tape alone to create a crisp, durable line, as discussed in Trim-Tex guidance on off-angle inside corners. In plain terms, if the corner isn't standard, the finish method shouldn't be standard either.
A corner that looks fine on day one can start cracking early if the material choice doesn't match the angle and movement in the wall assembly.
That's especially relevant in remodels where new work meets older framing. The flatter and cleaner the intended finish, the more attention those transitions need.
Planning Your Project Let Us Handle the Details
A wall finish decision affects more than appearance. It affects how long a room stays out of service, how much dust ends up in the house, what the painter can charge, and whether the finished wall looks right under Portland's gray daylight one month from now and five years from now.
That matters in this market. In older Portland homes, especially remodels where new drywall meets settled framing, the finish level is part of the investment decision. Spend too little in the wrong place, and the repair keeps showing up. Spend too much in the wrong room, and you pay for a standard the house did not need.
What the process actually looks like
A proper wall-finishing workflow usually includes:
Surface prep
Loose material, failed tape, damaged drywall, and weak patches need attention first. Finishing over unstable surfaces causes many repeat repairs. If movement, moisture damage, or poor fastening is still present, no amount of mud will solve it for long.Taping and first coats
Seams, corners, and fasteners get the initial build-up. This is also the stage where line quality starts to show, especially around butt joints, inside corners, and patched openings.Additional coats and correction
Flatness is built here. Repairs get blended into the field of the wall, and uneven transitions are widened so they disappear under primer and paint instead of telegraphing through.Sanding and inspection
Good sanding is controlled, not aggressive. The goal is a clean, even surface without fuzzing the face paper, digging low spots, or filling the room with avoidable dust.Cleanup and readiness for paint or texture
The job is not finished when the compound dries. It is finished when the room is clean, the surfaces are inspection-ready, and the painter or texture crew can start without fixing someone else's work first.
Why homeowners usually hand this off
Homeowners around Portland usually call for help for the same practical reasons. They do not want dust drifting through the house, they do not want a repair that flashes under side lighting, and they do not want to guess whether the wall should be smooth or matched to an existing texture.
Those concerns are valid.
A small patch can be simple on paper and still turn into an obvious spot after paint if the feathering is too tight, the texture match is off, or the wall was never flat to begin with. Smooth-wall work raises that risk because every defect shows more clearly. Texture can hide minor inconsistencies, but only if it matches the surrounding surface well enough to look intentional.
If the project includes drywall, painting, insulation, or metal stud framing, CS1 Real Interiors is one option for homeowners in Portland, Beaverton, Hillsboro, and nearby cities who want a clear scope before work begins. Getting that scope early helps set the right finish level, budget, and schedule before demolition or paint starts.
If a wall has to look flawless when the job is done, the process has to stay controlled from prep through cleanup.
Choosing the Right Finish for Your Portland Home

The right finish isn't always the highest finish. It's the one that fits the house, the lighting, the use of the room, and your long-term plans. In the Portland metro area, that choice often depends on whether you're improving an older home, maintaining a rental, or building a cleaner modern interior.
Match the finish to the house and the goal
An older Portland bungalow often benefits from a practical approach. If the house has lived-in character, previous repairs, and some natural movement, a carefully matched texture may be the better value. It blends with the home's existing look and doesn't force every wall into a perfectly modern standard that the rest of the house can't support.
A newer home in Lake Oswego or a remodel with large windows and smooth trim often points the other direction. If the design is clean and contemporary, a smoother finish usually fits better visually.
A few common scenarios:
- Pre-sale cleanup: Patch visible defects, correct bad seams, and choose a finish that photographs well without overbuilding the scope.
- Rental turnover in Beaverton or Gresham: Durability and repairability matter. Texture often helps future maintenance.
- Water-damaged wall after winter leaks: The priority is proper repair first, then matching the surrounding finish. If you're dealing with staining, soft board, swelling, or recurring cracks, start with drywall repair.
- Whole-room remodel: This is the time to decide whether the room should stay textured or move to smooth. Trying to make that decision after paint starts gets expensive fast.
Where a higher finish level pays off
A higher finish level is usually worth it when the wall will be judged closely. Living rooms with strong side light, kitchen remodels, office walls behind open shelving, and custom spaces all fall into that category. The finish becomes part of the design, not just a background surface.
There's also a documentation side to quality that homeowners rarely hear about. Architectural specifications commonly require finish products to be backed by manufacturer technical data, installation instructions, and certified test reports, as shown in this wall panel specification document. In practice, that reflects a broader truth. Good-looking walls come from repeatable methods and compatible materials, not just somebody “making it look nice.”
For homeowners across the Portland metro area, that's why finish selection should be treated like an investment decision. Not every room needs the same standard. But the rooms you use most, and the walls buyers notice first, usually deserve more than the cheapest possible patch.
Troubleshooting and When to Call a Pro
A wall can look like it needs a quick patch and still be hiding a bigger issue. I see this a lot in Portland-area homes, especially older houses that have settled a bit, rooms with past moisture problems, and remodels where a new smooth finish sits next to older textured surfaces. The cost difference between a simple patch and a proper repair gets much bigger once paint goes on and the flaw still shows.
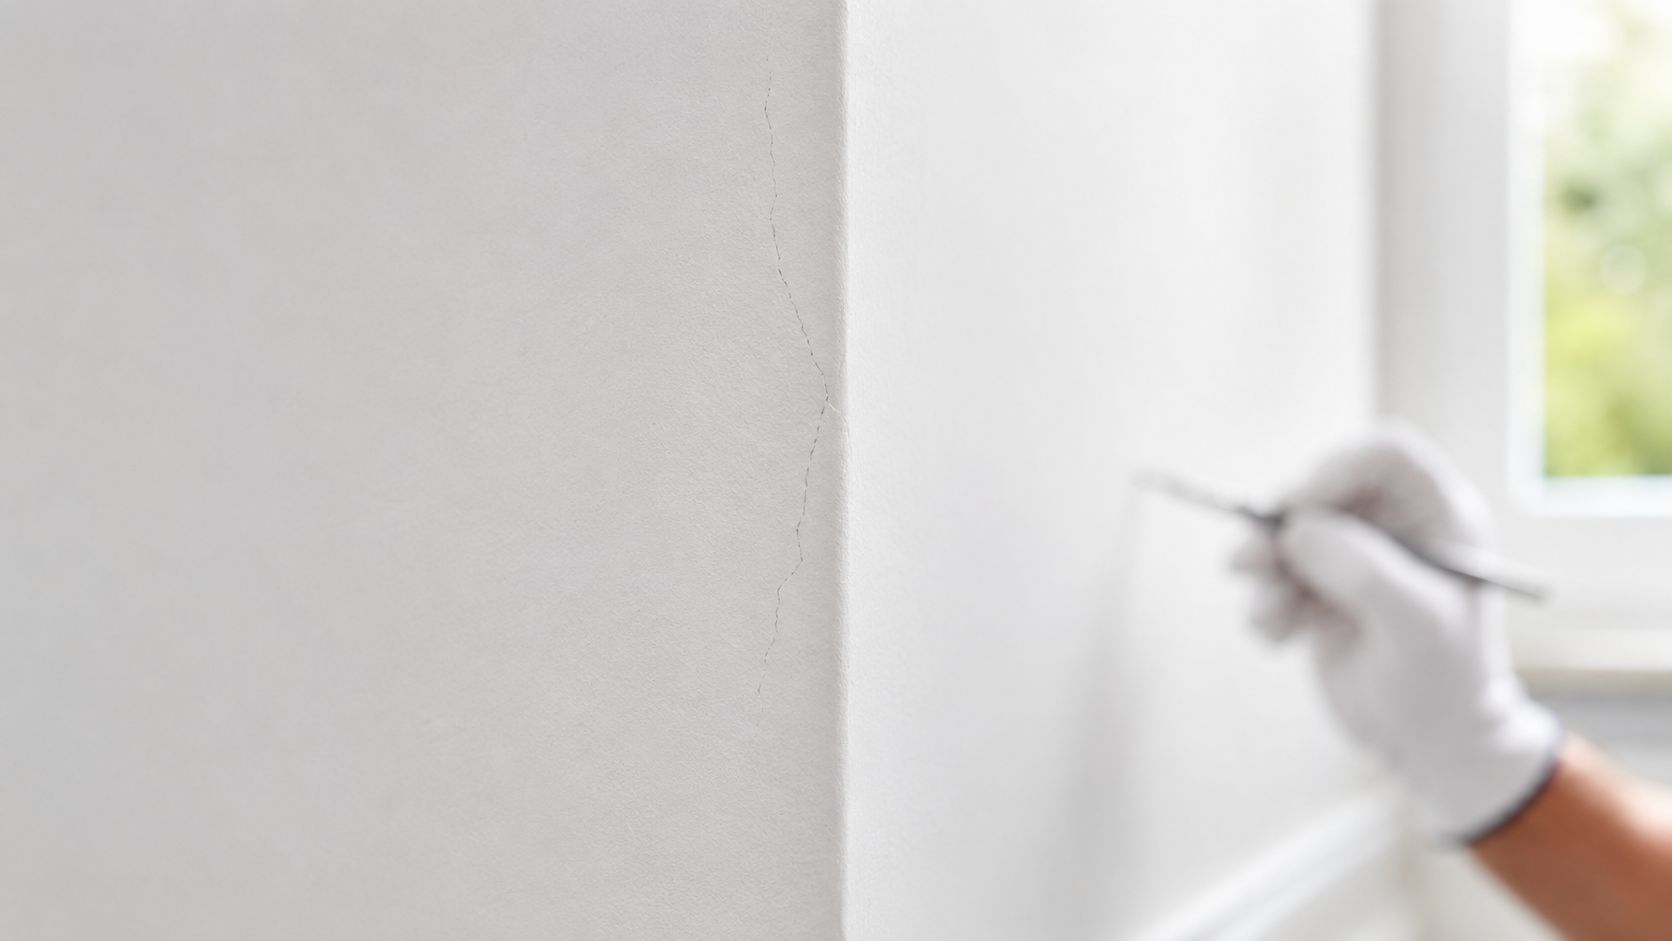
Problems that are usually cosmetic
Minor surface damage is often manageable if the drywall is firm and the finish around it is holding well. Small nail pops, light scuffs, and a shallow ding from furniture usually stay in the cosmetic category when the area is dry, solid, and not spreading.
A basic patch is often reasonable when:
- The damage is shallow
- There's no staining or softness
- The crack isn't returning
- The existing texture is simple and limited to a small area
Cleaning matters before any touch-up. Dirt, oils, and scrub marks can make a repair flash through the paint even if the patch itself is done well. If you want a good primer on cleaning walls without damage, that guide is a useful place to start.
Problems that need a professional repair
Some failures point to movement, moisture, or a bad repair sequence, not just surface wear. Recurring cracks, loose tape, soft drywall, stains, sagging ceilings, damaged outside corners, and patches you can spot from across the room all belong in that category.
These repairs usually need more than filler and touch-up paint:
- Recurring cracks: Framing movement, seasonal expansion, or a shallow patch can bring the crack back.
- Water damage: Stains and soft spots often mean the damaged board, joint tape, or insulation needs attention before finishing starts.
- Texture matching in visible areas: Entry walls, living rooms, and ceilings show every mismatch, especially in Portland homes with strong window light and long gray-day shadows.
- Large or irregular patches: The wider and flatter the surface, the harder it is to hide a transition under paint.
If the repair keeps coming back, the wall is telling you the first fix didn't solve the underlying problem.
Good results depend on the right materials, proper drying time, and a finish method that fits the room. A ceiling patch in a hallway with low natural light has a different tolerance than a smooth wall in a remodeled kitchen or living room. That is why finish work affects long-term value, not just appearance. A cheap patch in a high-visibility room often turns into a repaint, a second repair, and more mess than the homeowner expected.
Homeowners in Tigard, Vancouver, WA, and surrounding areas usually call once the failed patch has already been painted. It is usually cheaper, cleaner, and faster to stop before that point, diagnose the cause, and repair it once.
If your walls need repair, texture matching, smooth finishing, painting prep, or a full interior update, contact CS1 Real Interiors. Whether you're in Portland, Beaverton, Hillsboro, Lake Oswego, Gresham, or Vancouver, WA, professional help can save time, reduce mess, and give you a finish that still looks right after the paint dries.