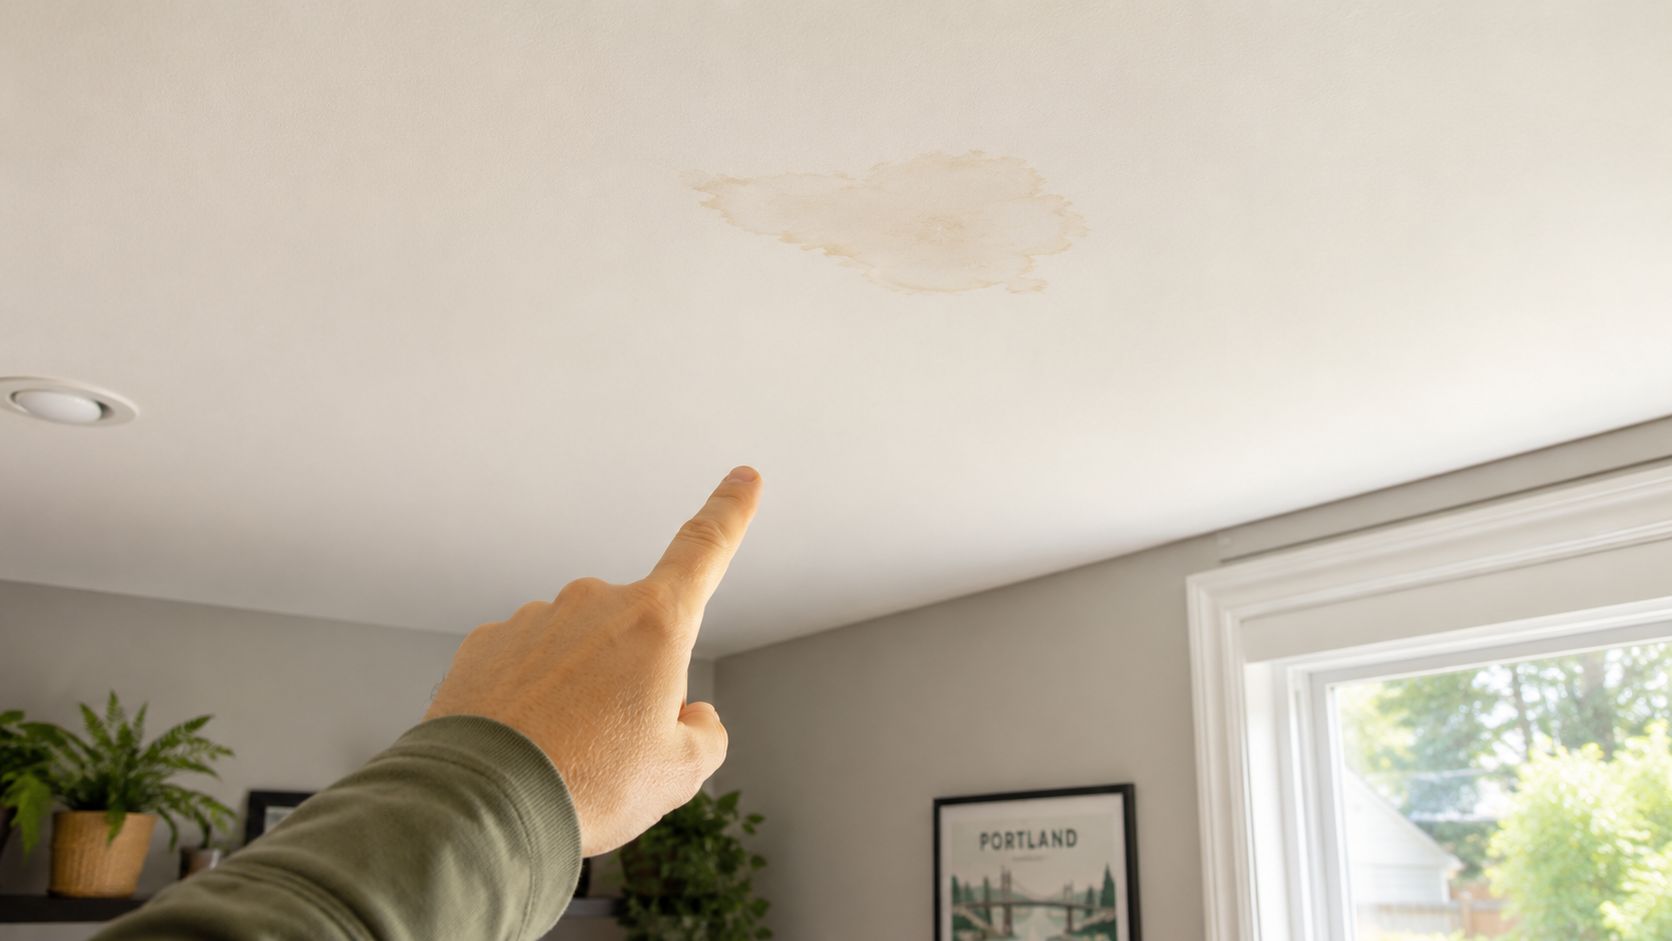
A ceiling stain after a Portland rainstorm gets your attention fast. So does a crack that keeps coming back in the hallway, a dent from moving furniture, or a patch of wall that looks worse every time somebody tried to “touch it up.” In that moment, most homeowners and property managers ask the same questions. Is this cosmetic, or is something behind the wall failing? Can it be repaired cleanly, or does it need to be opened up and replaced?
That's where hiring the right interior drywall contractor matters. Drywall work looks simple from a distance, but good results depend on diagnosis, board selection, fastening, taping, finish level, texture matching, and cleanup. It's also a large specialty trade. The U.S. drywall and insulation installers industry was estimated at $81.9 billion in 2026, with over 125,000 businesses in the market, according to Data USA industry data. Size alone doesn't make every contractor equal. It just means you need a clear way to sort through your options.
If you're planning a remodel and want to think through room changes before calling for bids, simple planning tools for room remodeling can help you define wall locations, room use, and where a finish really needs to look perfect.
Table of Contents
- When to Hire an Interior Drywall Contractor
- Defining Your Project Scope and Finish Level
- Get Your Professional Drywall Estimate
- How to Vet and Hire the Right Portland Contractor
- What to Expect During Your Drywall Project
- Solving Common Drywall Problems the Right Way
- Your Partner for Flawless Interiors in Portland
When to Hire an Interior Drywall Contractor
Some drywall jobs are small but still need a pro. Others look small and turn out to involve insulation, framing, or moisture inside the cavity. If you're in Portland, Beaverton, Hillsboro, Tigard, Lake Oswego, Gresham, or Vancouver, WA, the smart time to call is when you need the wall to disappear after the repair, not just get covered.
Signs the job is bigger than a basic patch
A professional interior drywall contractor is usually the right call when you're dealing with:
- Recurring cracks: If a crack reopens after caulk or filler, somebody needs to look at movement, seam failure, or framing conditions.
- Water staining or softness: Discoloration is one issue. Soft gypsum, swelling, or musty odor is another.
- Ceiling damage: Overhead repairs are harder to blend and usually show flaws sooner under light.
- Remodel transitions: New walls meeting old surfaces often require better planning than homeowners expect.
- Texture matching: Orange peel, knockdown, and older hand-applied textures are tough to blend without visible edges.
A drywall repair isn't successful when it's merely filled. It's successful when you can't tell where the damage was.
In older homes around Portland and in rental turnovers around places like Tualatin or Forest Grove, I'd also flag repairs that sit next to trim, cabinets, stairwells, or strong window light. Those are the spots where rushed work shows up first.
The question to ask first
Before you get attached to a cheap repair idea, ask this: Do I need a cosmetic fix, or do I need the wall system restored? That difference affects labor, drying time, painting, and whether the contractor should open the wall.
If you want the result to hold up, hiring an interior drywall contractor early usually saves money compared with patching the same area twice.
Defining Your Project Scope and Finish Level
Homeowners often ask for a drywall estimate before they've decided what kind of result they want. That's normal. But the more clearly you define the scope, the more useful the estimate becomes.
Repairs, replacement, or new installation
A drywall project usually falls into one of three buckets.
Small repair means localized damage. Think doorknob holes, furniture dents, popped fasteners, minor corner bead damage, or a single seam crack. These jobs are about blending. The repair can be technically small and still require careful finishing if it sits in a visible area.
Replacement means the damaged section should come out. That's common with water intrusion, sagging ceiling areas, softened board, mold concern, or heavily damaged walls in a turnover unit. In these cases, the full job may include opening the cavity, checking insulation, and rebuilding the surface in layers.
New installation applies to remodels, basement finishing, additions, tenant improvements, and layout changes. Here the contractor is not just repairing a surface. They're coordinating framing, board layout, fastening, joints, corners, and the final finish standard.
Practical rule: If your concern is “how do we hide this,” that's a repair conversation. If your concern is “what's happening behind this,” that's usually replacement or new work.
Finish level matters just as much as scope. In new single-family homes completed in 2024, 48% had painted walls and 23% had textured walls, based on the source summarized at Lujan Construction. That shift matters because smooth walls show imperfections more readily, especially in rooms with large windows, long sightlines, and angled natural light.
Understanding Drywall Finish Levels
Below is the simplest way to think about finish expectations before you request bids.
| Finish Level | Description | Best For |
|---|---|---|
| Level 3 | Joints are taped and coated, but the surface is not intended for a high-end smooth painted look. | Utility areas or surfaces receiving heavier texture |
| Level 4 | Standard paint-ready finish with taped joints and multiple coats, suitable for many finished spaces | Most bedrooms, hallways, living areas, and standard residential repaint work |
| Level 5 | Includes a thin skim coat across the full surface to reduce visible flaws under strong light | Smooth modern interiors, high-visibility remodels, kitchens, living spaces, and resale prep |
Choosing the right finish for the room
Level 5 isn't automatically the right answer. It costs more labor and calls for tighter quality control. In a low-visibility room with existing texture, matching the texture can be the better value. In a Lake Oswego remodel with large windows and smooth painted walls, Level 5 often makes more sense.
A useful way to decide is to ask:
- What will the wall look like under daylight?
- Will the room be painted smooth or textured?
- Is this a resale-facing area or a back-of-house area?
- Does the new work need to blend into older finishes?
If you don't define that up front, estimates won't be comparable. One contractor may price a basic repair and another may price a full paint-ready finish. Those are not the same job.
Get Your Professional Drywall Estimate
If you're not sure whether your project needs repair, replacement, texture matching, or a higher finish level, the fastest next step is to request a free estimate through this form. Clear photos help, but an in-person review is often what reveals the full scope, especially with ceilings, water damage, and remodel tie-ins.
How to Vet and Hire the Right Portland Contractor
A lot of drywall problems start before work begins. The wrong hire leads to vague scopes, thin bids, weak prep, and surfaces that look acceptable until the afternoon light hits them. If you're searching for a drywall contractor in Beaverton or anywhere in the Portland metro, vetting matters more than the sales pitch.

What to verify before you say yes
Start with the basics. For Oregon projects, confirm the contractor is properly licensed. For Vancouver, WA work, confirm the Washington-side requirements that apply. Then ask whether the company carries general liability and workers' compensation coverage.
After that, ask sharper drywall-specific questions:
- Who will do the work: In-house crew, subs, or a mix?
- What's included: Demolition, disposal, protection, texture matching, primer, paint, cleanup?
- What finish is being priced: Basic patch, Level 4, or Level 5?
- How will they handle dust: Floor protection, masking, containment, daily cleanup?
- Can they show similar projects: Ceiling repairs, water-damage replacement, remodel tie-ins, or occupied-home work?
A good contractor should also be able to explain reviews without leaning on hype. If you manage rentals or small commercial spaces and want to strengthen your own reputation pipeline after projects wrap, this guide on increase your Google reviews is a useful operational reference.
Cheap drywall pricing often means something was removed from the scope, even if nobody says it out loud.
The labor side of this trade is skilled work. In May 2022, drywall and ceiling tile installers in the building finishing industry had a mean annual wage of $57,880, according to the U.S. Bureau of Labor Statistics. When a bid comes in far below the rest, it's reasonable to ask what corners are being cut in labor quality, supervision, insurance, prep, or finish expectations.
How to read the estimate, not just the total
Don't compare bids by bottom-line price alone. Compare what each contractor is promising to deliver.
Look for line items or plain-language descriptions covering:
- Area of work: Which rooms, walls, or ceilings are included
- Type of repair: Patch, partial replacement, full rehang, skim coat, texture blend
- Finish target: Paint-ready, texture-ready, Level 4, or Level 5
- Adjacent work: Insulation, framing changes, trim removal, paint touch-up
- Schedule: Start window, drying time expectations, and final walkthrough
If you want a local benchmark for contractor scope and service categories, review the Portland drywall services page and compare that level of clarity against any estimate you receive.
One factual option in this market is CS1 Real Interiors, which provides drywall repair, drywall installation, interior painting, insulation, and metal stud framing for residential and small commercial interiors in the Portland area.
What to Expect During Your Drywall Project
The best drywall projects feel organized from day one. You know what area is being worked on, how the crew is protecting your home, what needs drying time, and when you'll see the final surface.

The work sequence that usually produces clean results
A professional workflow starts before the first sheet goes up. The crew should verify layout, confirm rough-in work is complete if the wall is open, and choose board type based on room conditions. In standard methodology, metal studs are commonly spaced at 400 to 600 mm center-to-center, boards are fixed with screws at 200 to 300 mm spacing, and installers leave a 3 mm floor gap to reduce moisture wicking, as described in this drywall installation methodology reference.
For the client, that usually translates into a sequence like this:
- Protection first: Floors, furnishings, openings, and adjacent finished areas get covered.
- Demolition or prep: Damaged board is removed, edges are squared, framing is checked.
- Board installation: New drywall is cut, fit, and fastened.
- Tape and first coat: Joints, corners, and fastener heads are treated.
- Dry time: This isn't dead time. It's necessary for a stable finish.
- Additional coats and sanding: The surface is built out and refined.
- Texture or smooth finish: Depending on the agreed scope.
- Cleanup and walkthrough: The contractor checks the surface before turnover.
For repair-focused work, homeowners can also review the drywall repair services page to understand the kinds of problems that usually need a pro rather than filler and paint alone.
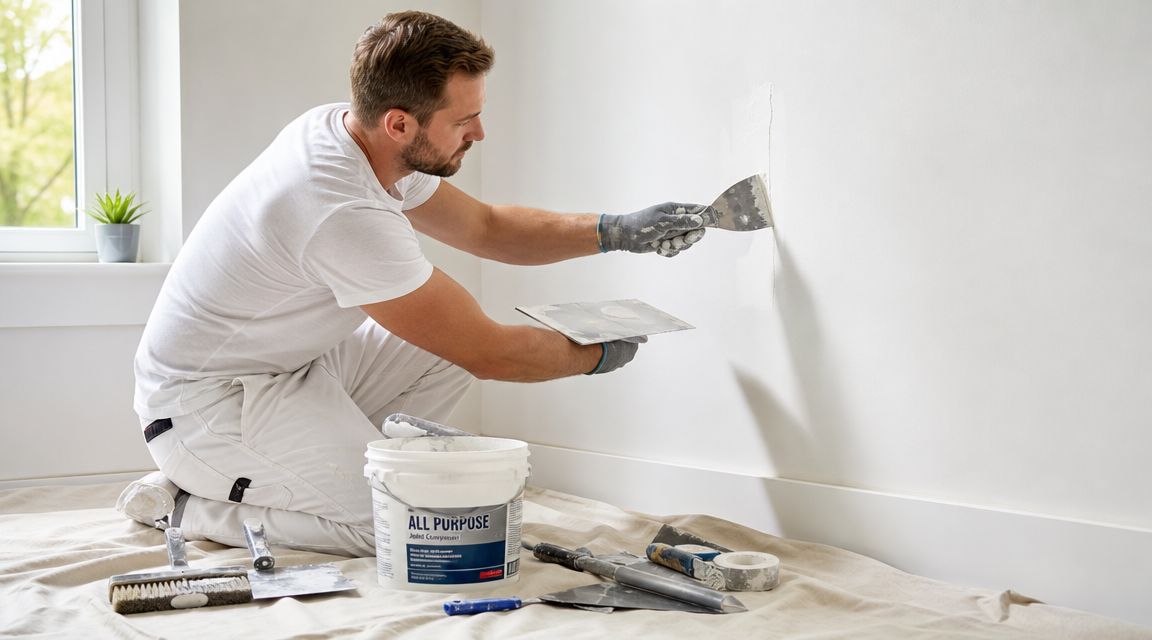
What a professional finish stage looks like
The finishing stage is where rushed work gets exposed. A proper taping and mudding sequence uses a thin bed of compound, embedded tape, then additional coats with drying between coats. Strong crews don't just fill joints. They feather them wide enough to hide the transition, especially on butt joints and ceiling seams.
Here's a short visual overview of the kind of process clients should expect to hear explained clearly:
Quality control should include checking joint treatment, flatness, and surface smoothness before texture, primer, or paint. If the project includes smooth walls, the contractor should talk with you about how lighting affects visibility. Morning and afternoon light from Portland-area windows can make a decent patch look obvious if the finish wasn't built and sanded correctly.
Good drywall work has a rhythm. Protect, hang, tape, dry, coat, sand, inspect. Problems usually show up when someone tries to skip one of those steps.
Solving Common Drywall Problems the Right Way
Most calls for an interior drywall contractor come down to a few repeat issues. The mistake is treating all of them like simple cosmetic defects.
Water damage needs a decision, not a patch
Water-damaged drywall causes the most confusion. Homeowners naturally want to dry the spot, stain-block it, and move on. Sometimes that works for a very minor issue that was caught immediately and confirmed dry. Often, it doesn't.
According to EPA guidance summarized in the source provided, wet building materials like drywall should be dried within 24 to 48 hours, and porous materials that can't be thoroughly dried, or that have mold present, should be removed and replaced, as noted in this water-damage drywall guidance reference. That's why a ceiling stain after a roof leak in Portland, or a wall leak behind plumbing in Hillsboro, can require more than a patch.
Ask a contractor to evaluate:
- Softness or swelling: The board may have lost integrity.
- Cavity conditions: Insulation and framing may also need attention.
- Staining source: The leak has to be solved before finish work starts.
- Odor or visible growth: Cosmetic repair may be the wrong approach.
Cracks, holes, and texture mismatch
Stress cracks are another area where homeowners get stuck in repeat repairs. If the underlying seam moved, a surface-only patch often reopens. A better repair may involve cutting out failed tape, re-taping, and rebuilding the joint so movement is handled correctly.
Large holes need backing, proper patch sizing, joint build-out, and blending into the surrounding plane. That's why big wall damage from a door swing or move-out isn't just “fill and sand.” The larger the patch, the more important feathering and surface control become.
Texture matching is its own skill. The challenge isn't just spraying or hand-applying a pattern. It's matching the size, spread, knockdown timing, and surrounding paint sheen so the repair doesn't flash from across the room. In Tigard, Tualatin, and many established neighborhoods with older wall textures, that difference is what separates a real repair from a visible patch.
The goal isn't to make the damaged area look better. The goal is to make it stop attracting your eye.
Your Partner for Flawless Interiors in Portland
Hiring an interior drywall contractor should reduce stress, not add to it. The right hire gives you a clear scope, realistic finish expectations, proper repair methods, and a cleaner project experience from start to finish. That matters whether you're fixing one ceiling stain, preparing a home for sale, or coordinating a full remodel with insulation, metal stud framing, drywall finishing, and painting.
If you need drywall repair, new drywall installation, texture matching, or paint-ready smooth walls anywhere in Portland, Beaverton, Hillsboro, Tigard, Lake Oswego, Gresham, or Vancouver, WA, get expert eyes on the project before a small problem turns into a repeat repair.
Need help with a drywall repair, remodel, or interior finish project? Contact CS1 Real Interiors and request a free estimate for your Portland-area home or small commercial space. Clear scope, professional workmanship, and reliable interior solutions start with the right conversation.