

You notice it when the light hits the wall just right. A thin line above a doorway in Beaverton. A seam opening at the ceiling in Portland. A jagged crack in a Lake Oswego living room that wasn't there last season, or maybe was, but now you can't ignore it.
Most homeowners ask the same question first. Is this just normal settling, or is something wrong?
That's the right question. Good drywall crack repair starts with diagnosis, not mud. Some cracks are cosmetic and easy to patch. Some are tied to movement, moisture, or framing issues and will keep coming back until the cause is handled. If you own an older home in Portland, manage rentals in Hillsboro, or are getting a place ready to paint in Tigard or Vancouver, WA, reading the crack correctly can save a lot of frustration.
Table of Contents
- That Unsettling Crack What Does It Really Mean
- How to Diagnose Your Drywall Cracks
- A Practical Guide to DIY Hairline Crack Repair
- Is Your Drywall Damage Beyond a DIY Fix
- Achieving a Flawless Finish for Complex Repairs
- Preventing Cracks and Protecting Your Investment
That Unsettling Crack What Does It Really Mean
A drywall crack rarely shows up at a convenient time. It appears after you paint, before family comes over, or right when you're thinking about listing the house. You see a small line and hope it's nothing. Then you start noticing a second one near a window, or a ceiling seam that seems a little more visible every winter.
In the Portland area, that uncertainty is common. Newer homes can show shrinkage and settling cracks. Older homes can have long-standing movement, seasonal expansion and contraction, or repairs that were done fast and painted over. Property managers in Gresham and homeowners in Lake Oswego deal with the same basic problem. The crack matters less than the reason it formed.
A crack is a symptom first and a repair item second.
Cost adds another layer to the decision. According to Angi's drywall repair cost guide, the average professional drywall repair cost is about $610, with a typical range of $296 to $927. A simple hairline crack can start around $60, while water-damage-related drywall repair can exceed $1,550. That spread tells you something important. A tiny visible crack can be a quick cosmetic repair, or it can be the first sign of a much bigger wall or ceiling problem.
The story behind the line
A straight hairline crack at a seam often points to normal movement or a weak previous finish. A recurring ceiling crack can suggest seasonal framing movement. A wider crack with staining nearby raises a different concern entirely.
Homeowners often focus on the line itself. Contractors focus on what's behind it.
That's the practical way to approach drywall crack repair. Don't ask only, “How do I fill this?” Ask, “Why did it open, and will it move again?” Once you answer that, the repair path gets much clearer.
How to Diagnose Your Drywall Cracks
Before you open a bucket of compound, look at the crack like an inspector would. Location, shape, and behavior tell you more than the width alone. The reason many DIY drywall crack repair jobs fail isn't bad effort. It's a bad diagnosis.
Sherwin-Williams notes that recurring cracks are often tied to settling, moisture changes, or roof truss uplift, which is why patching alone may not hold if the wall or ceiling is still moving in the background, as explained in its guidance on repairing seam cracks.
What the pattern usually tells you
A short, shallow hairline in a flat wall usually points to a cosmetic issue. That's often a surface-level repair if the drywall is dry, solid, and stable.
A crack that follows a seam, especially on a ceiling or near the wall-to-ceiling line, usually needs more than filler. That pattern often means movement at the joint.
A diagonal crack near a door or window deserves more caution. So does a crack that comes back after patching, or one that shows up with nail pops, trim gaps, sticky doors, or staining.
If you're also seeing signs of moisture at floor level, don't stop at the wall. Water problems often affect multiple finishes at once. For flooring-related symptoms, this resource on Flacks Flooring for floor water damage is useful because it helps you think about the whole damage path, not just the drywall surface.
Drywall Crack Diagnosis Cheat Sheet
| Crack Type | Appearance | Common Cause | Recommended Action |
|---|---|---|---|
| Hairline surface crack | Thin, short, usually uniform | Minor surface movement or previous finish shrinkage | Clean, widen slightly, patch, sand, prime, repaint |
| Seam crack | Straight line along a joint or ceiling seam | Joint movement, settling, moisture-related movement | Reinforce with tape and joint compound |
| Recurring crack | Reopens in same place after repair | Ongoing movement | Diagnose cause before repairing again |
| Concerning crack | Diagonal, widening, or paired with other house symptoms | Structural movement or moisture issue | Investigate underlying condition before cosmetic repair |
Practical rule: If the crack keeps coming back, the wall is telling you the first repair only hid the movement.
A quick homeowner check helps. Look for soft drywall, discoloration, peeling paint, or nearby trim separation. Open and close the nearest door. Step back and see whether the crack is isolated or part of a pattern across the room.
That five-minute inspection can tell you whether you're dealing with a simple patch or the start of a more involved repair.
A Practical Guide to DIY Hairline Crack Repair
For a small, stable crack, a DIY repair is often reasonable. The key is doing the boring parts right. Most failed patches happen because someone wipes filler across the surface, sands too soon, skips primer, and then wonders why the line prints back through the paint.
What to do before you fill anything
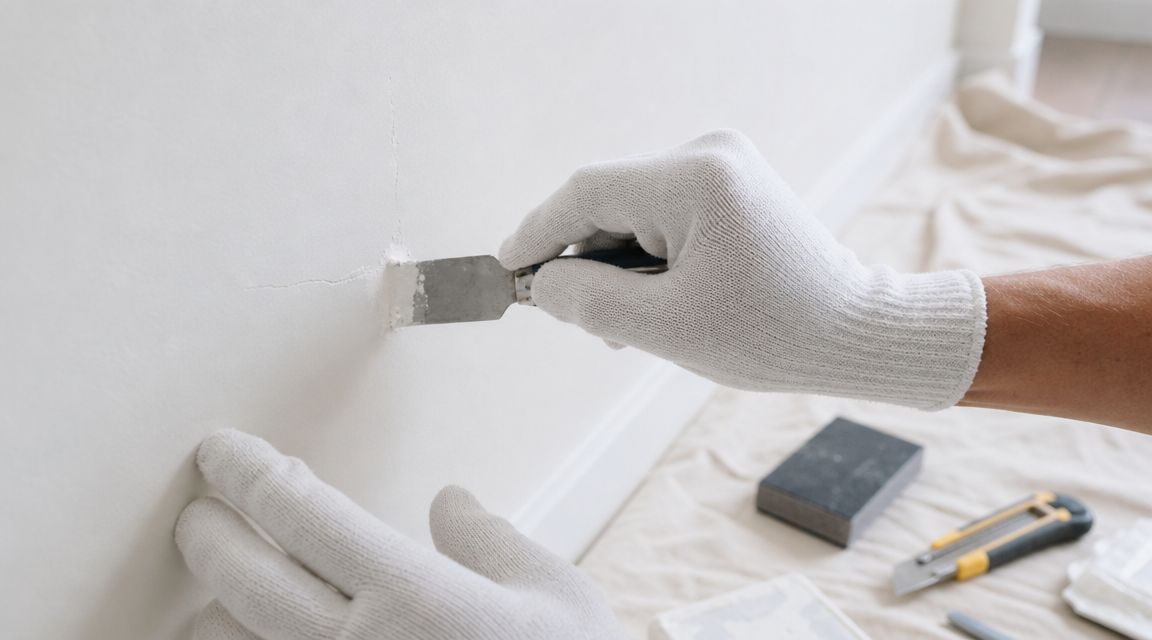
For small cracks under 1/4 inch, Behr recommends slightly widening the crack so the filler can bond, then applying a thin coat, letting it dry, sanding with 220-grit paper, and adding extra thin coats if shrinkage shows, as outlined in its drywall and plaster crack repair instructions.
That widening step matters more than is commonly assumed. You're not making the problem worse. You're giving the patching material something to grip.
Use this basic sequence:
- Remove loose material. Scrape away flaking paint, dust, or crumbling compound.
- Open the crack slightly. A 5-in-1 tool or sandpaper works for a small V-shaped groove.
- Clean the dust. Wipe or brush it out before every coat.
- Apply a thin coat. Press the material into the groove instead of smearing it only across the face.
How to patch it so it stays hidden
Let the first coat dry fully. If it shrinks, add another thin coat rather than one heavy pass. Thick applications take longer to dry, can shrink more, and leave a hump that shows under paint.
After it dries, sand lightly with 220-grit. You're leveling it, not gouging the wall. Then prime the patch before repainting.
Here's a visual walkthrough of the general repair process:
A few details separate a decent patch from one that disappears:
- Use thin coats so the repair cures evenly.
- Feather the edges beyond the crack so the patch blends into the surrounding wall.
- Prime before paint because raw patch material flashes under finish paint.
- Expect touch-up painting to spread beyond the crack if the wall has sheen or strong side lighting.
If the patch shrinks back into the groove, that's not unusual. Add another light coat. Don't try to solve it with one thick swipe.
For a plain wall in a bedroom or hallway, this can be a solid weekend repair. For ceilings, recurring seams, or anything textured, the trade-offs change fast.
Is Your Drywall Damage Beyond a DIY Fix
You patch a crack, paint it, and for a few months the wall looks fine. Then the line comes back in the same spot, or a second crack shows up nearby. At that point, the repair is no longer about filling a gap. You need to figure out what is causing the movement.
A small, dry, isolated crack in a low-visibility wall is often a reasonable DIY job. A crack that returns, spreads, stains, or shows up around doors, windows, or ceilings usually points to a bigger issue. Settlement, seasonal movement, moisture, and framing problems all leave different clues. If you treat all of them the same way, the wall usually tells on you later.
Signs you should stop patching and diagnose first
Watch for these conditions before you put more mud on the wall:
- The crack comes back in the same place after patching and paint.
- The crack is wider than a simple hairline or changes width with the seasons.
- It runs at an angle from a window corner, door opening, or ceiling line.
- You see stains, bubbling paint, or soft drywall that suggests moisture.
- The ceiling seam is cracking or sagging, especially under an attic space or truss area.
- Several cracks appear in one area instead of one isolated line.
- The door or window nearby sticks or has trim joints opening up.
Those patterns matter. A recurring seam crack may mean failed tape or movement at a joint. A soft, discolored area points to water first and drywall repair second. A diagonal crack near an opening can be a normal settlement issue, or it can be a sign that the framing is still shifting.
In Portland, Tigard, Gresham, and nearby areas, I see a lot of cracks tied to seasonal movement and past repairs that were filled but not reinforced. Older homes can move a little and stay stable. The problem is not always the crack itself. The problem is patching over active movement and expecting a permanent result.
Professional help makes sense when the cause is unclear, when moisture is involved, or when the finish has to disappear under paint and light. It also makes sense for ceilings, repeated joint failure, and texture repairs that are hard to blend. A clean-looking patch is one thing. A repair that stays closed is another.
If you are local and want to confirm service coverage, the Portland drywall contractor page is a useful place to start.
Achieving a Flawless Finish for Complex Repairs
Larger cracks and repeat cracks need reinforcement. Filler alone won't bridge ongoing movement for long. Drywall crack repair then shifts from cosmetic patching to actual joint repair.
Why tape matters on larger cracks
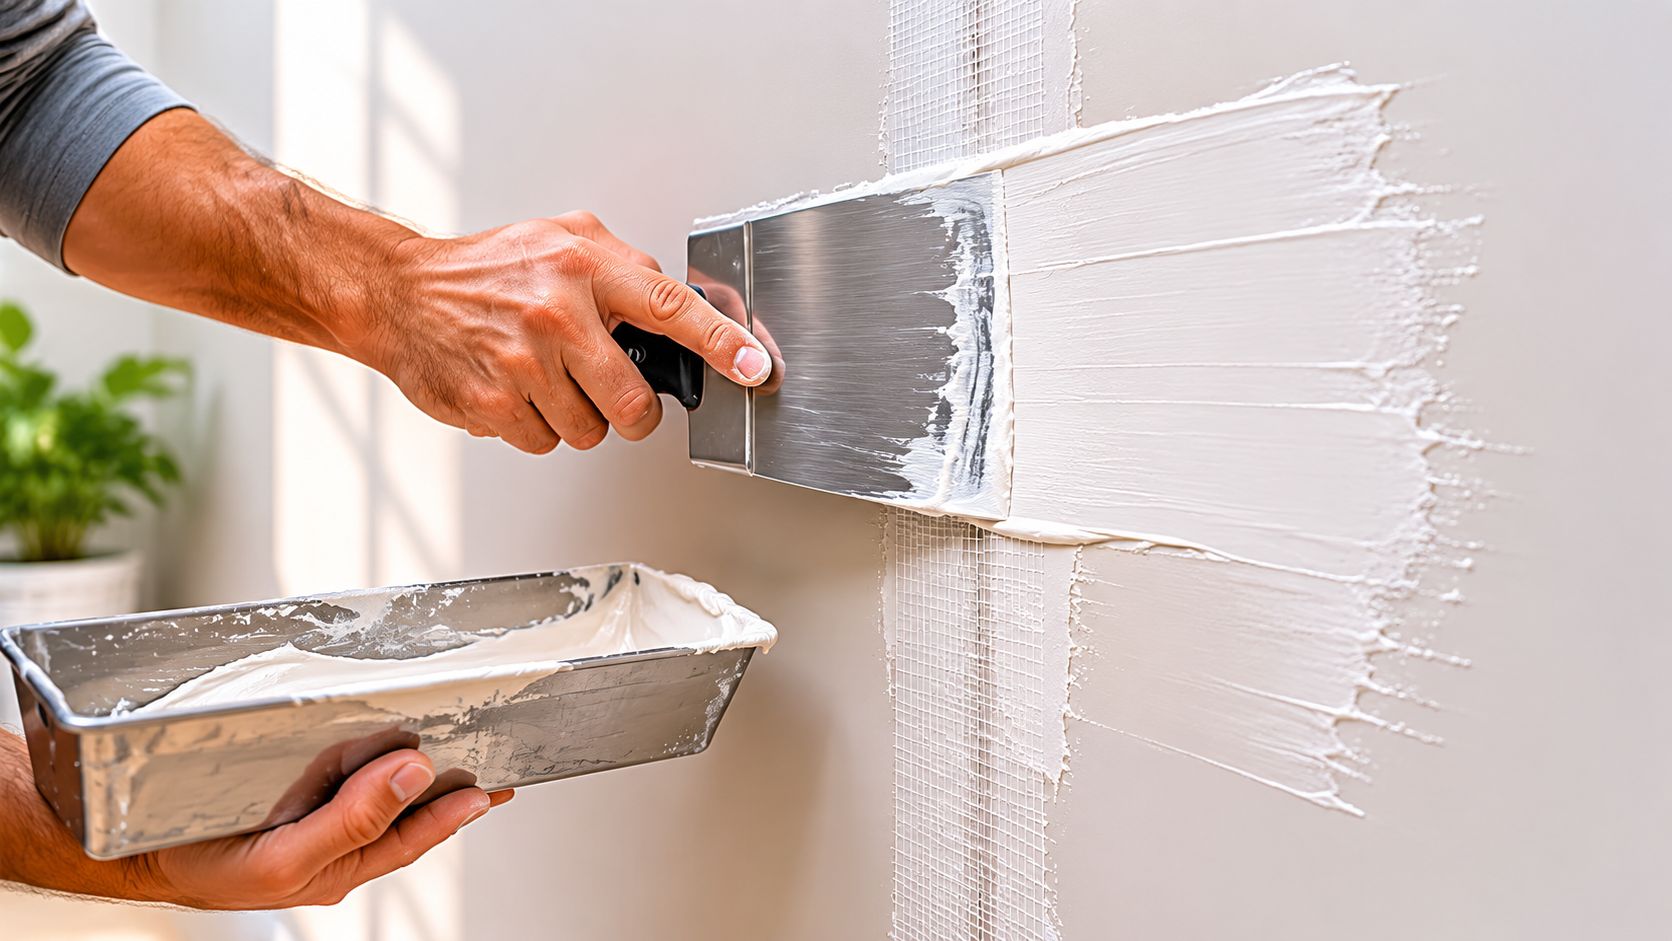
DAP recommends reinforcement for larger or recurring cracks by embedding drywall tape in joint compound and feathering the next coat 8 to 12 inches beyond the repair, as described in its drywall patching guidance.
That wider feather is what makes the wall look flat again. If the repair is too narrow, the crack may be closed but the patch telegraphs as a raised strip under paint.
A pro-style repair usually looks like this:
- Clean the seam well so loose compound and dust don't weaken the bond.
- Embed tape into compound to bridge the movement zone.
- Apply a wider second coat so the transition starts disappearing.
- Finish with controlled sanding to avoid fuzzing the tape or creating low spots.
Why good repairs still look bad sometimes
The repair can be structurally sound and still look obvious. That usually happens because of poor feathering, texture mismatch, or flashing under paint.
Smooth walls are less forgiving than people expect. Strong side lighting near windows will reveal ridges, shallow depressions, and rough sanding marks. Textured walls have a different problem. The patch may be flat while the surrounding field has orange peel, knockdown, or hand-applied variation.
Finish level matters. On modern interiors, especially where walls are painted in flat or eggshell and light washes across the surface, a smoother finish and careful blending make a visible difference. For homeowners who don't want to redo the same area twice, drywall repair services are one option for handling seam reinforcement, texture matching, and paint-ready finishing in one scope.
The hard part isn't closing the crack. The hard part is making the wall look untouched after you paint it.
Preventing Cracks and Protecting Your Investment
A lot of homeowners find out the hard way that a clean-looking patch is not the same as a lasting repair. The crack disappears after paint, then shows back up through the same seam next winter, or after the first stretch of wet weather. That usually points to an unresolved cause, not just a bad cosmetic patch.

Prevention starts with reading the pattern correctly. A small crack over a doorway may come from seasonal framing movement. A ceiling crack with a brown stain often means moisture. A crack that keeps widening, runs through multiple surfaces, or shows up with sticking doors and sloped floors deserves a closer structural look before anyone reaches for mud and tape.
Homeowners can lower the odds of repeat cracking with a few practical habits:
- Keep indoor humidity reasonably stable, especially through seasonal swings.
- Fix roof leaks, plumbing leaks, and window leaks as soon as they show up.
- Watch for cracks that return in the exact same spot after repair.
- Pay attention to new signs around the crack, such as staining, soft drywall, popped fasteners, or trim separating from the wall.
- During remodel work, insist on proper taping and enough finish width so joints are reinforced instead of just covered.
The goal is simple. Stop the movement or moisture first, then repair the drywall.
If you're getting a house ready for sale, wall cracks are rarely judged on drywall alone. Buyers notice the whole picture. This guide for real estate agents on repairs is a useful checklist for the visible issues that can affect how a home shows, including wall and finish problems.
Quality interior work protects value because visible defects draw the eye fast. Hallways, stairwells, living room ceilings, and long walls near windows tend to expose every ridge, shadow, and paint flash. In Portland-area homes, I often see the same pattern. A homeowner patches the line, repaints, and then ends up paying for a larger repair after moisture, framing movement, or repeated seam failure was missed the first time.
If the crack was caused by normal minor settlement, good repair methods and stable indoor conditions may be enough to keep it from returning. If moisture or movement is still active, no finish product will solve that by itself. That is the trade-off homeowners need to understand. A quick repair costs less today, but the wrong repair usually means more patching, more paint, and more disruption later.
If you need help with drywall, interior painting, insulation, or metal stud framing for a home or small commercial project, contact CS1 Real Interiors to start the conversation.