


Drywall finishing matters more than commonly understood because the highest-spec option, Level 5, adds a full skim coat over the entire gypsum board surface to reduce visible joints and flashing under critical lighting and high-gloss paint. For most homes, Level 4 is the standard painted-wall finish, but Level 5 is worth the extra investment when light rakes across the wall and every seam would otherwise show.
If you're staring at patched walls after plumbing work, planning a smooth-wall remodel in Portland, or trying to fix a ceiling stain before painting, the finish is what determines whether the room looks clean and flawless or just “repaired.” Drywall finishing services are the craft side of drywall work. They take raw board, taped seams, patches, and corners, then turn them into smooth, paint-ready surfaces through mudding, sanding, skim coating, and texture blending.
That step gets overlooked because people notice paint color first. In practice, paint only looks as good as the wall under it. A poor finish can leave ridges, flashing, visible fasteners, and patch outlines that become obvious the moment morning light hits the room.
Table of Contents
- The Secret to Flawless Walls in Your Portland Home
- Understanding the Levels of Drywall Finish
- Common Problems Solved by Professional Finishing
- The Finishing Process From Start to Finish
- How to Hire a Drywall Contractor in the Portland Area
- Choose CS1 for Your Interior Finishing Project
The Secret to Flawless Walls in Your Portland Home
A lot of homeowners first notice drywall finishing when something goes wrong. A ceiling repair in Beaverton leaves a visible patch. A remodel in Lake Oswego opens walls for electrical work. An older home in Portland shows stress cracks above doors and windows after years of movement. The drywall is “up,” but the room still doesn't look finished.
That's the gap drywall finishing services fill. This is the stage that hides joints, blends repairs, sharpens corners, and gets the surface ready for primer and paint. Without good finishing, even expensive paint and clean trim work won't save the final look.
What homeowners usually see
You might see one of these situations:
- A remodel interruption: Cabinets moved, plumbing rerouted, or a wall removed leaves open sections that must blend into existing rooms.
- A damage repair: Water, impact, or settling creates a problem that's small structurally but very visible cosmetically.
- A design upgrade: Smooth walls and cleaner lines become part of the overall finish standard, especially in updated kitchens, living rooms, and entryways.
The work may look simple from across the room, but the visual standard is high. Homeowners notice seams that catch light. Builders notice walls that aren't paint-ready. Property managers notice when patches stand out during turnovers.
A wall doesn't have to be structurally bad to look unfinished. Most of the complaints people have are surface complaints, and surface work is exactly what finishing corrects.
Drywall and related contractor work also sit inside a large, durable construction category. The U.S. Drywall & Insulation Installers industry is estimated at $81.9 billion in 2026, according to IBISWorld's U.S. industry outlook for drywall and insulation installers. That matters because finishing isn't a niche add-on. It's part of the standard workflow for remodels, repairs, tenant improvements, and new interiors throughout Portland, Hillsboro, Tigard, and nearby cities.
Understanding the Levels of Drywall Finish
Finish levels sound technical, but they really answer one practical question: How perfect does the wall need to look once it's painted and lit? The right level depends on the room, the lighting, the paint sheen, and how critical the visual standard is.
For homeowners searching for a drywall contractor in Portland, this is often the missing piece. They know they want “smooth walls,” but they haven't been told why one finish level works in a laundry room while another makes sense in a bright great room with large windows.
What each level really means
Here is the simple version.
Level 0 means the board is hung but not finished.
Level 1 gets basic tape embedded in compound.
Level 2 adds another coat and is commonly acceptable in utility-type areas where appearance isn't the priority.
Level 3 is better but usually not the target for a smooth painted residential wall.
Level 4 is the common standard for most painted interior walls.
Level 5 is the highest standard and adds a skim coat across the full surface.
That last jump is where most confusion happens. People assume Level 5 is always “better,” which is true in a strict finish-spec sense, but not always necessary for every room.
Drywall finish levels at a glance
| Level | Description | Common Application |
|---|---|---|
| 0 | Board installed, no tape or compound | Unfinished or temporary stage before finishing begins |
| 1 | Joints taped in compound | Areas not intended for final decorative finish |
| 2 | Additional compound over tape and fasteners | Garages, utility spaces, or surfaces with limited visual demands |
| 3 | More complete finish, but not ideal for smooth painted walls | Base for heavier textures |
| 4 | Standard finish for most painted walls | Most residential interiors with standard lighting and typical paint |
| 5 | Level 4 plus full skim coat over entire surface | Critical lighting, high-gloss coatings, high-end smooth-wall designs |
When Level 5 is actually worth it
Level 5 includes everything in Level 4 plus a full skim coat over the entire gypsum board surface. That skim coat is specifically intended to reduce joint visibility and flashing under harsh lighting, high-gloss coatings, and critical viewing angles, as described in Trim-Tex's explanation of drywall finish levels.
Think of Level 4 versus Level 5 like this. Level 4 is a well-finished wall that looks right in most conditions. Level 5 is the extra refinement that helps the entire wall plane read more uniformly when light is unforgiving.
Use cases where Level 5 often makes sense:
- Strong side lighting: Long hallways, stairwells, and living rooms with big windows.
- Modern smooth-wall design: Spaces where texture isn't there to hide anything.
- Higher sheen paint: The more reflective the finish, the more surface variation it can reveal.
- Feature areas: Entry walls, dining rooms, and main living spaces where people naturally notice the finish.
Practical rule: If light runs across the wall instead of hitting it straight on, the finish quality matters more than most people expect.
What doesn't work is paying for Level 5 everywhere without asking whether the room will ever expose the difference. In many Portland-area homes, the best approach is selective. Put the higher-spec finish where lighting and sightlines demand it, and use Level 4 where it makes sense.
Common Problems Solved by Professional Finishing
A lot of drywall problems aren't really board problems. They're finish problems. The wall may be stable enough, but the surface still shows every repair line, tape blister, patch edge, or texture mismatch.

Cracks, holes, and water damage
In Portland and surrounding cities, common calls include settling cracks, damage from moved furniture, plumbing-access holes, and ceiling repairs after leaks. Each one needs more than filler.
A proper repair usually involves cutting back loose material, securing the area if needed, taping joints where movement occurred, building compound in controlled layers, then sanding and priming so the patch disappears into the surrounding field. If moisture caused the issue, the source has to be resolved first or the cosmetic work won't last.
In older Hillsboro and Beaverton homes, one challenge is that the wall may have years of paint buildup, slight movement, or irregular texture. A patch can be technically sound and still look obvious if the finish isn't feathered wide enough.
Why texture matching is harder than it looks
Texture matching is where many DIY repairs fall apart. Knockdown, orange peel, hand texture, and older patch patterns all reflect light differently. Even if the patch is flat, a mismatch around it gives the repair away.
The same problem shows up on smooth walls. Under critical lighting, strong sidelight can reveal seams and fastener marks that would seem invisible in softer light. That's why the value of Level 5 is especially noticeable in modern interiors and high-end smooth-wall projects, as discussed in this Gypsum Association-related video explanation of critical lighting and Level 5.
A professional finish solves more than damage. It solves visibility.
- Crack repairs: Help stop a recurring line from telegraphing through fresh paint.
- Access patches: Blend mechanical or plumbing openings back into the room.
- Ceiling repairs: Reduce the halo effect that makes patched ceilings stand out.
- Texture transitions: Keep one repaired area from looking newer than the entire wall.
On repairs, the goal isn't just to fill the hole. The goal is to make the eye move past the repair without stopping on it.
The Finishing Process From Start to Finish
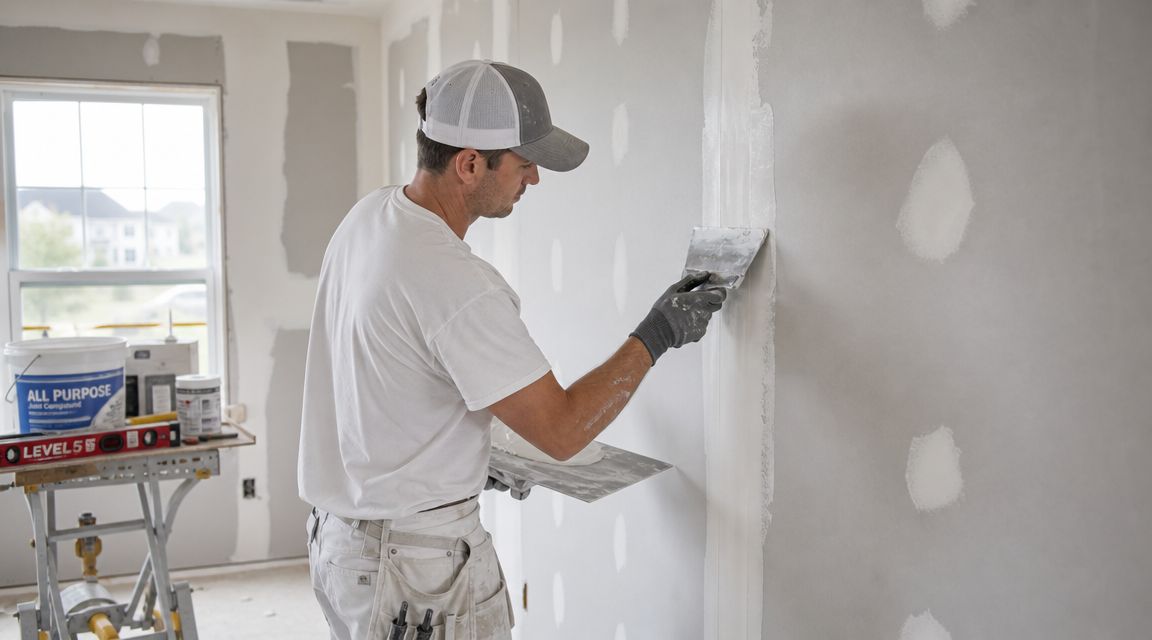
A clean drywall finish comes from sequence, timing, and judgment. Homeowners often see the painted result and assume the wall was patched in one pass. The part that makes it disappear happens in layers, with each step setting up the next.
What happens on the job site
The process usually starts with protection. Floors are covered, nearby finishes are masked off, and the work area is set up to keep dust under control. In an occupied Portland home, that prep matters as much as the repair itself.
Then comes taping and the first coat. Seams are taped, corners are shaped, and the initial compound ties the board system together. On repair work, this stage can also include backing, patch support, or small framing corrections so the surface stays stable after it dries.
Build coats do the visual work. Each coat widens the transition and flattens the surface so the finished wall reads as one plane under paint. This is also where finish level matters. A standard Level 4 finish is often the right choice for typical rooms with flat paint and forgiving light. A Level 5 finish adds a skim coat across the surface, which helps in rooms with large windows, long hallways, smooth walls, and strong sidelight that tends to show every seam and joint. In many Portland-area homes, that extra cost makes sense in main living areas and new additions with modern window layouts. It is usually less important in closets, utility spaces, or textured rooms where light and surface pattern hide minor variation.
After the compound dries, the surface is sanded and detailed. Fasteners, butt joints, corners, and patch edges are checked carefully because primer will reveal defects that looked minor before.
The final step is surface prep for paint. The goal is uniform absorption and a wall that stays visually quiet once primer and finish paint go on.
Why finishing takes more than one visit
Drywall compound needs time to dry and tighten up between coats. If the work is rushed, shrinkage lines, flashing, and visible edges tend to show after paint. That is why good finishing rarely happens in a single trip, especially on smooth walls or ceiling repairs.
Larger projects add another layer of coordination. Finishing has to line up with insulation, framing corrections, trim installation, and painting so one trade does not damage another trade's work. CS1 Real Interiors handles drywall repair and related interior finishing work, including painting, insulation, and metal stud framing, for residential and small commercial projects in the Portland area.
A clear site review can quickly determine the appropriate finish level and the scope of work required to make a repair disappear. That practical, scope-first approach is part of how service companies build trust online and offline, including through a local SEO partnership with Transactional LLC.
A short walk-through of the process helps set expectations:
How to Hire a Drywall Contractor in the Portland Area
Choosing a drywall contractor isn't just about who says they can patch a wall. It's about who can leave a room ready for primer and paint without excuses, missed appointments, or visible defects after the job is done.
What to check before you hire
Use a practical checklist.
- License and insurance: In Oregon, verify the contractor is properly licensed and can provide current proof of insurance and bonding.
- Recent finish examples: Ask to see work that includes smooth-wall repairs, ceiling blending, and Level 4 or Level 5 results.
- Written scope: The estimate should say what is being repaired, what finish level is included, whether texture matching is part of the job, and who handles priming or painting.
- Job-site standards: Ask how the crew protects floors, manages dust, and handles cleanup in occupied homes.
- Communication: You want clear scheduling, realistic timelines, and direct answers if hidden damage appears.
If you're evaluating online presence as part of your vetting process, it's also useful to understand how service contractors build local visibility and why trustworthy location pages matter. This overview of local SEO for home services from Transactional LLC gives helpful context for how legitimate local companies present service areas and project types online.
Why reliability matters as much as skill
Labor availability affects this trade more than many customers realize. A commonly overlooked point is that the BLS projects no net growth in employment for drywall installers through 2033 while still expecting 17,400 openings per year from turnover and retirements, as summarized in this discussion of drywall repair labor constraints and contractor reliability. For customers, the practical takeaway is simple. A contractor with a stable crew, consistent follow-through, and realistic scheduling is easier to work with than someone who overbooks and disappears between coats.
Hiring advice: Ask how they schedule multi-day finishing work. If the answer is vague, the timeline will probably be vague too.
Choose CS1 for Your Interior Finishing Project
When drywall finishing is done right, it disappears. Walls look flat, corners look crisp, repairs stop drawing attention, and paint reads the way it should. That's what most homeowners, builders, and property managers want. Not more jargon. Just a clean result that fits the space.
For Portland-area projects, that often means different solutions for different rooms. A rental turnover in Gresham may need efficient crack and hole repair with texture blending. A remodel in Tigard may need smooth walls ready for fresh interior paint. A custom home in Lake Oswego may call for selective Level 5 finishing in the areas where natural light is least forgiving.
CS1 Real Interiors serves Portland, Beaverton, Hillsboro, Tigard, Lake Oswego, Forest Grove, Cornelius, Tualatin, and nearby communities with drywall repair, drywall installation, drywall finishing, interior painting, insulation, and metal stud framing. That broader interior scope helps when a project isn't just a patch. It may also involve prep for repainting, framing changes, or coordinated work across several rooms.
The practical value is straightforward:
- Residential repairs: Cracks, holes, water-damaged drywall, and ceiling restoration
- Remodel support: Smooth wall prep, patch integration, and paint-ready finishing
- Small commercial interiors: Tenant improvements, clinics, retail spaces, and restaurant interiors
- Finish-level guidance: Clear recommendations on when Level 4 is enough and when Level 5 is worth it
If you want a drywall contractor who understands both repair work and finish quality, the next step is simple.
Need help with drywall repair, smooth wall finishing, interior painting, insulation, or metal stud framing in Portland or nearby cities? Contact CS1 Real Interiors and request a free estimate through the project form for your home or small commercial interior project.